| The tool known as a "paintbrush" in most paint programs is simply called the Brush in Director ( Figure 6.25 ). It's the most versatile of the paint tools. Figure 6.25. The Brush tool, often referred to as the "paintbrush" in other programs. 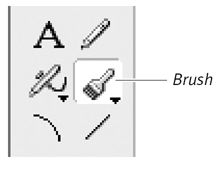 By default, Director offers five different shapes for the Brush. You can replace any or all of these with shapes chosen from the Brush Shapes dialog box, or you can create custom brush shapes. You can set the Brush to "remember" the last color it used, in which case it will paint with that color regardless of the current foreground color setting. To choose a brush shape: -
Select the Brush tool in the Paint Tool palette and hold down the mouse button. A pop-up menu appears, listing (but not describing) the brush shapes that you can choose ( Figure 6.26 ). Figure 6.26. Select the Brush tool and hold down the mouse button to open a pop-up menu of shape selections. 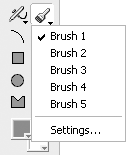 -
Select a brush shape.  Tip Tip
To change the set of available brush shapes: -
Select the Brush tool in the Paint Tool palette and hold down the mouse button. The Brush pop-up menu appears. -
Select the brush shape that you want to replace. Because the menu is limited to five choices at any one time, your new shape must replace one of the currently listed shapes. -
Open the Brush pop-up menu again and choose Settings. or Double-click the Brush tool in the Paint Tool palette. The Brush Settings dialog box opens ( Figure 6.27 ). Figure 6.27. Select a new brush shape in the Brush Settings dialog box. 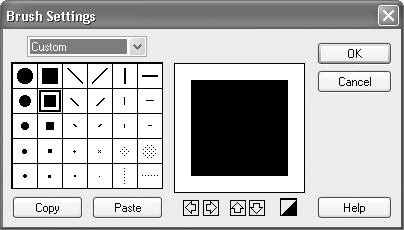 -
Select a brush shape to add to the menu. -
Click OK. The new brush shape takes its place in the pop-up menu. To create a custom brush shape: -
Double-click the Brush tool to open the Brush Settings dialog box. You'll create a new brush shape by editing an existing brush shape. -
If it's not already selected, choose Custom from the pop-up menu ( Figure 6.28 ). Figure 6.28. Choose Custom and select a brush shape to edit. 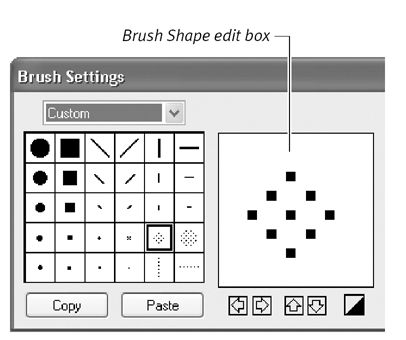 The set of custom shapes is initially identical to the set of standard shapes, except that the Custom set is editable and the Standard set is not. -
Select a custom brush shape to edit. An enlarged version of the selected brush appears in the Brush Shape edit box ( Figure 6.29 ). Figure 6.29. Use the arrow buttons to move the brush around within the edit box, or the Reverse button to create a negative image. 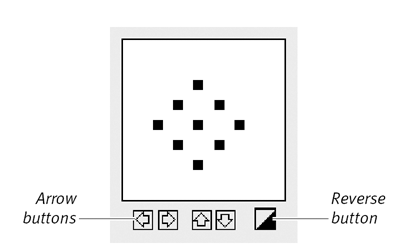 -
In the Brush Shape edit box, click empty spaces to add pixels to the brush or click existing pixels to erase them. You can click the arrow buttons to move the brush within the space, or the Reverse button to change all black pixels to white (and vice versa). -
When you're happy with your new brush design, click OK. -
Add your custom brush shape to the Brush pop-up menu by following the steps in the previous task, "To change the set of available brush shapes." To store a set of custom brush shapes: -
Double-click the Paint Brush tool to open the Brush Settings dialog box. -
In the Brush Settings dialog box, click Copy. -
Open a new, blank document iany third-party image-editing or paint program. -
Still in the image-editing or paint program, Choose Edit > Paste. The entire custom brush set is pasted as a single image ( Figure 6.30 ). Figure 6.30. A custom brush set can be copied into a third-party paint program (such as Microsoft Paint, shown here) and saved as a single image file.  -
Save the image as a file, with whatever name you like. Tip
To retrieve a stored set of custom brush shapes: -
Open the stored custom brush file in an image-editing or paint program. or Import the file into Director and open it in the Paint window. -
In the Paint window, select the entire custom brush set, using the Marquee tool or its equivalent. -
Choose Edit > Copy. -
In Director's Paint window, double-click the Brush tool to open the Brush Settings dialog box. -
Click Paste to install the stored brush set. To assign a color to a brush shape: -
Open the Paint Window Preferences dialog box by choosing Edit > Preferences > Paint (Windows) or Director > Preferences > Paint (Mac). -
Select the Remember Color checkbox ( Figure 6.31 ). Figure 6.31. Choose the Remember Color option in the Paint Window Preferences dialog box to make Director remember which color is associated with each brush shape.  From now on, when you choose one of the five brush shapes from the Brush pop-up menu, it will paint with whatever color was last used with that brush shape. (To change the color associated with a brush shape, choose a new foreground color from the color menu after selecting the brush shape. See "Using Colors and Patterns" later in this chapter.) Tip
|