11 About Paragraph Breaks and Tabs
| < Day Day Up > |
| Understanding exactly how Writer treats paragraphs is the first step in understanding Writer's formatting capabilities. Knowing exactly where a paragraph begins and ends is not always obvious. For example, in the next figure, it appears that the document has three paragraphs. Before You Begin See Also If you glance at the screen or print the document, three paragraphs certainly appear to be there. As far as your readers are concerned, the document does contain three paragraphs. Nevertheless, as far as Writer is concerned , this particular document contains only a single paragraph! Clicking the Nonprinting characters button on this particular document shows nonprinting characters that reveal this document contains only a single paragraph, as the following figure shows. NOTE
You can press Shift+Enter to start a new line without starting a new paragraph. The newline nonprinting character will appear when you turn on nonprinting characters. Without the nonprinting characters appearing, it looks as though the document will have multiple paragraphs. Seeing isn't always believing ”how many paragraphs are in this document? 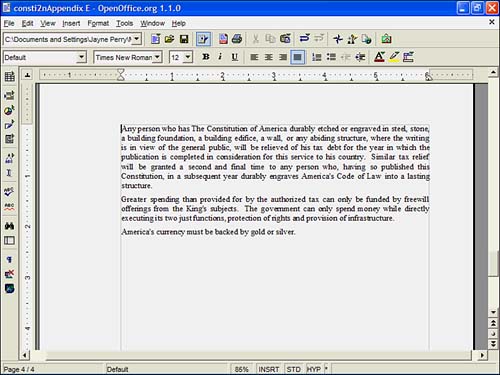 Only one paragraph mark appears, meaning that Writer views the entire document as one long paragraph. 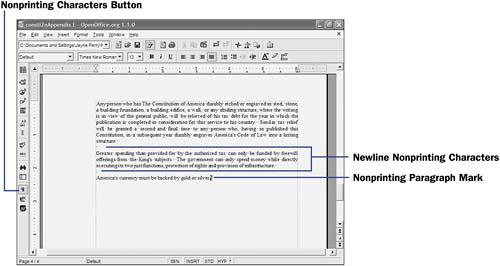 You won't want to create an entire document this way. There are times, though, when you want to do this so that Writer formats all the lines uniformly as though they were different paragraphs. In other words, if you are typing a section of text that is more than one paragraph, and you want to format that section differently from the rest of the document, one way to do so is to keep the text all one paragraph. You'll press Shift+Enter to give the lines the look of multiple paragraphs, but Writer will see them as being only one. Then, any paragraph formatting you apply to the text ”either from the ruler (see 10 About the Rulers ) or from the Paragraph formatting dialog box (see 13 Apply Paragraph Formatting) ”applies to all the text in that section. You won't have to format more than one paragraph individually. TIP
KEY TERM
This multiparagraph trick using Shift+Enter is wonderful to remember for the times when you have a couple or more paragraphs that you may need to adjust formatting for later. If, however, you have several paragraphs to format differently from surrounding text, or even a page or more of text, you may be better off creating a new section for that text. You can then easily change the formatting of all the paragraphs in that section without affecting the surrounding text. 14 Set Up Page Formatting discusses sections in more detail. Tab stops are critical in most documents. Tab stops enable you to align values consistently across multiple lines. Also, when you use a tab stop, you don't have to press the spacebar many times to jump to the right on a line. Tab stops enable you to start paragraphs with an indented first line. Writer supports four kinds of tab stops, as detailed in Table 3.1. Table 3.1. Writer's Four Tab Stops
Use the ruler to set and change tab stops. 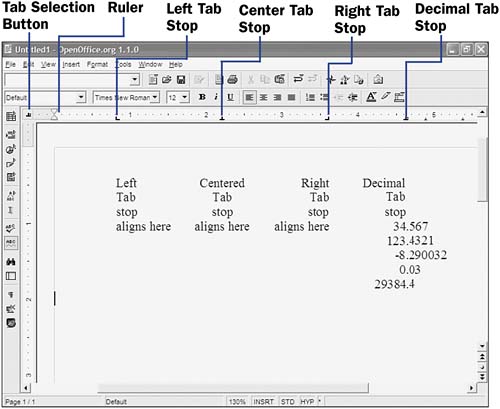 To set a tab stop, use either the ruler or the Tab dialog box. You can click the Tab selection button on the ruler to select which tab stop you want to place. Every time you click the Tab selection button, the symbol changes to a different kind of tab stop. When you then click anywhere on the ruler, that kind of tab appears on the ruler where you click. To use the Tab dialog box, double-click the ruler or select Format, Paragraph to display the Paragraph dialog box. Click the Tabs tab to display the Tabs page. The Tabs page enables you to set tabs for the current paragraph.  Table 3.2 describes each of the options in the Tabs page. Table 3.2. The Tabs Page Options
|
 1 Set Writer Options
  13 Apply Paragraph Formatting
 | < Day Day Up > |
EAN: 2147483647
Pages: 205
- Using SQL Data Manipulation Language (DML) to Insert and Manipulate Data Within SQL Tables
- Performing Multiple-table Queries and Creating SQL Data Views
- Working with SQL JOIN Statements and Other Multiple-table Queries
- Repairing and Maintaining MS-SQL Server Database Files
- Exploiting MS-SQL Server Built-in Stored Procedures