98 Impress with Special Effects
| < Day Day Up > |
| Adding special effects to graphics and other presentation elements can really make your presentation come alive . You can make graphic images fly onto the screen, not unlike the animated text you can cause to roll into place (see 90 Animate Text ). As with any special effects, don't overdo them. Reserve them for when you want to make an impression at a particularly critical part of your presentation. Before You Begin See Also Here are just a few of the effects you can apply to graphics and other presentation elements with Impress:
NOTE
|
 95 Insert Graphics into a Presentation
  99 Add a Slide Transition
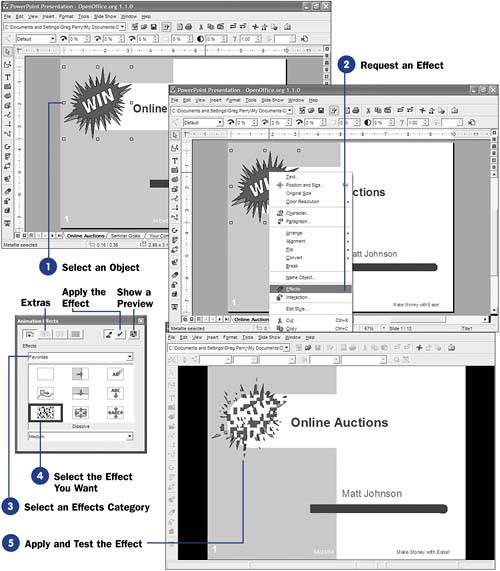
| < Day Day Up > |
EAN: 2147483647
Pages: 205
- Chapter I e-Search: A Conceptual Framework of Online Consumer Behavior
- Chapter II Information Search on the Internet: A Causal Model
- Chapter III Two Models of Online Patronage: Why Do Consumers Shop on the Internet?
- Chapter X Converting Browsers to Buyers: Key Considerations in Designing Business-to-Consumer Web Sites
- Chapter XVI Turning Web Surfers into Loyal Customers: Cognitive Lock-In Through Interface Design and Web Site Usability