| The WordArt feature included with PowerPoint enables you to create dynamic text drawings. Create a new logo or heading by using any of the hundreds of formatting combinations available to you with WordArt. Special effects and other embellishments are only a click away. There are many exciting features, such as 3D effects, shadows, and textured fills. WordArt also gives you several predefined shapes for your text as shown in Figure 27.5. Figure 27.5. Use WordArt in your presentation slides to create a dramatic effect.   | When you create WordArt, the text is changed to a drawing object, so it is not included in a spell check or the Outline view. Keep a dictionary close at hand, just in case you need to check the spelling of a word. A spelling error on a letter will seem like nothing, compared to a spelling error in a presentation that is magnified to two feet or more! |
-
Select Insert, Picture, WordArt from the menu to open the WordArt Gallery, or click the WordArt button on the Drawing toolbar. -
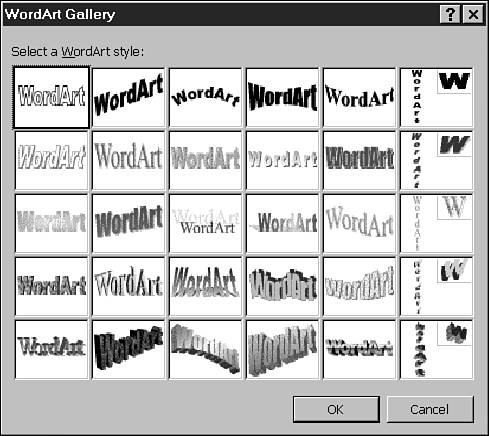
Select a style from the WordArt Gallery as shown in Figure 27.6. Don't pay attention to the color of the WordArt, as this can, and probably will, be changed later. Figure 27.6. The WordArt Gallery has several dozen samples for you to choose from.  -
Type your text. -
Change the font style and/or font size, if desired. -
Add bold or italic, if desired. -
Click the OK button. The WordArt object will be added to the middle of your slide, ready to be resized and repositioned as necessary. To resize WordArt, follow these steps: -
Click once on the WordArt to select it. -
Position the mouse over any white sizing handle. -
Hold down the left mouse button and drag the sizing handle to a new location. -
Release the mouse button. To move the WordArt object, follow these steps: -
Position the mouse pointer on the WordArt object (the middle of the object works well). -
Click and hold down the left mouse button; you should see a move pointer. -
Drag the WordArt object to a new location on the slide. -
Release the mouse button. To edit the text in a WordArt object, follow these steps: -
Double-click the WordArt object. -
Edit the text. -
Click the OK button. Using the WordArt Toolbar When you click on a WordArt object, the WordArt toolbar usually appears. Use this toolbar to add or change any of the special effects of a WordArt object. Some of the features you can change are the WordArt object's shape and format. You can also rotate the WordArt object and switch the text to a vertical or horizontal orientation. Changing the WordArt Shape There are 40 custom shapes you can use for your WordArt object. To change the shape, follow these steps: -
Select the WordArt object. -
On the WordArt toolbar, click the WordArt Shape button. -
Click a new shape. Formatting WordArt You can format WordArt in the same manner as any other object. You can change the color and line options for the WordArt. The Fill option is an excellent method for coloring the WordArt object and making it stand out. To add color and fill to a WordArt object, follow these steps: -
Select the WordArt object you want to format. -
Click the Format WordArt button on the WordArt toolbar to display the WordArt Gallery. -
Click the Colors and Lines tab. -
Select a fill option from the Color drop-down list. -
If you want, select Color, Style, Dashed, and Weight options for a border. -
Click the Preview button to preview your changes before accepting them. -
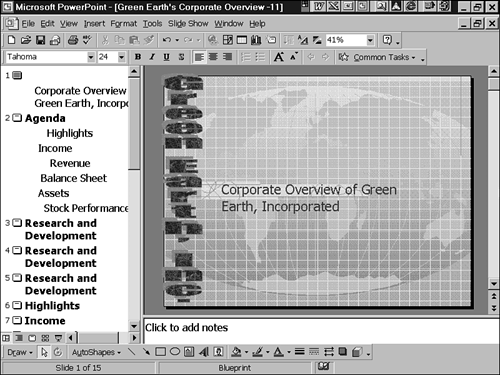
Click the OK button when you're done. Figure 27.7 illustrates vertical WordArt. To make the WordArt text vertical instead of horizontal, use the following steps: -
Select the WordArt object you want to change. -
Click the WordArt Vertical Text button on the WordArt toolbar. Figure 27.7. Use the WordArt vertical text option to display the text on the side of a slide.  You can easily rotate WordArt by using the Free Rotate button on the WordArt toolbar; just follow these steps: -
Select the WordArt object you want to rotate. -
Click the Free Rotate button on the WordArt toolbar. You should see four green rotate handles in each corner of the WordArt object. -
Place the mouse pointer on any green rotate handle, hold the left mouse button down, and drag to rotate the WordArt object. -
Release the mouse button when the WordArt object is in the position you want. |


