Tooling Around with Toolbars
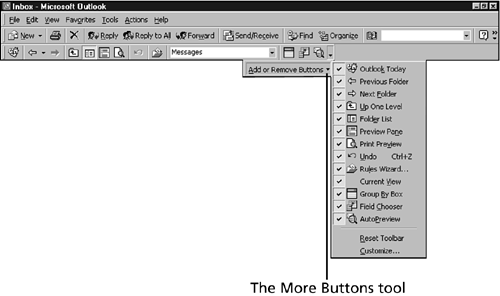
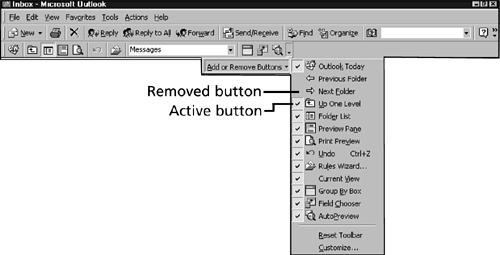
Tooling Around with ToolbarsThe key to customizing Outlook's menus and toolbars is knowing what you have to work with. First, you need to explore an often-overlooked aspect of toolbars. Display the Advanced toolbar, if it's not already displayed. Right-click any toolbar or menu and choose Advanced. Look at the right end of the Advanced toolbar. You should see a downward-pointing black triangle. Click that triangle, and then click Add or Remove Buttons to display the view shown in Figure 20.2. Figure 20.2. For quick customizing, use Add or Remove Buttons to selectively turn toolbar buttons off and on. To hide toolbar buttons that you do not need to see, follow these steps:
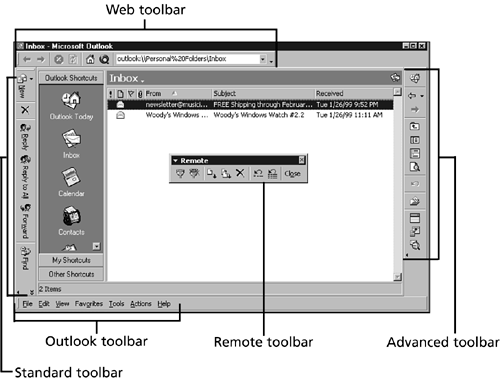
Do you like the toolbars where they are? If so, that's great. If not, why not move them somewhere else, as the following steps demonstrate (see Figure 20.4):
Figure 20.4. The menu and toolbars aren't welded to the top of the Outlook screen (shown in Corporate/Workgroup mode; the Remote toolbar is not available in IMO mode).
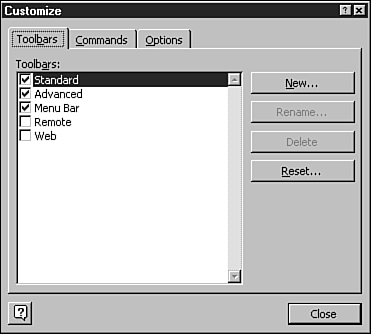
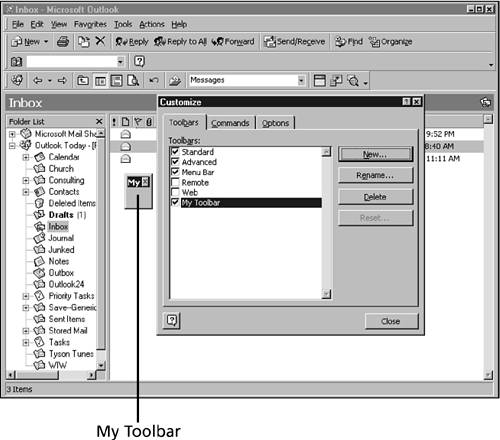
Displaying, Resetting, and Creating New ToolbarsYou've already seen how to choose which toolbars to display by right-clicking any menu or toolbar. That technique is useful for turning a single toolbar on or off, but it's tedious when you want to manipulate multiple toolbars at the same time. For more control, right-click a toolbar, choose Customize, and click the Toolbars tab to display the Customize dialog box shown in Figure 20.5. The Standard, Advanced, and Menu Bar toolbars are enabled. The Web and Remote toolbars are turned off. Figure 20.5. Use the Customize dialog box's Toolbars tab to turn on/off multiple toolbars at the same time. While you're here, use the New button to create a brand new toolbar. For example, you can create customized toolbars for different projects. Suppose you go through design phases. You can create a customized toolbar that contains just the design tools you need by following these steps:
After you've added the new toolbar, a couple of changes occur inside the Customize dialog box. Notice that with My Toolbar selected, the Rename and Delete buttons are now available. You cannot delete or rename the built-in toolbars, but you can rename and delete those you create. Keep the Customize dialog box onscreen as you begin the next section. |
EAN: 2147483647
Pages: 474