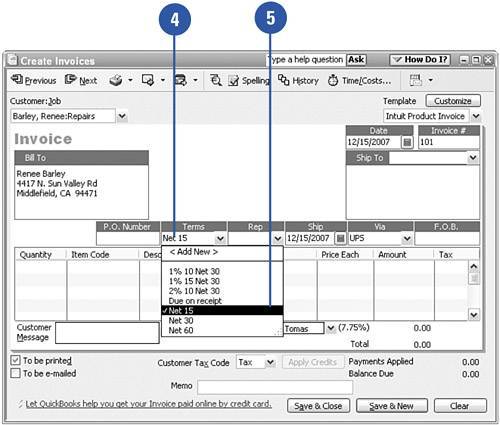
Displaying Lists on Forms
| When you're filling out a form, remember that all the information you enter on the form comes from your lists. Customers, vendors, product names, types of service, account names, shipping options, and payment terms all reside on lists. You don't have to guess how a vendor's name is spelled or the specific name of a product. You can display the appropriate list, select the item you need, and then close the list and complete your form.
|

- Seeing Services Through Your Customers Eyes-Becoming a customer-centered organization
- Executing Corporate Strategy with Lean Six Sigma
- Success Story #3 Fort Wayne, Indiana From 0 to 60 in nothing flat
- Success Story #4 Stanford Hospital and Clinics At the forefront of the quality revolution
- Phase 3 Mobilization