60 Select AutoMovie s Clips
| < Day Day Up > |
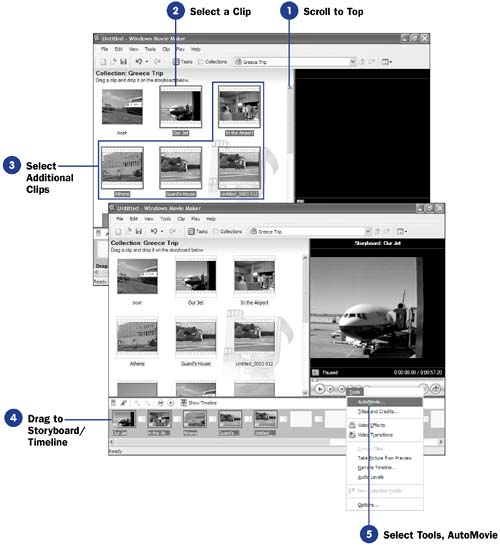
60 Select AutoMovie's ClipsBefore You Begin See Also Your Collection pane contains lots of video and audio clips, and depending on how much raw footage you might have imported into your project, it probably contains far more clips than you want to appear in your final movie. AutoMovie cannot read your mind and know exactly which set of clips you want in your final movie, so you must select the clips you want AutoMovie to use when generating your movie. After selecting all the clips you want to add, you drag those clips to the timeline before requesting AutoMovie's help. AutoMovie then looks at the clips and creates your movie based on AutoMovie options you've selected, such as the AutoMovie style ( see 61 Select an AutoMovie Style ). NOTE
 |


| < Day Day Up > |
EAN: 2147483647
Pages: 169