| Your DNS forward and reverse lookup zones might already be installed, depending on the action you selected in step 12 in the preceding task. Using DNS enables you to divide your namespace into zones that store name information in a database. Zones are primarily used for administration. DNS zones are represented by zone database files. Each DNS zone contains a primary zone database file and a secondary zone database file. Only the primary zone database file can be directly written to. Zones can be set up for a subnet, single domain, or multiple domains. Each zone contains a forward lookup zone and optionally a reverse lookup zone. When a client requests an IP address for a hostname, the forward lookup zone resolves the hostname into an IP address. Reverse lookup zones resolve IP addresses into hostnames. Small companies need only a forward lookup zone. The only real difference between forward and reverse lookup zones is the way in which they are sorted. Reverse lookup zone database files are in numerical order by IP addresses, thereby speeding up queries of IP address to domain name. Larger companies that have custom applications and multiple domains should install both forward and reverse lookup zones.  | If you plan on using the command-line DNS troubleshooting tool, NSLookup , you must have a reverse lookup zone installed and configured. NSLookup will not function unless a reverse lookup zone is installed. |
Installing forward and reverse lookup zones is clear-cut . To install and create a forward lookup zone, perform the following steps: -
Open the DNS MMC console. -
In the console tree, right-click your DNS server and choose New Zone. The New Zone Wizard appears. Click Next. -
Select Primary Zone. If your Windows Server 2003 is AD-integrated, make sure that the Store Zone Information in Active Directory check box is checked. Click Next to continue. -
In the Active Directory Zone Replication Scope dialog box, select how you want DNS zone data replicated. If you have just one domain, accept the default selection as shown in Figure 6.5 and click the Next button to continue. Figure 6.5. New Zone Wizard, Active Directory Zone Replication Scope dialog box. 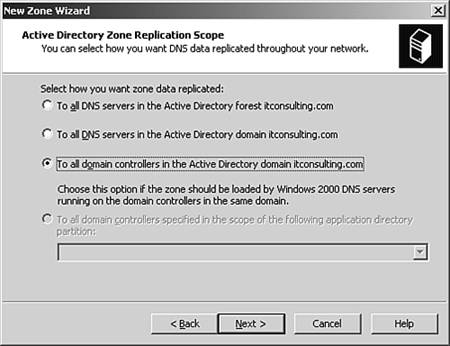 -
Select Forward Lookup Zone and click Next to continue. -
In the Zone Name text box, type a zone name. Normally it's your domain name or a portion of your domain name. It is not your DNS server computer name. Click Next to continue. -
In the Dynamic Name dialog box, you can select secure, nonsecure, or no dynamic updates for your DNS zone updates. Domains using AD-integrated zones should accept the default: Allow Only Secure Dynamic Updates. Make a selection and click the Next button. -
The Completing the Zone Wizard dialog box displays, listing a summary of your selections. Click the Finish button to install a forward lookup zone. To install and create a reverse lookup zone, perform the following steps: -
Open the DNS MMC console. -
In the console tree, right-click your DNS server and choose New Zone. The New Zone Wizard appears. Click Next. -
Using the New Zone Wizard, follow the preceding instructions to create a reverse lookup zone. One difference in creating a reverse lookup zone is to specify your network IP address. Figure 6.6 shows the network ID for a class C private network address. Notice the reverse lookup zone name 0.168.192.in-addr.arpa appears in the lower grayed-out text box. Figure 6.6. Reverse Lookup Zone Name dialog box showing Network ID: 192.168.0. 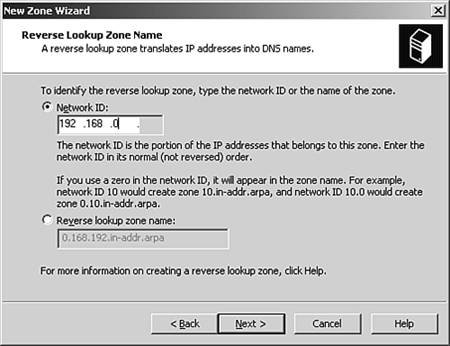  |