| Once all of the images are connected to the MultiPlane node, the Viewer displays the multiple pane view below. 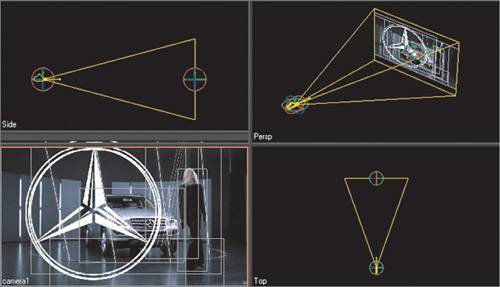 You can begin the composite by attaching layers to the camera. Attaching Layers to the Camera Attaching a layer to the camera locks the element to the camera perspective. As a result, the attached layer itself doesn't appear to move in the camera output, while any unattached layers that are positioned within the 3D workspace appear as if they're moving. 1. | Click the Viewer Layout button on the Viewer toolbar until you are in single-pane view.
 | 2. | Press the F key to fit the image to the Viewer.
| 3. | In the MultiPlane1 parameters, scroll down to the L1 (woman) layer, then click the Attach Layer to Camera button to lock this element to the camera perspective.
 The woman layer is locked to the full area of the renderCamera angle in the Viewer.
| 4. | Repeat step 3 for the rest of the layers, except for the logo layer, to lock them to the camera.
| 5. | Scroll to the L7 (logo) layer and temporarily turn off its visibility. Don't worry, we will turn it on later.
 The next step will be to set the filmGate in the Camera tab. The filmGate pop-up menu provides presets for setting the filmBack width and height parameters. There are options corresponding to most standard film formats.
| 6. | Click the Camera tab.
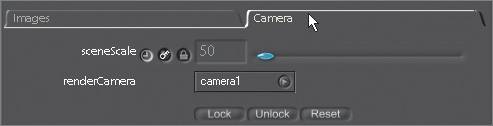 | 7. | Scroll down and set the filmGate to 35mm 1:85 Projection.
 |
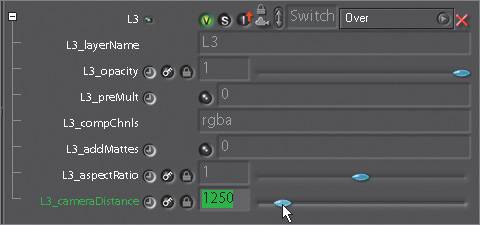
Placing Layers in 3D Space The individual layers can now be properly placed in 3D space. Earlier, when you turned on the layers' Attach to Camera button, the faceCamera, parentTo, Pan, Angle, Scale, Center, and aspectRatio parameters all disappeared from those layers' subtrees in the Images tab, replaced by a single parametercameraDistance. 1. | Go to frame 1 and expand the subtree beneath the L3 (SwitchMatte2) layer, and set the cameraDistance to 1250.
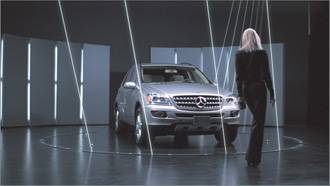
 The woman is now magically placed in front of the laser beams.
The cameraDistance parameter lets you adjust the spacing between layers attached to the camera, as well as between those layers and the other, unattached, layers and the other unattached layers that are arranged within the 3D workspace. This allows you to determine which layers appear in front of and behind attached layers.
| 2. | Go to frame 27, expand the subtree for the L4 (laser1) layer, and set the cameraDistance to 1540.
The laser1 layer is now positioned behind the car instead of in front of it.
| 3. | Go to frame 30.
Do you see the laser reflections on the driver's side front wheel of the car? Well, you should have. Thwack! That was the sound of my hand swatting the back of your head.
| 4. | Expand the subtree for the L6 (laser_reflection) layer and set the cameraDistance to 1540.
Just like laser1, the laser_reflection layer is now positioned behind the car.
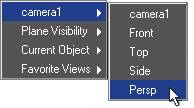
| 5. | Right-click the image and switch to perspective view.
 You should see that the layers are now placed at various distances in 3D space.
| 6. | Press F to fit the image to the Viewer.
 | 7. | Preview your results by rendering a flipbook preview.
Not too shabby.
 | 8. | Close the flipbook and set your display back to the camera view by pressing the 1 key on the numeric keyboard.
| 9. | Click the Viewer Layout button on the Viewer toolbar until you have a four-pane view.
 | 10. | Fit the camera image to the Viewer.
The last part of this lesson will show how an element can move through 3D space.
| 11. | Go to frame 1 and turn on the visibility for the L7 (logo) layer.
| 12. | Click the center of the Mercedes logo to activate its onscreen controls.
| 13. | Drag it to the center of the screen.
| 14. | Expand the subtree for the L7 (logo) layer and drag the Z pan parameter back and forth.
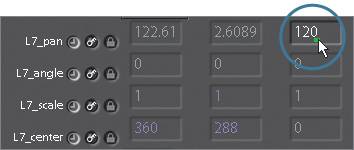 Watch how the logo layer changes layer priority in the 3D space in the various views. Oh, man, it's making me tingle.
| 15. | Quit Shake.
|
Now that you have had a taste of the MultiPlane node, the next lesson will explore it in greater depth. You'll import 3D tracking data and use it to add computer-generated elements to the scene. |