9.5. Modifying Pictures It's rare that you'll want to use an image file or piece of clip art as-is. If nothing else, you'll probably want to resize it or crop it to make it fit with the text and other elements on your slide. To be sure, PowerPoint isn't Photoshop, so don't expect editing miracles . In addition, your editing options are fewer when you use certain types of images (like photos) as compared to others (line-and-shape drawings you create in PowerPoint). Still, for most purposes you find PowerPoint's editing options more than adequate. The way you select, resize, reposition, rotate, align, group , and layer pictures is the same way you modify the shapes and lines you draw directly onto a slide (page 288). But some formatting is picture-specific, and that's the formatting this section acquaints you with: how to tweak a picture's brightness, apply special effects, and more. DESIGN TIME
Using Clip Art Creatively | | Clip art is convenient , but sometimes the problem is, well, it looks like clip art. If you want people to take your presentation seriously, you must avoid having your slides look like you plunked down the first cheesy stock image you found. PowerPoint doesn't enforce good graphic design principles, but if you follow these no-fail tips, you can turn cheese into fromage : -
Keep it small. Try to keep your clip art small and off to one side of the slide, leaving the bulk of the space for text, as shown in Figure 9-32 (top). -
Make it transparent. Applying a 75% or higher transparency effect to backgrounds, clip art, and even the basic shapes you add to your slides lets text shine through. (See Figure 9-32, bottom.) If you use clip art, you need to avoid hard-to-read-text sitting on a busy background. -
Not everything has to line up. Sometimes, tilting an image just a little results in the rakish, attractive effect shown in Figure 9-33 (top). -
Consider filled text boxes . Applying a contrasting fill color to your text boxes doesn't just make text stand out; it also adds an appealing design element to your slides (Figure 9-33, top). -
If all else fails, use contrasting text. If you're using a strong, stylized image as a slide background, you can get away with pasting text on topas long as you use a bold, contrasting font and color as shown in Figure 9-33 (bottom.) |
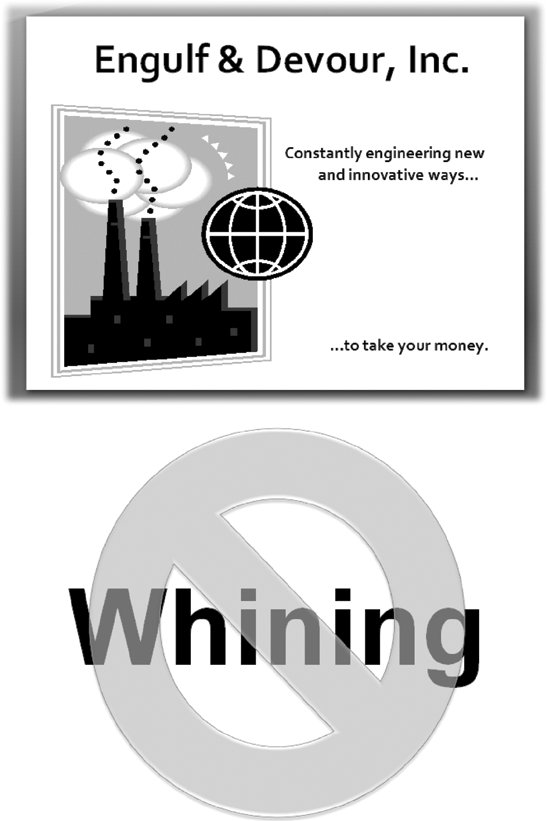 | Figure 9-32. Top: The easiest way to add clip artby tucking it out of the way, as shown heregives a conservative result.
Bottom: Transparency can be hard to pull off. Too transparent, and your audience may think there's a water stain on the overhead screen; not transparent enough, and they won't be able to read your text. Still, in the right situation and with the right degree of transparency, it can be effective. | |
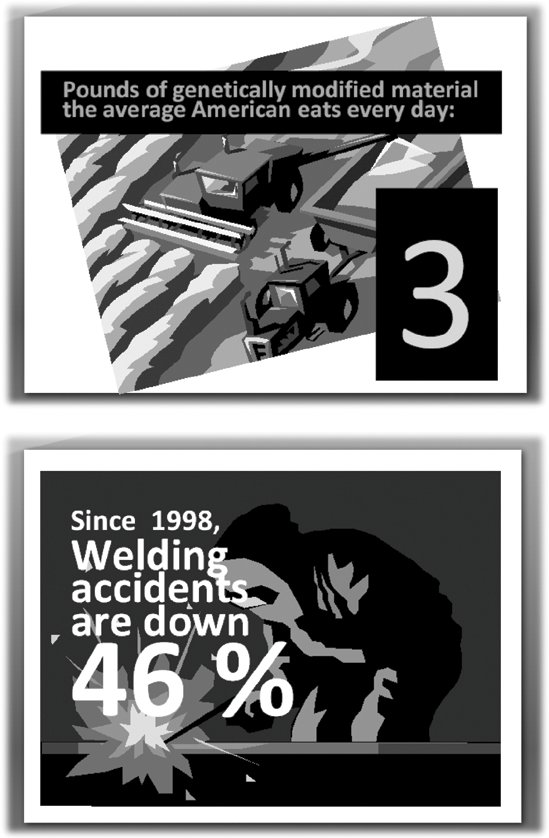 | Figure 9-33. Top: In this example, a clip art image was enlarged, rotated , and overlaid with filled text boxes. The result is both readable and attention grabbing .
Bottom: This text-on-image technique works best when you're trying to get across a single point, although it can also be effective for the first and last slides in your presentation. Make sure the background image is relevant to your presentation and choose a strong, clean font. | |
9.5.1. Applying a Picture Style PowerPoint makes it easy to apply a handful of attractive formatting options to your pictures. For example, you can add a picture frame, a shadow, and a rotated 3-D effectwith the click of a button. To apply a Picture Style, select the picture you want to format. Then, on the Picture Tools Format contextual tab, mouse over the thumbnail options in the Picture Styles section of the Picture Tools Format tab (Figure 9-34). As you do, PowerPoint shows you a preview of the formatting on your slide. Click the option you want to apply to your picture, and PowerPoint automatically redraws your picture based on your selection. 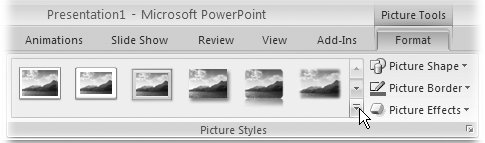 | Figure 9-34. The thumbnails you see in the Picture Styles section of the Picture Tools Format tab, shown here, are the most popular. But if you like, you can click More (note the pointer) to see the entire Picture Style gallery. | |
9.5.2. Recoloring Your Picture Tinting, or recoloring, can turn an ordinary picture into an artful design element. You can give a colored picture an old-time look by tinting it sepia or give it a jazzy, sophisticated appearance by tinting it blue. To recolor a picture, select the picture you want to tint. Choose Picture Tools Format  Adjust Recolor. Move your mouse over the color swatches in the gallery to preview each color on your slide. Click the color you want to apply to your picture, and PowerPoint redisplays your picture based on the color you selected. Adjust Recolor. Move your mouse over the color swatches in the gallery to preview each color on your slide. Click the color you want to apply to your picture, and PowerPoint redisplays your picture based on the color you selected. POWER USERS' CLINIC
Deleting Clip Art Backgrounds | | Deleting the background of an image can mean the difference between an amateurish result and a polished one (see Figure 9-35). Unfortunately, deleting a background is hard . In the case of bitmapped images think scanned-in photographs, where a blue sky is actually made up of a zillion different pixels, each a slightly different shade of blue, gray, purple, or whitethat difficulty is understandable, because PowerPoint has no way of knowing which pixels you consider background and which you consider foreground. (In other words, trying to excise a background from a bitmapped image can be next to impossible in PowerPoint. If you want to try, add a bitmap image to your slide and select it, choose Drawing Tools Format Adjust Recolor Set Transparent Color, and then click a color to delete all the pixels in the image bearing that same color.) But in the case of vector images which you can think of as blocks of uniform color, like those used to create Clip Artstripping away a background should be a two-click proposition. Click on the background, click Deletebingo. Well, deleting backgrounds in PowerPoint isn't quite a two-click proposition, but you can get there. Here's how: -
On your slide, right-click the clip art whose background you want to delete and then, from the context menu that appears, choose Edit Picture. -
A message pops up asking if you want to convert the picture to a Microsoft Office drawing object; click Yes. -
Right-click the image, and then choose Group Ungroup. (At this point you can move, resize, or otherwise manipulate the individual shapes that make up the clip art image.) -
Right-click the image's background and choose Format Shape. -
In the Format Shape dialog box that appears, make sure the Fills tab is selected. Then turn on the No Fill radio box and click Close to dismiss the Format Shape dialog box. -
Right-click the image, and then choose Grouping Regroup. You now have a background-free Clip Art image ready for formatting. For example, you can select the image and then, in the Picture Tools Format tab, click Picture Styles Picture Effects Shadow and apply a shadowing option. |
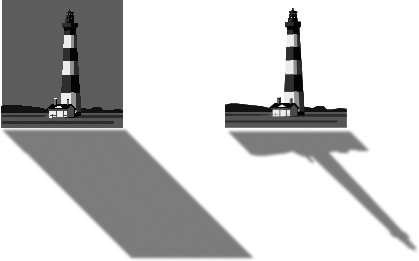 | Figure 9-35. Not only does a clip art background affect the way the image looks, it also affects the way PowerPoint formats the image. Here, you see the original clip art image next to a background-free copy of the image. As you can see, the shadowing effects are quite different. | |
9.5.3. Making Your Picture Transparent Making a picture transparent lets the images or text you've placed behind it show through, similar to the example you see in Figure 9-32 (bottom). But it also lets you add a subtle watermark to your slides, such as a barely -there logo or the word Confidential.
Note: The Washout option described in this section isn't a true transparent effect, because it's a one-shot deal: it doesn't let you choose the degree of transparency. If you absolutely need to control the degree of transparency for a pictureif Washout and adjusting the brightness don't yield the effect you're aftertry filling a shape with your picture, and then apply a transparency effect (see the box on page 313) to the shape.
To make a picture transparent: -
On your slide, select the picture you want to make transparent. Then choose Picture Tools Format Adjust Recolor. An option gallery appears. -
In the gallery, head to Color Modes and choose Washout. PowerPoint applies a transparent effect to your picture. 9.5.4. Adjusting Brightness and Contrast You can't do a whole lot to improve a picture after you've added it to your slide, but you can brighten and sharpen a muddy picture slightly. Don't expect miracles from the Brightness and Contrast options PowerPoint offers; they can't make a bad picture shot in too little light look good, just a bit better. To adjust brightness and contrast: -
On your slide, click to select the picture you want to brighten. Choose Picture Tools Format Adjust Brightness. A menu of brightness options appears. -
Choose a positive brightness option to brighten the picture; choose a negative one to darken it. The menu disappears, and PowerPoint applies your option to your picture. -
Choose Picture Tools Format Adjust Contrast. A menu of contrast options appears. -
Choose a positive contrast option to sharpen the picture; choose a negative one to equalize the light and dark portions of the picture. The menu disappears, and PowerPoint applies your option to your picture. 9.5.5. Applying Special Effects Sometimes, the difference between ho-hum and hot is as easy as applying a special effectsuch as soft edges or a shadowto your pictures. Figure 9-36 shows you an example.  | Figure 9-36. Here, you see the same picture with six different effects applied: a shadow, 3-D rotation, glow, soft edges, reflection, and a custom border. The picture is a scanned-in photo, but you can apply the same effects to clip art or any other picture. You can apply multiple effects to the same picture, too. | |
To apply a special effect to your picture: -
On your slide, click to select the picture you want to modify. The Picture Tools Format contextual tab appears. -
Click Picture Tools Format Picture Styles Picture Effects. -
Picture Styles Picture Border and use the Shape Outline, Dashes, and Weight options to tell PowerPoint what color you want your border, whether you want it dashed, dotted , or straight, and how thick you want it (page 289).
Tip: If you apply a bunch of different effects to your picture and then change your mind, you may be able to get your original picture back quickly: clicking Picture Tools Format Adjust Reset Picture tells PowerPoint to discard all of the formatting changes you made since you added the picture to your slide. (Unfortunately, Reset Picture doesnt always revert your picture to pristine condition. In that case, you can click Undo a few times orworst case scenariodelete the picture from your slide and start over.)
9.5.6. Cropping Your Picture Cropping a picture in PowerPoint is similar to taking a pair of scissors to a printed picture and snipping off the parts you don't want. Cropping is useful for discarding distracting background elements; it's also useful for reducing pictures to a serviceable size . -
Select the picture you want to crop. On the Picture Tools Format tab, click Size Crop. Crop marks (Figure 9-37, left) appear at the sides and corners of your picture. -
Mouse over the crop mark nearest where you want to crop. PowerPoint changes your cursor from an arrow to a crop mark. 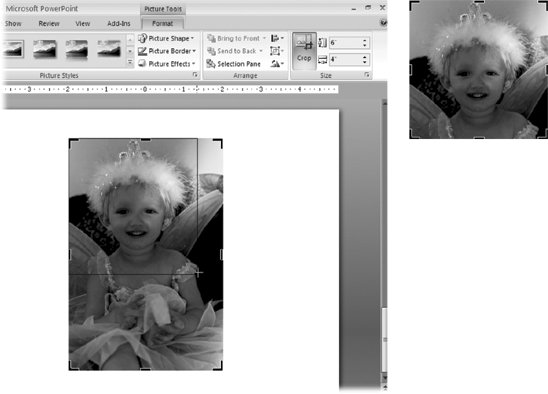 | Figure 9-37. Left: Click a crop mark and drag to crop a picture.
Right: Cropping doesn't affect the uncropped portion of the picture; the result is the same as if you'd snipped off part of the picture. | | -
Click and drag a crop mark to tell PowerPoint how much to cut off. As soon as you click, PowerPoint changes the crop-mark-cursor into a plus sign. After you let go of your mouse, PowerPoint redraws your picture without the cropped portion (Figure 9-37, right). -
Repeat steps 2 and 3 until you're satisfied with your picture. When you're finished, click somewhere else on your side to turn the editing cursor back into the selection (arrow) cursor.
Note: Cropping reduces the visible size of a picture by snipping bits off the top, bottom, or sides. If what you want to do is shrink the whole picture, check out the instructions for resizing elements on page 295. To whack off the top and bottom in equal increments and blur the edges, check out the Soft Edges effect described above.
9.5.7. Applying a Picture to a Slide Background If you've got a subtle, well-designed picture, you may want to apply it to your slide's background so that the text and graphics you apply to your slide appear on top of it. Doing so provides visual interest; and depending on the background picture you choose, it can also reinforce the message you're trying to get across. Think sunset background for a travel presentation, or a background showing a photo of your development team for a slide describing milestones met.
Note: For help in identifying a well-designed picture, check out the tips in the box on page 282. They work equally well for other types of pictures.
To designate a picture as a slide background: -
Right-click the slide you want to add a picture background to and then choose Format Background from the shortcut menu. The Format Background dialog box appears.
Note: If you want the background to appear on all the slides in your slideshow, you need to apply it to the slide master. See page 157 for details.
-
On the left side of the Format Background dialog box, make sure Fill is selected; then, on the right side of the dialog box, turn on the radio box next to "Picture or texture Fill." Additional options appear in the Format Background dialog box. -
Under "Insert from," click File to use an image file stored on your computer as a background. (Or, if you prefer, click Clip Art to choose a clip art image.) The Browse Image dialog box appears. -
Browse your computer for the image file you want to apply to the background. When you find it, click to select it and then click Insert. PowerPoint fills your slide's background with the selected image, stretching or squishing it as necessary to make it fit your slide. (If your image is tiny and you want to tell PowerPoint to repeat it over and over again to fill the slide instead of stretching it out of shape, turn on the "Tile picture as texture" checkbox in the Format Background dialog box.)
Tip: Because PowerPoint is so hugely popular, lots of companies offer backgrounds, multimedia clips, and themes specifically for you to use in your PowerPoint presentations. Prices vary widely, as does quality. Three companies you may want to look into: www.powerfinish.com, www.powerpointart.com, and www.probackgroundart.com.
 |