9.4. Adding Pictures from Other Programs Instead of drawing your own image directly onto your slide, as described on page 282, you can insert a scanned photo, digital picture, professionally drawn sketch, one of the stock images that come with Microsoft Office, or any other image you have stored on your computer. The upside of using a canned picture, of course, is that it's easier than rolling your own. And depending on your artistic skills, the results could be more professional looking, too. The downside is that some folks are tempted to fill their presentations with generic imagesdollar signs, handshakes, spinning globes, and so onjust because they have access to them. (See the box on page 282 for details.) In this section, you see how to spice up your presentation with image files from your computer as well as from Microsoft Office's cache of free clip art. You also see how to create a super-quick slideshow consisting of nothing but captioned images called, appropriately enough, a photo album. 9.4.1. Inserting a Picture Stored on Your Computer You can insert virtually any image file into your slideshow, from the common .jpg, .bmp, and .gif file formats to the less-well-known .cgm and .emz formats. The following steps walk you through the process. -
In the Slides tab in Normal view, select the slide to which you want to add an image. -
Click Insert. The Insert tab shown in Figure 9-26 appears. 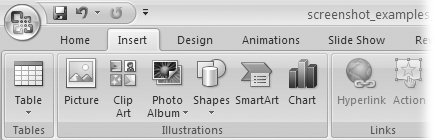 | Figure 9-26. The Illustrations section of the Insert tab lets you add several different types of graphics to your slides: Picture, Clip Art, Photo Album, Shapes , SmartArt, and Charts , respectively. | |
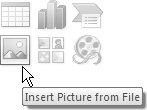
Tip: If you applied a content layout to your slide, then clicking the picture icon (Figure 9-27) displayed in the center of the slide automatically shows you the Insert Picture dialog box.
 | Figure 9-27. Content layouts, including Title and Content, Picture with Caption, and Comparison, come complete with clickable icons you can use to add pictures to your slide quickly, without having to click around on tabs. | | -
From the Illustrations section of the Insert tabs, choose Picture. The Insert Picture dialog box (Figure 9-28) appears. -
Browse your computer for the file you want to add to your slide by clicking the "Look in" drop-down box, or the icons listed on the left side of the Insert Picture dialog box. When the name of your file appears in the center of the dialog box, click it to select it. PowerPoint places the name of your file in the File name box. -
Click Insert. PowerPoint inserts the selected file onto your slide, and the Picture Tools Format tab appears. (You see how to use the Picture Tools Format tab to modify pictures on page 288.) 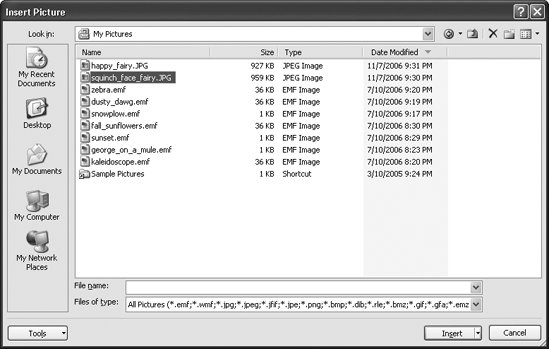 | Figure 9-28. The Insert Picture dialog box is similar to just about every other dialog box PowerPoint uses to let you add non-PowerPoint files to a PowerPoint presentation. The only real difference is the image file formats PowerPoint fills in for you in the "Files of type" box. | |
9.4.1.1. Picture file formats you can add to your slides PowerPoint recognizes almost any imaginable type of image file. If you have any of the files that are shown next on your computer, you can put them on a slide. -
Windows metafiles, extended metafiles, compressed enhanced metafiles, compressed metafiles (.wmf, .emf, .emz, .wmz). These relatively large graphic files are native to the Windows operating system. -
Various formats from the Joint Photographic Experts Group (.jpg, .jpeg, .jfif, .jpe). Best for photographic images (lots of different colors), these compressed files tend to be modest in size , but don't always enlarge well. -
Portable Network Graphics (.png). Developed specifically for exchange over the Web, these compressed files are typically pretty small. -
Microsoft Windows bitmaps, device-independent bitmaps, run-length encoded bitmaps, and zipped (compressed) bitmaps (.bmp, .dib, .rle, .bmz). Typically used to create images containing lots of different colors (in other words, photographs rather than simple shapes), these files tend to be hefty.
Tip: For a more detailed explanation of bitmap files, see the box on page 313.
-
Tagged image file format (.tif, .tiff). Uncompressed, these Macintosh and Windows image files show great detail, but can add quite a bit to the size of your PowerPoint presentation. They're ideal for slides you're going to print out on paper. -
Graphics Interchange Formats (.gif, .gfa). Often larger than .pngs or .jpgs, these compressed files can contain either static images, or compact animations. -
Macintosh uncompressed and compressed picture formats (.pct, .pict, .pcz). Comparable to the Windows metafile format, the Mac-native .pict files bear the .pct extension when they're converted for use on Windows and .pcz when they're zipped. -
Corel Draw (.cdr). Corel's CORELDraw graphics program produces files in this format. -
Computer Graphics metafile (.cgm). Used as a "least common denominator" file format (for transferring images from one type of format and computer to another) in industries such as automobile manufacturing and defense. -
Encapsulated PostScript (.eps). Developed for printing documents on a wide range of printers, these files can be pretty large. -
WordPerfect Graphics (.wpg). Graphics file format created by Corel's WordPerfect suite of programs (similar to Microsoft Office). 9.4.2. Creating a Photo Album Slideshow Imagine that you took a bunch of digital pictures at your grandparent's 50th wedding anniversary, and you want to convert them into slideshow you can post on the Web for far-flung relatives to enjoy. Or say Engineering handed you a dozen schematics that you need to turn into a presentation by the end of the day. No matter the situation, when you've got a bunch of image files you want to paste into a presentation, creating a photo album is the way to go. Because photo albums are nothing more than quick-and-easy slideshows, you can present them as-is, or use them as the basis for a more complicated presentation by adding additional text, charts, slide transitions, and so on. 9.4.2.1. Creating a photo album from picture files on your computer Start by creating a new blank PowerPoint presentation. -
Choose Insert  Illustrations Photo Album. Illustrations Photo Album. The Photo Album dialog box appears. -
In the Photo Album dialog box, click File/Disk. The Insert New Pictures dialog box appears. -
In the Insert New Pictures dialog box, browse your computer for the files you want to add to your album, click them to select them (Shift-click or Ctrl-click to select multiple files), and then click Insert. The file (or files) you selected appear in the Photo Album dialog box, as shown in Figure 9-29. 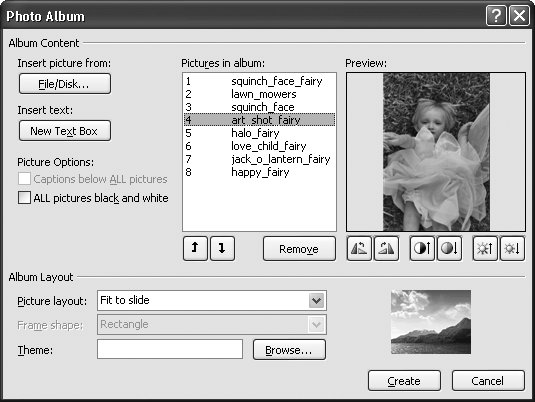 | Figure 9-29. The Photo Album dialog box lets you add photos, retouch them, organize them, apply a quickie layout and caption placeholderspretty much everything you need to create a quick photo slideshow. You just need to fill in your own caption text for each slide (page 306 shows you how). | |
Tip: Don't let photo albums get so huge your audience has a tough time running them, especially if you plan to put yours on the Web. To help keep file size down, instead of clicking Insert, click the down-arrow next to Insert and then choose "Link to file." For more on slideshow optimization, check out page 255.
-
If you like, take a minute to edit your pictures. PowerPoint's picture editing options aren't nearly as detailed as in a program like Adobe Photoshop, but you can make your pictures look a bit better, and even add an arty effect or two by choosing one ore more of the following options from the Photo Album dialog box: -
Rotate Left, Rotate Right, Increase Contrast, Decrease Contrast, Increase Brightness, Decrease Brightness. -
If you plan to print your photo album on a black-and-white printer or just want to experiment with a stark "newspaper" effect, turn on the checkbox next to "All pictures black and white." -
To add text placeholders under each of your images (Figure 9-30), choose a layout other than "Fit to slide" (see page 307) and then turn on the checkbox next to "Captions below ALL pictures."  | Figure 9-30. PowerPoint starts off your slideshow with a title page containing the generic text "Photo Album" and your name. (Chapter 13 shows you where PowerPoint got your name, and how to change it.) As for captions, PowerPoint uses each image's file name as a placeholder. To change a caption, simply click it and start typing, as you would any other text box. | |
-
If you like, you can change the order of your pictures. To do so, click to select the picture you want to move in the order. (Use Shift-click to select multiple contiguous pictures.) Then click Up (to move the selected picture up one in the slideshow order) or Down (to push the selected photo down one in the slideshow order).
Note: To delete a photo from the album, click to select it, and then click Remove.
-
In the Picture Album dialog box, from the "Picture layout" drop-down list, choose "Fit to slide" (if you want your pictures to fill the slides completely) or 1, 2, or 4 pictures per slide, with or without titles. The layout you choose determines how many pictures appear on each slide, and whether or not the pictures appear accompanied by a title. If you choose to add titles, you'll need to add your own title text to the title placeholders PowerPoint places above your images; see Figure 9-30 for an example. When you choose a layout, you see a preview in the Photo Album dialog box. If you chose a layout option other than "Fit to slide," PowerPoint lets you select a frame shape (your options include Rectangle, Oval, Beveled, and several more) as well as a theme (see page 32 for the skinny on themes). -
When you're ready to create your Photo Album, click Create. PowerPoint creates a title slide and additional slides containing your images, based on the slide layout, theme, and other formatting options you specified.
Note: After you create a photo album, you can edit it by choosing Insert Illustrations Photo Album Edit Photo Album, or by using the editing techniques covered in Part 1 of this book. Theres no special file format associated with a photo album; you can save it as a regular PowerPoint presentation, a self-contained show, or any other format you choose.
9.4.3. Adding Built-in Clip Art Drawings When you install PowerPoint 2007 or any other Microsoft Office program, you automatically install a pile of free, built-in drawings you can add to your slideshows. Although some of the drawings are pretty cheesy, Microsoft maintains a large and growing online library of clip art drawings and photos (and animation and sound clips, too), some of which look downright sophisticated. UP TO SPEED
Finding the Perfect Clip Art | | Using the Clip Art panel to find just the right piece of clip art for your slideshow can be a challenge. Here are a few tips that should help: -
Look in all the right places. If a basic search (for nature or industry , for example) doesn't bring back any thumbnails, click the down-arrow next to "Search in" and make sure the checkboxes next to all of the possible collections (file folders) are turned on. -
Filter out animation and sound clips. When you're looking for clip art, it's frustrating to get a bunch of search resultsonly to find they're all sound clips. To confine your searches to images, click the down-arrow next to "Results should be" and make sure the checkboxes next to "Clip Art" and "Photographs" are turned on (and that the checkboxes next to "Movies" and" Sounds" are turned off ). -
Look online. If you've searched for clip art and come up empty-handed, click the "Clip art on Office Online," which whisks you to Microsoft's growing online library of clip art. -
Add your own images. If you've got your own drawings, photographs, or other image files already stored on your computer, you can add them to the Clip Art Organizer (a fancy name for "file folder") so you can use them the next time you go looking for clip art. Here's how: Click the "Organize clips" link you find at the bottom of the Clip Art pane and then, from the dialog box that appears, choose File Add Clips to Organizer. |
To add clip art to a slide: -
In the Slide tab in Normal view, select the slide you want to add clip art to. Then choose Insert Illustrations Clip Art. The Clip Art pane you see in Figure 9-31 appears. 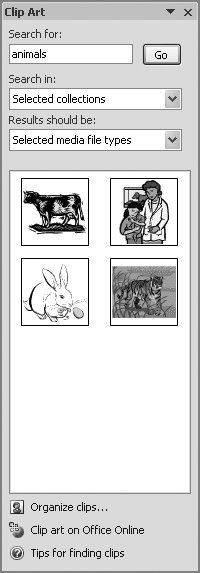 | Figure 9-31. As you can see from these representative thumbnails, there's a reason clip art isn't called high art. Still, depending on the effect you're after, clip art can be perfectly serviceable. Check out the box on page 308 for ideas. | | -
In the "Search for" box, type a description of the picture you'd like to add to your slide and click Go. In the results area of the Clip Art pane, PowerPoint displays thumbnails of all the clip art pictures that match your search word or phrase. To see all the clip art images stored on your computer, don't type anything; just click Go. -
Click a thumbnail to add that drawing to your slide. PowerPoint places a copy of the drawing in the center of your slide, on top of whatever else already happens to be there. You can also drag the thumbnail from the Clip Art pane to the precise spot on your slide where you want it. |