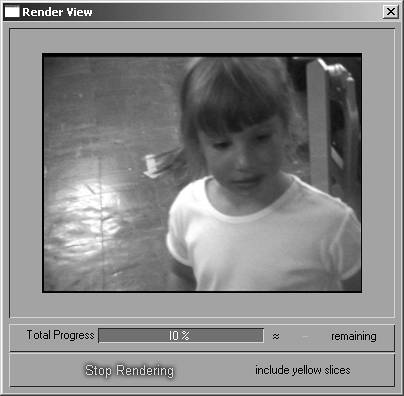
| Most Standard and Alpha Magic transitions are fairly simple. That's why you can get real-time previews on fairly old computers. However, Hollywood FX transitions, even some of the free ones, are much more complex, making real-time preview challenging. To accelerate preview, Studio will automatically use the 3D graphics capabilities now embedded in most graphics cards. In Studio 9, you had the option to enable or disable this capability; with Studio 10 it's always on. Like Studio 9, version 10 also enables background rendering, where Studio renders the actual frames that make up the transition and stores them in a separate file. Although the process takes a few moments, while Studio is rendering I can still be editing elsewhere in the production, and when it's done I can view my transition in real time. The sidebar "About Background Rendering" discusses other benefits of this feature, and how to select the optimum rendering alternative. About Background Rendering Studio is a nondestructive editor, which means that it leaves all captured or imported files untouched and implements your edits by producing a completely new file. This process is called rendering, and depending on project duration, complexity, and the speed of your computer, rendering can take quite a long time. When you render at the end of a project, it's a foreground task, which means that the program is totally dedicated to rendering, and you can no longer edit. Virtually all editing and graphics programs work this way. However, Studio also provides an option to render transitions and other effects in the background, which means that you can continue to edit while Studio is rendering. When you're ready to output your final video files, the process will be quicker since much of the rendering will already be completed. As shown in Figure 8.27, Studio 10 offers two format choices for background rendering, DV, which is ideal if you're sending your project back to tape, and MPEG-2, which is great for DVD projects that must be rendered into MPEG-2 before recording to disc. Neither alternative speeds your rendering if you're outputting into Windows Media, Real, or another format. However, you still may want to render in the background, using the DV option, because this provides the most accurate preview of your effects. Figure 8.27. Here's where you select your background rendering options. 
Note, however, that background rendering may make your system feel sluggish during editing. For example, you may notice that you have to select a video file two or three times before the system responds, that dragging files on the Timeline takes longer than usual, or that scenes in the Album take longer to appear when you select a new video file. This is because rendering is very computationally intensive, which means that it consumes lots of your computer's processing power. On my 2.4 GHz Pentium 4 HP workstation, I notice very little difference when background rendering is turned on. On my Dell laptop with a 1.6 GHz Mobile Pentium chip, background rendering creates some sluggishness, but it's still worthwhile, because I get to view effects I couldn't preview otherwise and because of the rendering time it saves me on the back end of the project. So what's the net/net? If your goal is to output to DV tape or DVD, give background rendering a try, using the appropriate format choice. If your goal is to output in some other format, try rendering in the background to DV format. In both instances, be aware that background rendering may slow performance, and if this becomes unacceptable, disable background rendering. In addition, recognize that rendering in the background stresses the system, which may lead to instability and system crashes. If this occurs, turn off background rendering and see if the situation improves. |
To render as a background task 1. | From the Studio menu, choose Setup > Project Preferences.
The Studio Setup Options screen appears, open to the Project Preferences tab.
| 2. | In the Rendering list box at the right (Figure 8.27), select one of the following options:
- No Background Rendering, to disable background rendering
- Optimize for DVD, to render into MPEG-2 format
- Optimize for Make Tape, to create a file in DV format
See the sidebar "About Background Rendering," earlier in this chapter, for assistance with this decision.
| 3. | Click OK to close the Studio Setup Options dialog box.
Studio will now render all transitions and effects as background tasks.
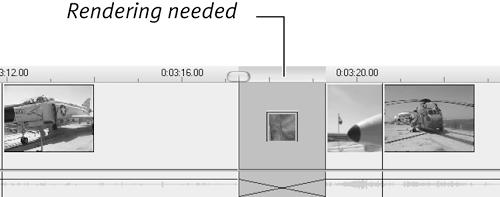
After applying background rendering, you'll see a small green bar above all areas on the timeline that require rendering (Figure 8.28). When this disappears, Studio has finished rendering the effect or clip.
Figure 8.28. Background rendering at work. This bar indicates that video needs to be rendered and disappears once the job is finished. The bar is very faint in the grayscale figure but it's bright green and impossible to miss in the real application. 
|
 Tip Tip
|


 Tip
Tip