Customizing Album Views

 < Day Day Up > 

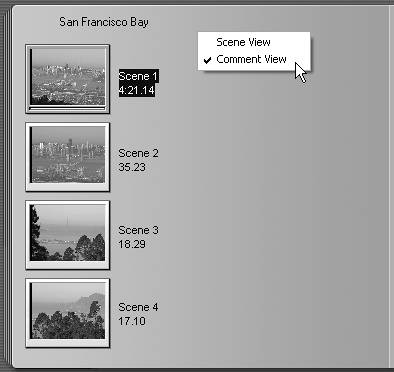
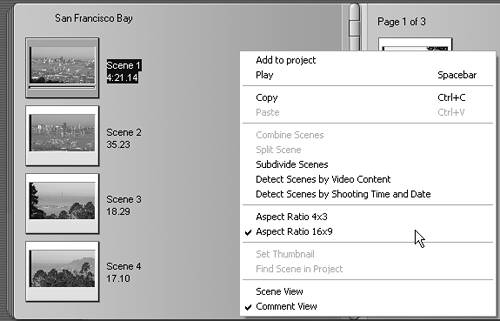
While your time spent using the Capture Album is usually brief, Studio helps you get as comfortable as possible by providing options for customizing the view.

I've captured some 16:9 footage to illustrate 16:9 views in the Album. Figure 3.24 shows the Album post-capture in the default mode, which is Scene View with 4:3 images. I'll show you how to switch to 16:9 view in a moment.

Figure 3.24. The default Album view: Scene view in 4:3 mode.


To switch between Scene and Comment views

  • Right-click anywhere in the Album and choose Comment View (Figure 3.25).

    Figure 3.25. Now in Comment view, where you can annotate your scenes.


    The Album switches to Comment view. See the next section, "Adding Scene Comments," to learn how to add comments to your scenes.

    Note that if you touch the Album in a gray area, and not on a picture, you get only the options shown in Figure 3.25. To get the complete list of options shown in Figure 3.26, you must right-click a picture.

    Figure 3.26. Now in 16:9 mode, converting your project to the 16:9 aspect ratio.


    To switch back to Scene view, right-click and choose Scene View.

To switch between 4:3 and 16:9 views

  • Right-click a picture in the Album and choose Aspect Ratio 16x9 (Figure 3.26).

    The Album switches to 16:9 view. To switch back, right-click and choose Aspect Ratio 4x3.

Tip

  • Note that changing views does absolutely nothing to the captured file; it just changes the way that Studio displays it. It does not convert the file from 4:3 to 16:9, or vice versa.


     < Day Day Up > 


    Pinnacle Studio 10 for Windows. Visual QuickStart Guide
    Pinnacle Studio 10 for Windows Visual Quickstart Guide
    ISBN: B001E08S6S
    EAN: N/A
    Year: 2005
    Pages: 189

    flylib.com © 2008-2017.
    If you may any questions please contact us: flylib@qtcs.net