Flylib.com

Books Software


39 Setting Up Overlay Effects with the Multi-Camera Tool


#39 Setting Up Overlay Effects with the Multi-Camera Tool

While switching back and forth between camera angles adds a lovely professional touch, adding multiple layers and picture-in-picture effects can convert your edits to pure art. For example, how else could we show a close-up of the concert pianist's face and her hands playing, as shown in Figure 39a ?

Figure 39a. An example of a layered effect you can easily create using the Multi-Camera tool in Premiere Pro.


Be Careful When Moving Clips

If you click and drag either clip in this exercise, you'll lose synchronization. Think about it like this: you're not moving the clip to a new location; you're exposing another camera angle at the same location on a higher track to produce the overlay effect.


All Dressed Up and Nowhere to Go?

Now that you're all set up for picture-in-picture and overlay effects, perhaps you'd like some help in implementing them. If so, see #42 and # 45.


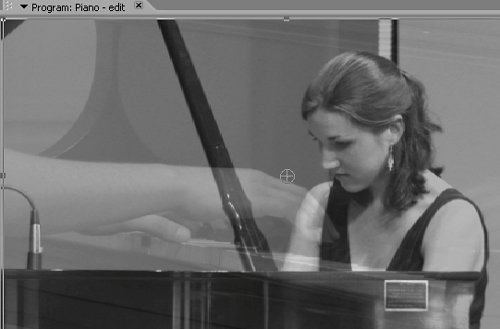
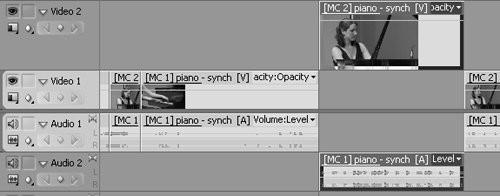
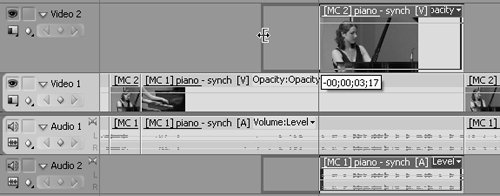
To create any overlay effect, you need to place one track on top of the other, without loss of audio synchronization, of course. Here's how to get that done.

1.

Identify the target clips for the overlay effect on the timeline.

2.

Drag the target top clip to Video 2 and Audio 2, as shown in Figure 39b .

Figure 39b. You have to drag both the Video and Audio clips to different tracks in order to layer the two clips.


Note

If your layered effect includes more than two clips, drag each clip one track higher (or lower, for audio) on the timeline .

3.

Use the Trim tool to fill the Gap in Video 1 and pull Video 2 over the target region for the effect ( Figure 39c ).

Figure 39c. Use the Trim tool to close the gap in the lower track and drag the upper clip(s) to create the layers.


4.

Apply the desired effect.


#40 HDV and Multi-Camera Editing, Part I

One of the joys of shooting in HDV for SD delivery is the ability to pan and zoom around the HDV clip with little or no loss in quality. When editing HDV outside of the Multi-Camera environment, Premiere Pro's motion tools make this a snap. However, when you use the Multi-Camera tool, you lose some flexibility.

Which Preset Should You Use?

Which preset should you use when producing a Multi-Camera project with HDV video? As discussed more fully in #1, you should always use the preset that matches your target output, which for most producers is 16:9 SD resolution video.


In essence, when you drag your synch sequence into the edit sequence, you're dragging over a 720x480 frame, not the original 1440x1080 frame. If you want to zoom in to the image while editing in the edit sequence, Premiere Pro doesn't go back to the original HDV video for additional detail; it zooms in to the 720x480 image. This can result in pixelation and suboptimal quality.

If you zoom in to your HDV video in the synch sequence and then try to pan across the image, you'll see a black strip in the video frame like that shown in Figure 40 , even if the HDV video has image detail in the original HDV frame.

Figure 40. Premiere Pro truncates the HDV frame to a 720x480 resolution when you nest the synch sequence in an SD edit sequence. Even though there's additional detail on the left in the original HDV frame, you can't access it in the edit sequence; instead you'll see the black bar on the left.


If pan and zoom is critical to your project, #41 describes a procedure that lets you work around this issue, and it works perfectly for occasional adjustments in a project. However, if you're planning to pan and zoom around your HDV footage extensively, you may want to consider foregoing Premiere Pro's Multi-Camera tool and performing the task manually.