Importing and Exporting Data
Outside of XML-land, moving data around is pretty simple. There are three major ways to do import/export tasks in SQL Server. They all have strengths and weaknesses. The Bulk Copy Program (BCP) is probably the hardest to learn, but it is also extremely capable and almost ludicrously fast. The BULK INSERT statement implements part of BCP inside SQL Server, so it has all the speed of BCP with an easier-to-use interface. Finally, the Data Transformation Services, or DTS, provide a lot of flexibility and capabilities in a very graphically intensive , point-and-click environment. Importing and Exporting Data with BCPThe first thing to understand about BCP, the Bulk Copy Program, is that it's not a SQL Server command. It's not part of T-SQL. If you attempt to use BCP in Query Analyzer, it does everything it can to just laugh at you. Don't do it; it doesn't work. BCP is a command-line tool. That's right: the big, black empty window with the blinking cursor command line. So fire up a command prompt and dig in. NOTE Bee Sea Pea If you're looking for help with BCP, or just trying to find articles on Microsoft's support web site, you can just look for the acronym BCP. It's one of those "so common people usually don't remember what the letters mean" acronyms. BCP is ancient, in computer years anyway. It's part of the wild history of SQL Server, and has been part of SQL Server since at least version 4.21, back when it was still a joint development effort between Microsoft and Sybase. The reason it's still around is that it's an extremely useful tool for loading data into a database quickly. The reason it's a command-line tool is all about overhead. Keep in mind that you can run BCP across the network; it doesn't have to run on a server. You can have a bunch of servers all across your network using BCP at once, and, assuming you have enough disk speed, SQL Server just sits there and soaks up data. BCP has lots of command-line options. The basic syntax is: bcp <table> <in or out> <file> <security information> <format information> The <table> is the destination table, usually specified as a three-part name , like Chapter5.dbo.sales . The <in or out> is what direction. Telling BCP to go IN tells BCP to read from the file and put data IN SQL Server. Telling BCP to go OUT pulls data OUT of SQL Server and writes it to a file. The <file> is the name of the file that you want to use. If it's an IN operation, then the file should exist and have data in it. If it's an OUT operation and the file exists, the file gets overwritten by the data coming out; otherwise , the file is created. The <security information> is the name of the server that you're trying to use, and either username and password or a note to use your Windows authentication to handle it. Finally, <format information> tells BCP what kind of format the data is in. BCP can deal with three data formats: native, character-delimited, and column-delimited. Native format works only when you're moving data from one SQL Server to another, and the servers have to use the same collation and character set for it to work. It's also the fastest format, so use it whenever you can. The second fastest format is character-delimited. Character-delimited formats use some character, typically a comma, space, or a vertical bar, to separate the data columns. Finally, there is column-delimited data, which means the columns within the data file start and end at specific positions in the file. This is also called "fixed column width" or just "fixed column" data format. This tends to be the slowest way to BCP data around. NOTE BCP Speed and File Format What makes one method of BCP faster than another? Native format files are the smallest; character-delimited files are the next smallest; and column-delimited files are the largest. BCP is so fast and well optimized that it is bound by how fast it can read or write data to or from the file. BCP does not create tables. You have to have a table set up and waiting for BCP before you run BCP. So, how do you run BCP? Here's an example of reading data from a comma-delimited text file into a database table: bcp chapter5.dbo.sales in sales.csv -T -c -r\n -t, The -T tells BCP to use a trusted connection. There is no server specified; it would be specified with the -S option, so the data goes to the local server. The -c tells BCP that it's supposed to use a character-delimited copy; the -r says that each row will be delimited with a newline character; and the -t says that each column will be delimited with a comma. BCP has a bunch of command-line parameters. Table 5.3 lists the ones that are used for determining the file format. Table 5.3. BCP Command-Line ParametersFormat Parameters
Notice that there is a command-line option -n and another one that's -N . All BCP command-line options are case sensitive. If you don't specify one of -c , -f , -n , -N , or -w , BCP assumes that you don't have a format file, you don't want to use any of the predefined formats, and that you want to make one. It reads the layout of the table you're using and then walks you through a prompted one-column-at-a-time process, and then you can save the file as a format file. Here's an example of a BCP session where BCP is prompting for information: C:\Documents and Settings\MILLCS>bcp Chapter5..Sales out sales.dat -T Enter the file storage type of field PersonID [int-null]: Enter prefix-length of field PersonID [1]: Enter field terminator [none]: Enter the file storage type of field ProductID [int-null]: Enter prefix-length of field ProductID [1]: Enter field terminator [none]: Enter the file storage type of field QtyPurchased [int-null]: Enter prefix-length of field QtyPurchased [1]: Enter field terminator [none]: Enter the file storage type of field DatePurchased [datetime-null]: Enter prefix-length of field DatePurchased [1]: Enter field terminator [none]: Do you want to save this format information in a file? [Y/n] Host filename [bcp.fmt]: Starting copy... 8 rows copied. Network packet size (bytes): 4096 Clock Time (ms.): total 1 In this example, all the defaults were used by just pressing the Enter key. This session of BCP results in two files being created: one is the output file, and the other is the format file, which in this case was named bcp.fmt. The data file that is created is the same you'd get if you'd used the -n for native format. Here's a format file: 8.0 4 1 SQLINT 1 4 "" 1 PersonID "" 2 SQLINT 1 4 "" 2 ProductID "" 3 SQLINT 1 4 "" 3 QtyPurchased "" 4 SQLDATETIME 1 8 "" 4 DatePurchased "" The first row of the format file is the version number of BCP. (If you want to see just the version number, by the way, you can use BCP -v at the command line.) The second row is the number of data rows that are in the file. The third row on to the end of the file is the actual layout of the file. The first column is the file column number. The second column is the data type. The third column is the prefix length, which is the number of bytes in the file that tell BCP how long the data field is, and is used only in native-format BCP. The fourth column is the number of bytes wide the data column is. The fifth column is the delimiter, which is what separates this column from the next column. Next is the server column order. Finally, the row ends up with the field name and the collation for the column. The file column number and server column number fields are used to do a couple of interesting things. First of all, if the table has columns that are in a different order than the file, you can manipulate the server column number to make it correct. Second, if you set the server column number to zero, then the column from the file gets skipped . Prefix length is used when copying data in SQL Server native mode. If the format file weren't native mode, then it would have SQLCHAR as the type for each column, rather than SQLINT or SQLDATETIME . The type is the type that is written (or read) from the file, not the database type. So if the type is SQLINT , then BCP is going to write out the actual 4-byte integer for the value 42, not the 2-byte character for 42. Here's an example of a session to create a character-based file: C:\Documents and Settings\MILLCS>bcp Chapter5..Sales out saleschar.dat -T Enter the file storage type of field PersonID [int-null]: char Enter prefix-length of field PersonID [1]: 0 Enter length of field PersonID [12]: Enter field terminator [none]: Enter the file storage type of field ProductID [int-null]: char Enter prefix-length of field ProductID [1]: 0 Enter length of field ProductID [12]: Enter field terminator [none]: Enter the file storage type of field QtyPurchased [int-null]: char Enter prefix-length of field QtyPurchased [1]: 0 Enter length of field QtyPurchased [12]: 12 Enter field terminator [none]: Enter the file storage type of field DatePurchased [datetime-null]: char Enter prefix-length of field DatePurchased [1]: 0 Enter length of field DatePurchased [26]: Enter field terminator [none]: \n Do you want to save this format information in a file? [Y/n] y Host filename [bcp.fmt]: bcpchar.fmt Starting copy... 8 rows copied. Network packet size (bytes): 4096 Clock Time (ms.): total 1 This creates the same output as if you'd specified just -c on the BCP command line. Notice that the field storage type and prefix length had to be changed for each row, and the last row had to have a field terminator of \n . The \n puts each record on a new line. The resulting output file is a nice, column-delimited file: C:\Documents and Settings\MILLCS>type saleschar.dat 1 37 4 2001-07-22 16:50:38.257 1 38 3 2001-07-22 16:50:38.257 3 39 1 2001-07-22 16:50:38.257 4 51 1 2001-07-22 16:50:38.257 4 47 1 2001-07-22 16:50:38.257 9 37 10 2001-07-22 16:50:38.257 9 38 5 2001-07-22 16:50:38.257 10 41 6 2001-07-22 17:53:51.793 So far, all the examples have involved exporting data from SQL Server. Now it's time to take a look at importing data. The BCP command works the same both ways: you should specify IN instead of OUT to import data into SQL Server. For large files, with more than a couple thousand rows perhaps, you should turn on the Select Into/Bulkcopy option for the database, or set the database recovery mode to BULK_LOGGED or SIMPLE . These options disable all transaction log backups while they are turned on, and you must do a full backup to get transaction log backups to work afterwards. What the option does is for certain operations, namely those involving SELECT INTO and BULK COPY ; it changes how transaction logging works. Typically, whenever you insert a row, SQL Server logs the row being inserted into the transaction log. This prevents data loss in case of power outage and enables you to do point-in-time database recovery. This also significantly slows down the process of inserting huge numbers of records. Switching to BULK_LOGGED or SIMPLE changes the behavior so that rather than logging the entire row insert, SQL Server just logs the page allocations , which involves a lot less overhead. Basically, when you do a BCP and the database is set for BULK_LOGGED or SIMPLE recovery, all the data goes into allocated space in the database; and when the copy commits, it attaches the allocated space to the table. It's really fast, and it's still very safe because all the page allocations are logged, and if the transaction fails and has to roll back, the pages are deallocated. This process is called Fast Bulk Copy . NOTE What About SELECT INTO/BULKCOPY ? If you're used to using SQL Server 7.0 or previous versions, you're probably wondering what happened to the SELECT INTO/BULKCOPY option. It's been replaced by a Recover Mode option. You can choose one of three recovery modes: FULL , BULK_LOGGED , or SIMPLE . FULL mode is the default for everything except Desktop and the Data Engine versions of SQL Server. BULK_LOGGED is similar to the old SELECT INTO/BULKCOPY option, in that any bulk row operations have only allocations logged, not the data. FULL mode is the normal mode for most operations; it offers the widest variety of recovery options. In addition to having the BULK LOGGED or SIMPLE recovery option selected, you need to do a few other things to get fast bulk copy to work.
Typically, if you're adding more than 50% of the current table count or more into the table, you should drop the indexes first because they slow down the inserts , and the indexes will be better if you rebuild them after adding that much data anyway. Regardless, fast bulk copy doesn't work if there are indexes on the table unless the table is empty to begin with. Another option for large bulk inserts sets the batch size. Batch size is the number of rows that will be inserted as part of a transaction. If the batch size is large, then the transaction that is generated will be large, and it may cause your transaction log to fill up. If the transaction is too small, SQL Server spends too much time committing transactions rather than writing your data, and performance suffers. Typically, a batch size between 1,000 and 10,000 is used. Files with lots of rows and very few columns tend to benefit from higher batch sizes. By default, BCP does the entire operation in one batch, but it lets you know when it finishes sending each 1,000 rows to SQL Server. You should be aware of a few special options, as shown in Table 5.3, that are used for importing data into SQL Server. Table 5.3. BCP Data Import Parameters
The -h option enables you to specify one or more different hints to SQL Server about how to process the bulk copy. These options enable you to fine-tune BCP performance, and are listed in Table 5.4. Table 5.4. BCP Bulk Insert Hints
Here is an example of using BCP to put data into a database: C:\Documents and Settings\MILLCS>bcp Chapter5..Sales in salesnative.dat -n -T Starting copy... 8 rows copied. Network packet size (bytes): 4096 Clock Time (ms.): total 1122 C:\Documents and Settings\MILLCS> If more than 1000 rows were being copied, BCP would supply a running count of the number of rows inserted. So, you keep seeing that -T option on the BCP examples and you want to know what it means? Table 5.5 shows you the rest of the BCP command-line switches: Table 5.5. Other BCP Command-Line Switches
There are two other things to be covered with BCP, then you can move on. First of all, in addition to just pulling the data for a given table, you can use the QUERYOUT option in place of IN or OUT , and specify a query rather than a table name. The rest of the options work the same way. This works for output only. Here's an example: C:\Documents and Settings\MILLCS>bcp "SELECT * FROM Chapter5..Sales S INNER JOIN Chapter5..Person P on S.PersonID = P.Personid" queryout qo.txt -c -T Starting copy... 14 rows copied. Network packet size (bytes): 4096 Clock Time (ms.): total 1 C:\Documents and Settings\MILLCS>type qo.txt 1 37 4 2001-07-22 16:50:38.257 1 Danny Jones 1 38 3 2001-07-22 16:50:38.257 1 Danny Jones 3 39 1 2001-07-22 16:50:38.257 3 Scott Smith 4 51 1 2001-07-22 16:50:38.257 4 Alex Riley 4 47 1 2001-07-22 16:50:38.257 4 Alex Riley 9 37 10 2001-07-22 16:50:38.257 9 Shelly Alexander 9 38 5 2001-07-22 16:50:38.257 9 Shelly Alexander 1 37 4 2001-07-22 16:50:38.257 1 Danny Jones 1 38 3 2001-07-22 16:50:38.257 1 Danny Jones 3 39 1 2001-07-22 16:50:38.257 3 Scott Smith 4 51 1 2001-07-22 16:50:38.257 4 Alex Riley 4 47 1 2001-07-22 16:50:38.257 4 Alex Riley 9 37 10 2001-07-22 16:50:38.257 9 Shelly Alexander 9 38 5 2001-07-22 16:50:38.257 9 Shelly Alexander Another option is the FORMAT option, which can be used in place of IN , OUT , or QUERYOUT . It produces a format file based on the specified options. If you use the FORMAT option, you must specify a value for the -f parameter. Here's an example call: C:\Documents and Settings\MILLCS>bcp Chapter5..Sales FORMAT qo.txt -c -T -f format.out C:\Documents and Settings\MILLCS>type format.out 8.0 4 1 SQLCHAR 0 12 "\t" 1 PersonID "" 2 SQLCHAR 0 12 "\t" 2 ProductID "" 3 SQLCHAR 0 12 "\t" 3 QtyPurchased "" 4 SQLCHAR 0 24 "\r\n" 4 DatePurchased "" This is a pretty powerful tool, but it's kind of difficult to use when you need to just read a file from within SQL Server as part of a script or scheduled job. It sure would be nice if there were a T-SQL equivalent. Using the BULK INSERT StatementThe BULK INSERT statement is a lot like BCP, but inside T-SQL. It uses most of the same options, but it doesn't need to know which server to use or what security to use because you use it from within T-SQL, so it runs on that server with the security context with which you logged in. The basic syntax goes something like this: BULK INSERT table_name FROM 'data file' WITH ( operational and format options> The table name is a table name or three-part name to use. You can actually use this statement to bulk copy into views as well as tables, which is a handy option. The data file is a data file as read from the server. Keep in mind that if you specify a data file like c:\myfile while talking to a remote server, it's going to try and read data from the C:\ drive on the server, not the one on your workstation. Table 5.6 provides a list of all the operational and format parameters you can use. As mentioned, they're all fairly similar to the ones used by BCP. Table 5.6. Options for the BULK INSERT Command
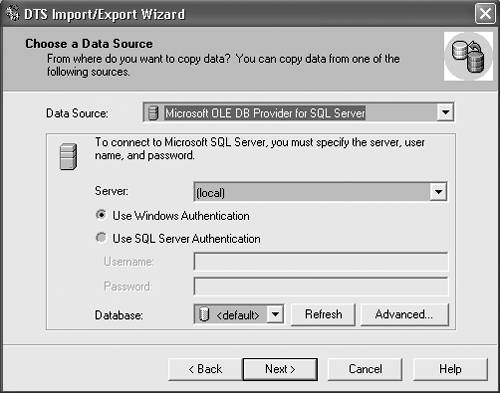
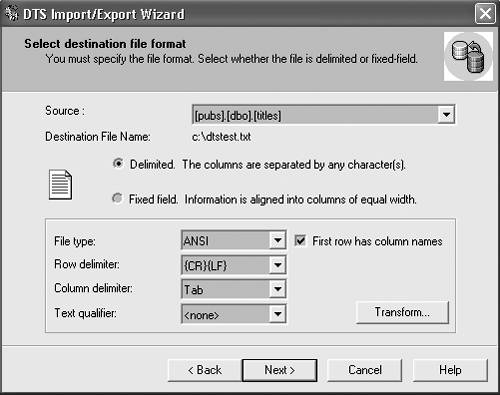
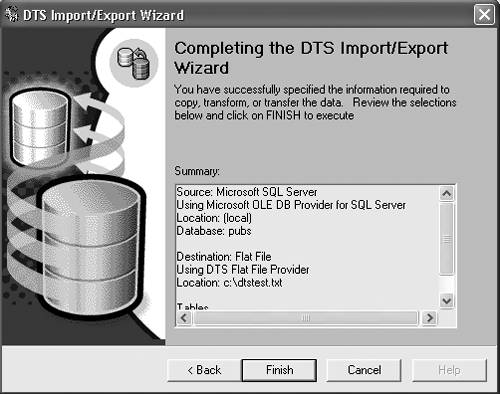
Here's an example, using the same bulk copy operation you used before. Remember, this runs in Query Analyzer, not on the command line: BULK INSERT Sales FROM 'C:\salesnative.dat' WITH ( DATAFILETYPE = 'native' ) This performs a standard native-mode insert of a file created earlier using BCP. The DATAFILETYPE='native' tells SQL Server that the file is stored in native mode. Command line really got you down? Tired of all of this typing stuff? Take a look now at how to import and export data using the graphical tools. Importing and Exporting Data with Data Transformation ServicesSQL Server 2000 provides a great tool that imports and exports data for you called the Data Transformation Services (DTS) Import/Export Wizard. This tool uses SQL Server DTS to copy data into and out of SQL Server using nice, easy-to-understand graphical tools. Step by Step 5.2 provides an explanation of how to copy data out of SQL Server.
The only really tricky part of the entire wizard is the transformations. DTS enables you to write transformations in VBScript that can make simple changes to data, such as formatting or localizing. By clicking on the Transform window, you can go into the transformation and change the VBScript so it changes the data format. That's all there is for import and export. You've now finished quite a long chapter that covers everything from complex queries to the DTS Import/Export Wizard. Next up is a lesson on scripting, so you can find out what that @ was doing in the section on OPENXML . |
EAN: N/A
Pages: 228