Oracle Application Server Portal Content
| | ||
| |
Just as with the preceding section, devoting only one section of one chapter to Oracle Application Server Portal Content does not do it justice . Oracle Application Server Portal contains sophisticated methods and programs to store, display, and manage content, giving administrators almost limitless ways to administer content on their portals. The Content Management SDK gives administrators and developers the ability to automate many of the tasks of content management.
| Tip | For more information on the Content Management SDK, go to http://www.oracle.com/technology/products/ifs/index.html. |
A good place to start our discussion of Oracle Application Server Portal Content would be the definition of content. As we have seen, Oracle Application Server Portal allows developers to build components such as forms, reports , charts , calendars, etc. But what if you have information that you wish to display on your portal that does not fit into one of these component types; for example, you have a Microsoft Word document or an Adobe PDF file? The developers of Oracle Application Server Portal were smart enough to design it so that both types of objects can be displayed on your portal. Portlets query Oracle databases and display that data in a form, report, calendar, etc.; and items display content such as word processor files, spreadsheets, or images. Within the context of Oracle Application Server Portal, content can be defined as any piece of information displayed on a portal that does not fit into the traditional interface of an Oracle Application Server Portal component such as a form or report. There are two basic types of items that can be placed on a page: Content Item Types and Built-In Navigation Types. The following is a list of Content Item Types you can place on your Oracle Application Server Portal pages:
-
File This option allows you to place a file on your portal and is the most common option selected when placing content on your portal. When a file is selected, it is converted to a binary large object and stored in the infrastructure database automatically. You also have the option of displaying a Simple File, which does not prompt you for advanced content attributes such as publish date or expiration (advanced content attributes are discussed shortly).
-
Text This option displays a WYSIWYG (for What You See Is What You Get) editor that allows you to enter text for your content area. Just as with the File option, there is a Simple Text option.
-
URL This option allows you to place a URL in your content area. Alternatively, the editor displayed in the text option allows you to create links in your text area. As with the File and Text options, there is also a Simple URL option.
-
Page Links This option allows you to place links in your content area to other Oracle application Server Portal pages. There is also a Simple Link option.
-
Images This option allows you to place an image in your content area. There is also a Simple Image option.
-
Zip Files This option allows you to upload a zip (compressed) file to your content area. The only difference between this and a File is the existence of a link titled Unzip next to the item when displayed. Clicking the Unzip link gives end users the ability to unzip and store whatever is in the zip file on a page in the portal.
-
PL/SQL This option allows you to store a PL/SQL code fragment as a content item in the content area. Clicking this link will execute the PL/SQL code.
-
Oracle Reports This option allows developers to embed an Oracle Report on a content area. Clicking the link will display the Oracle Report on the Web.
The following is a list of Built-In Navigation Types you can place on your Oracle Application Server Portal pages:
-
Portal Smart Links This option allows you to place various links in the content area to perform actions such as edit user account information, edit the page, display a help menu, take the user to her personal page, refresh the page, etc.
-
Login/Logout Links This option places a Logout link on the content area page.
-
Basic Search Box Two types of searches are available to end users in Oracle Application Server Portal: a basic search that allows users to search through their portals without reducing the information returned by category or perspective; and an advanced search that gives end users the ability to use various methods of reducing information returned by their search as well as advanced features such as Boolean operators. The Basic Search Box places a Search field on the content area allowing the end users to perform basic searches through content on the portal.
| Tip | For now, understand that categories and perspectives are ways of organizing content in your portal. Categories organize the content based on what the content is. Perspectives organize the content based on who might be interested in it. |
-
List Of Objects This option allows you to return a set of Oracle Application Server Portal content that fits a certain criteria. You can return a drop-down list or a set of links that points to a page group , a perspective, or a category.
-
Portal Smart Text This option can be used to display the current date, user, or page.
-
Object Map Link This option can be used to create a link that will display a hierarchical map of pages and subpages when clicked by an end user.
-
Page Path This option creates a breadcrumb menu on the page that allows end users to see where they are in the portal site and gives them the ability to navigate through levels quickly. Placing a Page Path navigation link on a root page has no effect; it is only useful on subpages.
| Tip | Not all of these types are available for pages by default. Some of the items will have to be enabled for a page group. To add these types, select the Properties link next to Page Group on the top left of the page editor. Select the Configure tab, then click the Edit link in the Content Type and Classification section of the page. Add the Item Types in the Item Types section of the page and click OK. |
For this example, let s create a page and place content on it. You will need some basic content that is on the hard drive of the computer you are doing the exercise on. The content for these examples is not important ”a simple text file will do. To begin, click the Navigator link on the top-right of any Oracle Application Server Portal page. Click the Page Groups tab (Figure 10-33).
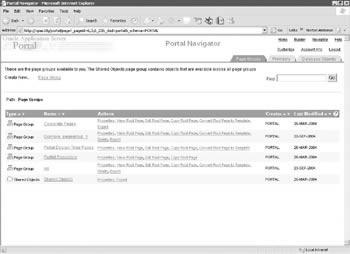
Figure 10-33: The Page Groups tab of the Oracle Application Server Portal Navigator
Click the Create New Page Group link on the top-left of the screen. Give the page group a meaningful name and display name and click Create. The root page for the page group is created for you automatically and you are placed in the Edit Page for the root page (Figure 10-34).
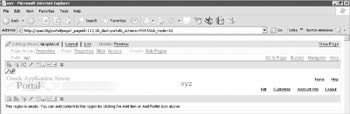
Figure 10-34: The Edit Page screen for the default page of the new page group
Click on the Add Item icon for the lower region. You are presented with the Add Item Wizard (Figure 10-35).
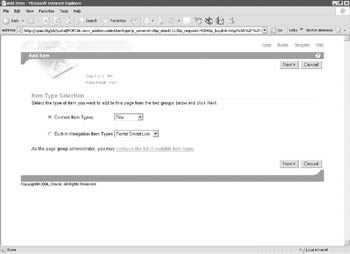
Figure 10-35: The Add item Wizard
This wizard will allow you to add content to your portal. As we mentioned earlier, there are two basic types of content: Content Item Types and Built-In Navigation Item Types. Select the radio button next to Content Item Types, select File in the drop-down box to the right, and click Next>. The following screen, the Item Attributes page, (Figure 10-36) allows us to set attributes for the content we are about to add. Again, as we mentioned earlier, if we had selected Simple File instead of File, this page would not display any of the attributes. The first field prompts for the file. After all of the fields on this page are entered, the Oracle Application Server Portal engine will convert the item specified here into a binary large object and store it in the infrastructure database. The next field, Display Name, is what will be displayed as a link on the content area. The field after that, Category, is what category this item will be associated with. By default, the only category available is General. Later on, we will see how to go about creating new categories. Categories will become relevant when looking at the Oracle Application Server Portal search features later in this section and in the sections Categories and Perspectives and Advanced Search. Description, the next field, serves two purposes. It allows content administrators to enter descriptive information about the content item and provides information that the search capabilities of Oracle Application Server Portal can use when building indexes end users can use to search content.
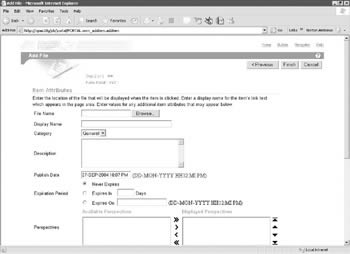
Figure 10-36: The Item Attributes page for the item we wish to add
The next field is called Publish Date. This date, which defaults to the current time, gives content managers that ability to control when a piece of content will become available to end users. If the default is taken, the content will be available immediately. If the time is set to the future, the content will not become available until that time threshold is reached. As a content coordinator , you will see the content on the edit page screen. End users, however, will not see it until the system time is greater than the time specified here.
| Note | The clock that determines when content is available is the system clock of the server running your Oracle Application Server Portal instance. |
The next field, Expiration Date, gives content administrators the ability to expire an item; that is, make it unviewable after a certain date. This is particularly useful for something like a monthly report, which can be made available on a site and would expire on the final day of the month. In this scenario, an end user viewing the page on the last day of the month would see the content item, but when he views the same page after the start of the next month, the item would not be displayed. The Oracle Application Server Portal engine handles this automatically; no programming or administrative actions are needed.
| Note | Expired content still exists within the Oracle database. |
The next field lists the perspectives available for this item. Perspectives organize content based on who might be interested in seeing it. A content item can belong to multiple perspectives simultaneously . An image can be placed next to the link by specifying an image file or web location in the Image field. The drop-down box next to the Image Alignment field allows you to align the image in the content area. Basic Search Keywords allows you to add keywords that will be indexed by the search engine. By default, the following attributes of a content item are indexed: its name, its description, and what is in the content, provided it is part of the following list:
-
Microsoft Word documents
-
Microsoft Powerpoint presentations
-
Text files
-
Microsoft Visio documents
-
HTML files
-
Microsoft Excel spreadsheets
The author allows you to enter an author for this content piece. Enable Item Check-Out allows you to lock the content item. In most organizations, there are numerous people who can add content. This can potentially be an issue if more than one person is updating a piece of content simultaneously. This issue can be overcome by clicking the check box next to this field. The content will not be able to be updated if someone has checked the item out. That will, in effect, lock the content, preventing anyone else from modifying it. Other users can still see the content; however, no one else is able to modify it until it is checked back in. The final set of radio buttons on the page, Display Options, control whether the item is displayed in the same page of the browser (if it is a supported Multipurpose Internet Mail Extensions (MIME) type for your browser) or if a new browser window opens up automatically.
For this example, create a text file on your local machine called sports.txt. In that, file type the line:
football hockey basketball baseball
Then save the file. Go back to your browser and add an Item by clicking the Add Item icon in the bar above the empty region. Select the radio button next to Content Item Types and select File in the drop-down box. Click Next >. Click the Browse button and select the sports.txt file you just created. Give it a display name and in the description field, type soccer lacrosse (without the quotes). Leave the rest of the fields the way they are and click Finish. The sports.txt file will be uploaded to your portal, and you will be taken back to the Edit Page window in your browser (Figure 10-37).
Figure 10-37: The Edit Page screen displaying the newly added content
On the top right of the page, there is a link called View Page. Click that link to show how the page will be displayed. Clicking the link will display the contents of the file in the browser. If the link pointed to a file with an extension that was associated with a MIME plug-in for your browser, the appropriate program would have executed and displayed in your browser. Click the back button in your browser to return to the Edit Page screen. In the banner region, click the Add Portlet icon on the top left of the screen. In the search text box, type search (without the quotes) and click the Go button. Single-click on Basic Search to move that portlet to the Selected Portlets window (Figure 10-38). Click OK.
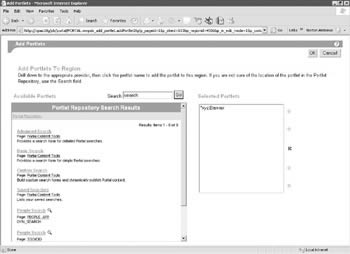
Figure 10-38: The Selected Portlets window
Click the View Page link to view the page. Note the search portlet on the top of the page. Type any of the keywords in the file we just uploaded. Remember, the following things are searchable: the title, the description, and the content, so any of the four sports in the sports.txt file (football, hockey, basketball, baseball) should be searchable along with the description (soccer, lacrosse) and the title (sports.txt). Type any combination of those keywords into the search dialog and click the Search button (Figure 10-39).
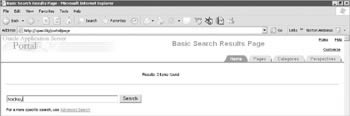
Figure 10-39: The Search results window
How come no results were returned? The answer lies in the fact that the indexes that maintain information about the content in our portal are not built dynamically. That is, they are not updated automatically when new content is added. The indexes must be rebuilt manually whenever new content is added. Luckily, this is an easy procedure and can be automated. The procedure to run is the SYNC procedure in the WWV_CONTEXT package owned by the PORTAL user in the infrastructure database. You can run it from a SQL*Plus session:
SQL*Plus: Release 10.1.0.2.0 - Production on Mon Sep 20 21:40:17 2004 Copyright (c) 1982, 2004, Oracle. All rights reserved. Connected to: Oracle9i Enterprise Edition Release 9.0.1.5.1 - Production With the Partitioning option JServer Release 9.0.1.4.0 - Production SQL> exec portal.wwv_context.sync; PL/SQL procedure successfully completed. SQL>
You can also run it from within Oracle Application Server Portal by performing the following steps:
-
Go back to the Navigator by clicking the Navigator link on the top right of the screen.
-
Click the Database Objects tab.
-
In the Find text box on the top right of the screen, type wwv_context .
-
Click the Show Properties link.
-
Scroll down until you see the procedures and packages in the wwv_context package (Figure 10-40).
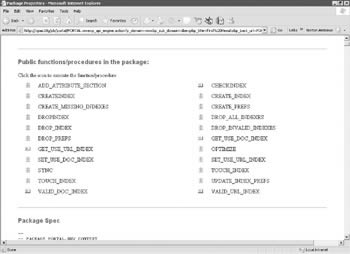
Figure 10-40: The list of procedures/functions in the www_context package -
Click the small icon next to the SYNC procedure.
After the procedure successfully executes (signified by a check mark displayed on the screen), return to the Navigator by clicking the Navigator link on the top right of the screen. Click the Page Groups tab, then the View Root Page link next to the Page Group you created. In the search text box on the top of the screen, enter one of the search items again. The Search page will now correctly display the results of the search (Figure 10-41).
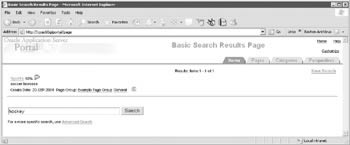
Figure 10-41: The Search page returing expected results
Categories and Perspectives
Categories and perspectives are ways of organizing the content that is on your site. In general, categories are used to group items based on their content; that is, what purpose they serve for your company or organization. Perspectives are used to organize the content based on who would be interested in seeing it. Right now, these concepts may be hard to visualize, but when we look at the advanced search capabilities of Oracle Application Server Portal in the next section, having the ability to group information using these concepts will be invaluable, particularly when the content on your portal site grows to a large number.
By default, there is only one category created for you: general. Categories can be created at either the page group level or at the shared objects level. A category created at the page group level will only be available to the root and subpages of the page group; a category created at the shared objects level will be available across all pages, subpages, and page groups. A category does not have many attributes ”you can associate images with it ”so the creation of a category is a relatively simple process. When adding content, you can specify your new category in the Category drop-down box. A content item can only be in one category.
Perspectives allow you to organize your content based on who might be interested in seeing it. The process of creating a perspective and the attributes that can be defined for a perspective is virtually identical to those of a category. The main difference is that an item can belong to multiple perspectives, whereas an item can belong to only one category. Also, there are no perspectives created by default.
Advanced Search
Go to the Edit Page screen for your page and click on the Add Portlets icon for a region that has been defined as a portlet region. In the Add Portlets to Region page, type search in the Search text box and click Go. This will list the eight seeded portlets that Oracle gives you to add searching capabilities to your portal. Earlier, we added the Basic Search portlet to our page. This time, add the Advanced Search portlet by single-clicking on it. Click on OK to return to the Edit Page screen (Figure 10-42).
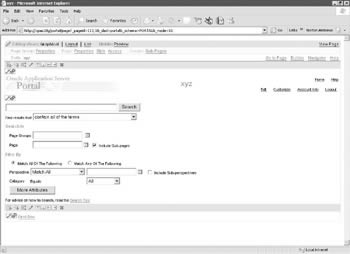
Figure 10-42: The Edit Page screen with an Advanced Search portlet placed on it
The Advanced Search portlet gives the end user greater flexibility when she searches for content. End users can search by perspective, category, page group, page, or any combination of these. Users can also search for all items in a particular category or perspective by leaving the search text box blank and selecting the appropriate category or perspective.
Page Group Attributes
Content attributes are associated with item types and page types, and store information about an item or page, such as the associated category, description, or perspectives. These attributes are included in the add and edit screens where users can provide information about the item or page they are adding or editing. Content administrators can create their own item types and page types and specify exactly what information they want users to supply by choosing which attributes to include. In addition, page group administrators can create their own attributes for containing extra information. You can add attributes at either the Page Group level or the Shared Objects level. To add an attribute at the Page Group level, click on the page group link on the Navigator, click the Attributes link, then click Create New Attribute on the top left of the page. To add an attribute at the Shared Objects level, click on the Shared Objects link on the Navigator, click the Attributes link, then click Create New Attribute on the top left of the page. Table 10-3 lists the built-in content attributes that are provided with Oracle Application Server Portal:
| Attribute | Description |
|---|---|
| Author | The name of the author of the item. |
| Category | The name of the category to which the item or page belongs. |
| Description | A short text description of the item or page. |
| Display Name | The display name of the item or page. |
| Display Option | Information about how the item or portlet should be displayed: |
| Item Displayed Directly In Page Area | |
| Link That Displays Item In Full Browser Window | |
| Link That Displays Item In New Browser Window | |
| Enable Item Check-Out | Information about whether or not the item can be checked out and checked in. This provides document control, allowing groups of users to edit items and not overwrite each other's work. Users cannot edit items that are checked out by another user. |
| Expiration Period | Information about how long an item should be displayed on a page. |
| Image | The image associated with the item or page. |
| Image Alignment | Information about where the item image should appear in the page. |
| Keywords | Keywords that describe the content or purpose of the item or page. When a user performs a search, the user's search criteria is compared to the keywords to find a match. |
| Perspectives | The names of the perspectives associated with the item or page. |
| Publish Date | The date (in the format DD-MON-YYYY HH12:MI PM) when the item should start being displayed to users. |
| Rollover Image | The second image associated with the item or page. This image is displayed whenever a user moves the mouse cursor over the original image on a navigation bar or tab. |
| | ||
| |
EAN: 2147483647
Pages: 192