Editing Text
Microsoft Office Specialist You can edit text in the Slide pane or on the Outline tab of the Outline/Slides pane. A typical slide contains a title, called title text , and a list of items, called bullet points . Items called subpoints might be indented below the bullet points. In the Slide pane, text appears in text-object boxes, and on the Outline tab, text appears in bulleted outline form.
When you hover over text on the Outline tab or in a text object on the slide, the pointer changes to an I-beam. When you click text, a blinking insertion point appears where you clicked to indicate where text will appear when you type.
Before you can edit or format existing text, you have to select it. Selected text appears highlighted on the screen. You can select specific items as follows :
-
To select a word, double-click it. The word and the space following it are selected. Punctuation following a word is not selected.
-
To select all the text on a slide, click its slide icon on the Outline tab.
-
To select a bullet point, click its bullet.
You can select adjacent words, lines, or paragraphs by dragging through them. Or you can position the insertion point at the beginning of the text you want to select, hold down the [SHIFT] key, and either press an arrow key to select characters one at a time or click at the end of the text you want to select.
To delete text, you select it and press either the [DEL] key or the [BACKSPACE] key. To replace text, you select it and type the new text.
| Tip | PowerPoint s spell-checking feature indicates a possible spelling error with a red wavy underline. You can right-click a word with a red wavy line to display a shortcut menu with a list of possible spellings, and then click the correct spelling. You can turn off or modify this feature by clicking Options on the Tools menu and changing the settings on the Spelling and Style tab. |
If you change your mind about a change you have made, you can reverse it by clicking the Undo button. The number of actions you can undo is set to 20, but you can change that number by clicking Options on the Tools menu, clicking the Edit tab, and changing the Maximum number of undos option. If you undo an action in error, you can click the Redo button to restore the action. You can undo or redo actions only in the order in which you performed them ”that is, you cannot reverse your fourth previous action without first reversing the three actions that followed it. To undo a number of actions at the same time, you can click the down arrow to the right of the Undo button and then click the earliest action you want to undo in the drop-down list.
In this exercise, you will edit text on the Outline tab of the Outline/Slides pane, and undo and redo actions that you recently performed.
USE the EditText presentation in the practice file folder for this topic. This practice file is located in the My Documents\Microsoft Press\PowerPoint 2003 SBS\WorkingOutline\Editing folder and can also be accessed by clicking Start/All Programs/Microsoft Press/PowerPoint 2003 Step by Step .
OPEN the EditText presentation.
-
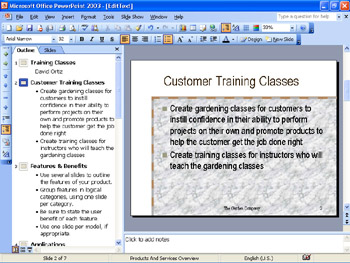
On the Outline tab of the Outline/Slides pane, double-click the word Overview in Slide 2 to select the title.
-
Type Customer Training Classes .
Notice that what you type replaces the selection. Notice also that the text changes in the Slide pane. (If you make a mistake while typing, press [BACKSPACE] to delete the error and then type the correction.)
-
On the Outline tab, position the pointer on or slightly to the left of the first bullet on Slide 2, and when the pointer changes to a four-headed arrow, click once to select the entire bullet point.
-
Type Create gardening classes for customers to instill confidence in their ability to perform projects on their own and promote products to help the customer get the job done right (no period).
-
Click the second bullet on Slide 2, and type Create training classes for instructors who will teach the gardening classes (again, no period).
-
On the Standard toolbar, click the Undo button to reverse your last action.
-
On the Standard toolbar, click the down arrow to the right of the Undo button.
The Undo list appears, displaying the first two items as Typing .
-
Click the second Typing item in the list.
The first bullet and title in Slide 2 reverts to the original text, which was created by the AutoContent Wizard.
-
On the Standard toolbar, click the Redo button to restore the title text in Slide 2.
-
On the Standard toolbar, click the down arrow to the right of the Redo button, and then click the second Typing item in the list to restore the bullet points.
-
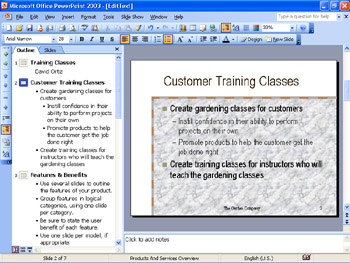
In the first bullet point on Slide 2, click at the right end of the word customers , and press [Enter].
Word breaks the bullet point into two.
-
Press the [TAB] key to demote the new bullet point to a sub-point. Then delete to , and change instill to Instill .
-
Click at the right end of the word own , press [Enter], delete and , and change promote to Promote .
Slide 2 now has two bullet points, one with two sub-points.
-
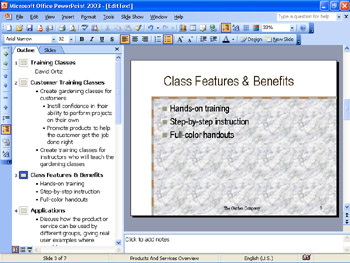
Click Slide 3 s title, press [Home] to move the insertion point to the beginning of the text, type Class , and then press [Space].
-
In Slide 3, click the bullet to the left of the first bullet point, and type Hands-on training (no period).
-
Click the second bullet, type Step-by-step instruction , and then press [Enter].
A new bullet appears. It will be gray until you add text.
-
Type Full- color handouts .
-
Click the next bullet to select the text of the bullet point, and press the [DEL] key.
The bullet point is deleted.
-
Repeat the last step to delete the last bullet point, and then press [BACKSPACE] twice to remove the gray bullet.
-
Click Slide 4 s icon, and then press [DEL].
The entire Applications slide is deleted. PowerPoint renumbers the slides, and the Specifications slide is now Slide 4.
-
On the Edit menu, click Delete Slide to delete the Specifications slide.
-
Right-click the new Slide 4, and click Delete Slide from the shortcut menu.
-
Repeat the previous step to delete Slide 4 again.
The presentation now contains only three slides.
-
On the Standard toolbar, click the Save button to save the presentation.
CLOSE the EditText presentation.
EAN: N/A
Pages: 145