Creating New Documents
In this topic, we will begin working on the sample business letter so that you can see how to enter text. Then we ll show you techniques for moving around the screen and selecting text so that you ll be ready to give Word some instructions in the next section.
Entering Text
Let s start by writing a paragraph. The blinking insertion point indicates where the next character you type will appear on the screen. Follow these steps to enter some text:
-
Type the following text:
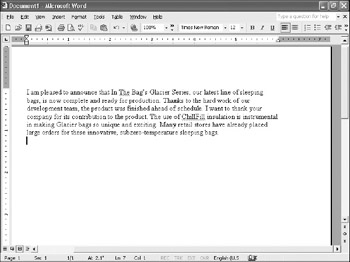
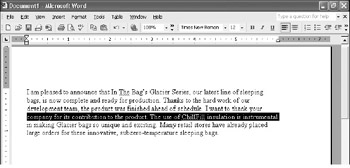
I am pleased to announce that In The Bag s Glacier Series, our latest line of sleeping bags, is now complete and ready for production. Thanks to the hard work of our development team, the product was finished ahead of schedule. I want to thank your company for its contribution to the product. The use of ChillFill insulation is instrumental in making Glacier bags so unique and exciting. Many retail stores have already placed large orders for these innovative, subzero-temperature sleeping bags.

Other ways to start Word There are several ways to start Word besides clicking it on the All Programs menu. You can create a shortcut for Word on your desktop by right-clicking an open area of the desktop, and clicking New and then Shortcut on the shortcut menu. In the Create Shortcut dialog box, click the Browse button, navigate to the C:\Program Files\Microsoft Office\Office10 folder, click Winword, and then click OK. Click Next, type a name for the shortcut icon, and then click Finish.
For maximum efficiency, you can start Word and open a recently accessed document by clicking the document on the My Recent Documents submenu of the Start menu, where Windows XP stores links to up to 15 of your most recently opened files. You can also click Open Office Document at the top of the All Programs menu (or Start menu if you are running Windows 2000) and navigate to the folder in which the document you want to open is stored. To start Word and open a new document, you can click New Office Document at the top of the All Programs menu and then double-click the Blank Document icon.
As each line of text reaches the right edge of the screen, the next word you type moves to a new line. This is called word wrapping . When entering text in Word, you don t have to press the Enter key to end one line and start another; Word takes care of that chore for you, filling each line with as many words as will fit. (As you follow our examples, don t worry if your word wrapping isn t identical to ours.)
-
Press Enter to end the paragraph.
Your document should look like this:
Information about: Spelling and grammar alerts, page 65
Moving Around in a Document
With a little text on the screen, you now have something to work with. But first let s cover some navigation basics. You need to know how to move around in a document for two reasons: so that you can view a document that is too long to fit on the screen, and so that you can edit text.
The document window is often not big enough to display all of the document s contents. To bring out-of-sight information into view, use the vertical and horizontal scroll bars . Clicking the arrow at the end of a scroll bar moves the window s contents a small distance in the direction of the arrow. Clicking on either side of a scroll box moves the contents one windowful. The position of the scroll box in relation to the scroll bar indicates the position of the window in relation to its contents. Drag the scroll box to see specific parts of a document ”for example, the middle or end. (As you move the vertical scroll box in a multi- page document, Word displays the corresponding page number in a pop-up box next to the scroll bar.)
| |
Word automatically corrects some simple typos, such as teh (the) and adn (and). If you misspell a less common word ”or if you use proper nouns or other correct but obscure spellings ”Word points out the mistake with a red, wavy underline. If Word thinks you ve made a grammatical mistake, it uses a green, wavy underline. We show you some editing techniques later in this chapter, but in the meantime, if you make a mistake and want to correct it, press the Backspace key until you ve deleted the error, and then retype the text.
| |
When it comes to editing, the insertion point is where the action is. You can click anywhere in the text on the screen to move the insertion point to that location, or you can move the insertion point with the navigation keys, like this:
| To move the insertion point... | Press... |
|---|---|
| One character left or right | Left Arrow or Right Arrow |
| One word left or right | Ctrl+Left Arrow or Ctrl+Right Arrow |
| One line up or down | Up Arrow or Down Arrow |
| One paragraph up or down | Ctrl+Up Arrow or Ctrl+Down Arrow |
| One screenful up or down | PageUp or PageDown |
| To the left or right end of the current line | Home or End |
| To the first or last character in the document | Ctrl+Home or Ctrl+End |
| To the previous editing location | Shift+F5 |
In this course we indicate that two or more keys are to be pressed together by separating the key names with a plus sign. For example, press Ctrl+Home means hold down the Ctrl key while simultaneously pressing the Home key .
| |
By default, Word selects whole words. For example, if you start a selection in the middle of a word and drag beyond the last character, Word selects the entire word. If you drag to the first character of the next word, Word selects that word, and so on. You can tell Word to select only the characters you drag across by clicking Options on the Tools menu, clicking the Edit tab, deselecting the When selecting, automatically select entire word check box, and clicking OK.
| |
Selecting Text
Before you can do much with the paragraph now on your screen, we need to discuss how to select text. Knowing how to select text efficiently saves time because you can then edit or format all the selected text at once, instead of one letter or word at a time. Follow these steps to select some text blocks:
-
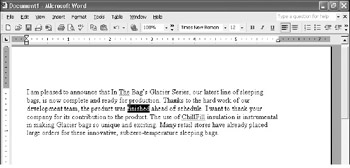
Point to the word finished , and then double-click it.
The word changes to white on black to indicate that it is selected (or highlighted ), as shown here:
-
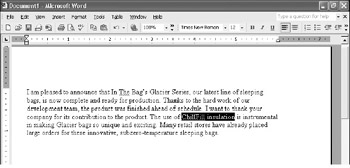
Point to the left of ChillFill , and click the left mouse button to position the insertion point at the beginning of the word. Next point to the right of insulation , hold down the Shift key, and click the left mouse button.
This action is called s hift-clicking . Word highlights the words between the two clicks, as shown in this graphic:
-
Point to the left of the word innovative , hold down the left mouse button, drag to the right until innovative, subzero- temperature sleeping bags is selected, and then release the mouse button.
Using this technique, you can easily highlight exactly as much or as little text as you need.
-
Click an insertion point to the left of the T in Thanks . Hold down the Shift key, press the Right Arrow key until the entire word is highlighted, and release the Shift key.
-
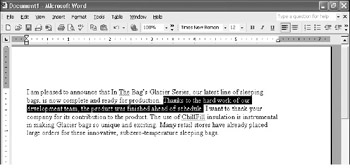
Without changing the selection, hold down the Shift key again, press the Down Arrow key, and then press the Left Arrow or Right Arrow key until the entire sentence is highlighted.
Selecting multiple individual text items To select more than one text item, select the first text item, and, holding down the Ctrl key, select the next and subsequent items. When multiple characters, words, or paragraphs are selected, you can apply character or paragraph formatting to them as a group . If you want to apply the same type of formatting to multiple characters, words, or paragraphs but can t select them as a block because other characters are in the way, select the first word or paragraph in the usual way (for example, by dragging or double-clicking), then hold down the Ctrl key and select the next item, and so on. When all the characters, words, or paragraphs you want to format in a similar manner are selected, apply the formatting as usual.
The text now looks like this:
-
Try pressing different Arrow keys while holding down the Shift key.
As long as you hold down the Shift key, Word extends the selection in the direction of the key s arrow.
-
Release the Shift key, and then press Home .
The insertion point moves to the beginning of the line where the selection started. Moving the insertion point anywhere in the text releases the selection.
-
Move the mouse pointer to the left edge of the document.
When the pointer changes from an I-beam to an arrow, it is in an invisible vertical strip called the selection bar .
-
In the selection bar, point to the line containing ChillFill , and click the primary mouse button.
Word highlights the line, like this:
-
Highlight the entire paragraph by double-clicking in the selection bar next to the paragraph.
| |
You can drag the pointer in the selection bar to select multiple lines or paragraphs. You can select all of the paragraphs in a document by triple-clicking in the selection bar.
| |
EAN: N/A
Pages: 74