Storing and Retrieving Often-Used Text
Storing and Retrieving Often-Used Text
To help you enter often-used text efficiently , accurately, and consistently, Word has two special features ”AutoText and AutoCorrect. At first glance, these two features seem almost identical; they both enable you to store text or a graphic with a name and then insert the text or graphic in any document at any time simply by typing the name . An AutoText or Auto- Correct entry can be as short as a single text character or as long as several pages of text or several graphics. Unlike the contents of the Office Clipboard, AutoText and AutoCorrect entries are saved from one Word session to the next .
So what s the difference between them? To insert an AutoText entry, you type the entry s name and then press the F3 key. To insert an AutoCorrect entry, you simply type the name: The instant you type a punctuation mark or press the Spacebar, Word automatically replaces the name with its entry.
How do you decide which to use? Here s an example. Suppose you own a landscaping business. You know you d save a lot of time and effort if you could type aspen instead of having to type and italicize Populus tremuloides (the botanical name for the aspen tree) every time you include this tree in an inventory list for your wholesale customers. But when you communicate with your clients , you want to be able to refer to the aspen tree by its common name rather than its botanical name. This entry is a prime candidate for AutoText, because you can control when Word replaces the name aspen with the entry Populus tremuloides and when it stays plain old aspen . If you use AutoCorrect instead, Word will always replace the name aspen with Populus tremuloides . In this section, we ll take a look at both features.
Storing an AutoText Entry
You can use Word s AutoText feature to store text or a graphic so that you can later retrieve it by typing its name and pressing the F3 key. For this example, you ll type a word and then turn it into an AutoText entry. Follow these steps to lay the foundation for the FAQ and then create an AutoText entry:
-
Start Word by clicking the Start button and then clicking All Programs and Microsoft Word .
Word starts and displays a new, blank document.

FAQ contents When creating an FAQ for an organization, you need to consider what common questions a member or customer might have about your product or service. The answers to these questions should give the potential member or customer enough information that they can decide whether they are interested in your organization.
-
If necessary, give yourself a bit more room to work by clicking Ruler on the View menu to turn off the rulers, and by clicking the task pane s Close button.
-
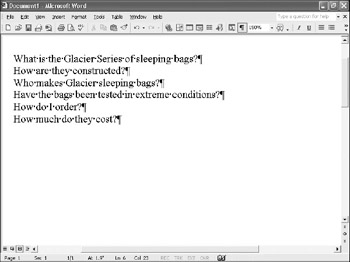
Type What is the Glacier Series of sleeping bags? and press Enter .
Word enters the heading, inserts a paragraph mark, and moves the insertion point to the next line.
-
Type How are they constructed ? and press Enter .
-
Enter the remaining headings, as follows :
Who makes Glacier sleeping bags? (Press Enter.) Have the bags been tested in extreme conditions? (Press Enter.)
How do I order? (Press Enter.)How much do they cost? (Press Enter.)
Your document should now look like this (we ve magnified and scrolled the document to make it easier to read):
-
Save the document by clicking the Save button on the Standard toolbar, specifying Frequently Asked Questions as the name of the file, and clicking Save .
-
Click an insertion point between the question mark and the paragraph mark at the end of the What is the Glacier Series of sleeping bags? heading, press Enter , and then type the text on the following page.
The Glacier Series was created for use in extreme weather conditions. Glacier sleeping bags are ideal for temperatures ranging from 20 degrees Fahrenheit to -30 degrees Fahrenheit. Constructed with quality, rugged materials, Glacier bags meet the needs of the avid hiker or climber.
You ve typed Glacier three times in this paragraph. You can save keystrokes and ensure that the word is always entered correctly by turning it into an AutoText entry.
-
Right-click a toolbar, and click AutoText on the shortcut menu to display the AutoText toolbar.
Information about: Shortcut menus , page 19
-
Double-click any instance of Glacier in the sentence you just typed, and on the AutoText toolbar, click the New button.
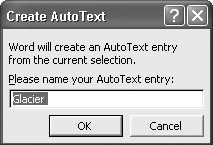
Word displays the dialog box shown in this graphic:
-
In the Please name your AutoText entry text box, type g , and click OK .
Inserting an AutoText Entry
Now let s use the entry you ve just created as you write a few more paragraphs for the FAQ. Follow these steps:
-
Click an insertion point after the question mark in the How are they constructed? paragraph, and press Enter.
-
Type All models of g (don t press the Spacebar after g ), and then press F3 .
Word replaces g with the Glacier entry.
-
Continue typing the paragraph exactly as follows. Include the misspelling, and use the g -then- F3 combination to insert Glacier where indicated:
Formatted entries If you want an AutoText orAutoCorrect entry to retain its paragraph formatting (such as alignment and indents), include the paragraph mark when you select the entry. AutoText entries retain their character formatting, but if you want an AutoCorrect entry to retain its character formatting, you must be sure to select the Formatted text option on the AutoCorrect tab of theAutoCorrect dialog box when you create the entry.
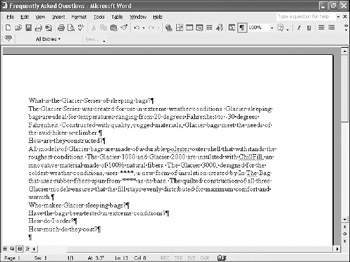
bags are made of a durable polester outer shell that withstands the roughest conditions. The g(press F3) 1000 and g(press F3) 2000 are insulated with ChillFill, an innovative material made of 100% natural fibers. The g (press F3) 3000, designed for the coldest weather conditions, uses ****, a new form of insulation created by In The Bag that uses rubber fibers spun from **** as its base. The quilted construction of all three g(press F3) models ensures that the fill stays evenly distributed for maximum comfort and warmth.
Be sure to mistype polester , so that you will have a mistake to correct later in the chapter. Also include the **** characters , which are placeholders for information you ll add later. When you ve finished, your document should look like the one shown in this graphic:
Viewing AutoText Entries
Suppose you forget the code for an AutoText entry. Does that mean you can t use the entry anymore? Not at all. Try this:
-
Click an insertion point at the end of the How much do they cost? heading, press Enter , and then type Prices for followed by a space.
Using AutoComplete When you start typing the date, a day of the week, a month, your name, your company name, or anAutoText entry, the AutoComplete feature displays a pop-up box containing the complete entry.If you want to insert that entry in your document, press Enter orF3. If you don t want to use it, just ignore it and keep typing.
-
On the AutoText toolbar, click the AutoText button.
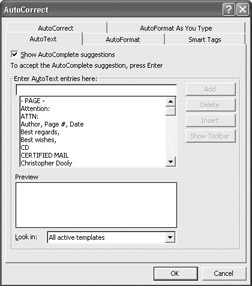
Word displays the AutoText tab of the AutoCorrect dialog box, as shown in this graphic:
-
Scroll the list of AutoText entries, select g , and look in the Preview box to see what the entry represents.
Information about: AutoComplete, page 45
The list includes several ready-made entries, including Auto- Complete entries. To insert the selected entry, you could simply click the Insert button. Instead, we ll show you another way to insert the entry.
Deleting entries To delete an AutoText entry, click the AutoText button on theAutoText toolbar, and on the Auto-Text tab of the AutoCorrect dialog box, select the entry you want to delete from the list, click Delete, and then click OK. To delete an AutoCorrect entry, click Auto-Correct Options on the Tools menu, and in the AutoCorrect dialog box, select the entry you want to delete from the list box, click Delete, and then click OK.
-
Click Cancel to close the dialog box.
-
On the AutoText toolbar, click the All Entries button.
Word displays a drop-down list of categories of entries. The default categories pertain to writing a letter.
-
Point to each category in turn to see its contents.
All user -defined entries are stored in the Normal category.
-
Click Normal , and then click g .
Word inserts the entry Glacier at the insertion point.
-
Finish typing the paragraph with this text:
bags range from $150 to $400. Bulk discounts are available. Customized bags cost slightly more.
-
Turn off the AutoText toolbar by right-clicking it and clicking AutoText on the shortcut menu.
Storing an AutoCorrect Entry
When you want Word to automatically replace a name with its entry, you can use the AutoCorrect feature. AutoCorrect names should be unique sequences of characters that you are not likely to use in a document. Follow these steps to get an idea of how this feature works:
-
1. In the paragraph that begins All models of , select In The Bag , and then on the Tools menu, click AutoCorrect Options .
Word displays the AutoCorrect tab of the AutoCorrect dialog box, as shown in this graphic:
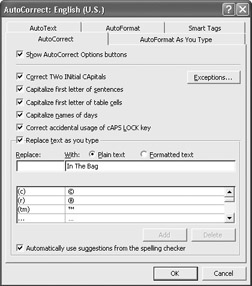
The selected text appears in the With text box. The box below contains a list of ready-made entries for symbols and commonly misspelled words, such as teh (the), which Word replaces each time you type them.
Bypassing AutoCorrect To turn off AutoCorrect, deselect the Replace text as you type check box on the AutoCorrect tab of the AutoCorrect dialog box. If you don t want to turn off Auto-Correct but you also don t wantAutoCorrect to replace a particular instance of a name with its entry, type the name, and afterAutoCorrect replaces it, click theUndo button.
-
In the Replace text box, type itb as the name of the entry, and click Add .
Word adds the name and the text it represents to the list.
-
Click OK to close the dialog box.
Inserting an AutoCorrect Entry
Now let s use your new AutoCorrect entry so that you can get a feel for what a time-saver AutoCorrect can be. Follow these steps:
-
Click an insertion point at the end of the Have the bags been tested in extreme conditions? heading, and press Enter .
-
Type the following:
itb tests their sleeping bags in their on-site labs and on actual expeditions. In the labs, test dummies are used in simulations of extreme weather conditions, including temperature, precipitation, and wind-chill factors.
As you type, AutoCorrect automatically changes itb to In The Bag .
-
Click an insertion point at the end of the How do I order? heading, and press Enter .
-
Type the following, being sure to misspell can as acn , which is one of Word s ready-made AutoCorrect entries:
You acn purchase g(press F3) bags in one of three ways: You can buy them at most outdoor equipment stores. You can order them directly from itb by calling us at (800) 555-0140 or by faxing us at (907) 555-0141. You can e-mail your order (or inquiries) to us at custserve@bag.tld.
AutoCorrect options In the AutoCorrect dialog box are several options that take care of common typing errors. Word can correct two initial capital letters in a word, correct sentences that don t begin with a capital letter, capitalize the first letter of an entry made in a table, capitalize the days of the week, and correct accidental usage of the Caps Lock key. You can turn any of these options on or off by selecting the corresponding check box. If you click the Exceptions button, you can tell Word not to capitalize the word immediately following an abbreviation (such as apt. for apartment). You can also tell Word not to correct two consecutive initial capital letters in certain instances or not to make other corrections. At the bottom of the dialog box, you can deselect the Automatically use suggestions from the spelling checker check box so that Word will not automatically correct your spelling if you are working with a document that uses unusually spelled words.
The results are shown in this graphic:

-
Save the document.
From now on, remember to save frequently in order to safeguard your work.
EAN: N/A
Pages: 74