Section 10.3. Fleshing Out the Application: The Client


10.3. Fleshing Out the Application: The Client

Now that the simple application is in place, we need to make it do something interesting. We know how to create a skeleton, and we have a sense of how to debug, but we're a long way from having a working ZipCodes application. We'll start by working on the client.

The source code for the rudimentary client that GWT built is in the src/com/oreilly/ajax/client/ZipCodes.java file. This file looks a lot like a Java GUI application. There's a listener, there's a button, you can set text on elements with a call to setText( ), and so on. It's not all that different from AWT or Swing.

The main points to note are that the ZipCodes class implements EntryPoint and overrides the onModuleLoad( ) method. The onModuleLoad( ) method configures the GUI widgets, and at the end of this method, the widgets are added to elements in the HTML page. The HTML file (Example 10-3) is located in the project's public subdirectory.

Example 10-3. ZipCodes.html

 <html> <head>     <title>Wrapper HTML for ZipCodes</title>     <!-- The module reference below is the link   -->     <!-- between HTML and your Web Toolkit module -->     <meta name='gwt:module' content='com.oreilly.ajax.ZipCodes'> </head> <body>     <script language="javascript" src="/books/4/163/1/html/2/gwt.js"></script>     <h1>ZipCodes</h1>     <p>         This is an example of a host page for the ZipCodes application.         You can attach a Web Toolkit module to any HTML page you like,         making it easy to add bits of AJAX functionality to existing pages         without starting from scratch.     </p>     <table align=center>         <tr>             <td ></td>             <td ></td>         </tr>     </table> </body> </html> 

The ZipCodes.html file contains a hook to the Web Toolkit module, which is defined by the <meta> tag. You'll also see that the JavaScript reference to gwt.js is in the document's body rather than inside the <head> tag, where you would normally expect it. That's supposed to make it faster to load.

Finally, note that the <td> elements in the table have ids of "slot1" and "slot2". These are the places where GWT puts the button and the label. If you look back at ZipCodes.java (Example 10-2), you'll see that "slot1" and "slot2" are used to identify elements in the root panel; the button and the label are added to these elements. The Java client uses these ids to access elements in the HTML page.

10.3.1. Customizing the Client

Now let's get started with the ZipCodes client. We only need three fields: zip code, city, and state. Those fields will be in a <div> with the id of "gridholder" (see Example 10-4).

Example 10-4. Modified ZipCodes.html

 <html xmlns="http://www.w3.org/1999/xhtml" xml:lang="en" lang="en"> <head>     <link rel="stylesheet" type="style/css" href="gwtpage.css" />     <title>Ajax response</title>     <meta name="gwt:module" content="com.oreilly.ajax.ZipCodes" />     <meta http-equiv="content-type" content= "text/html; charset=UTF-8" /> </head> <body>     <script language="javascript" src="/books/4/163/1/html/2/gwt.js"></script>     <h2>Ajax with the Google Web Toolkit. </h2>     <div ></div>     <div ></div> </body> </html> 

The status div is used to pass error messages and other information from the server, as you'll see shortly.

You might have thought that you wouldn't need to write any HTML with GWT. It's true that the ApplicationCreator generates a skeleton HTML file for you, but you do need to edit that HTML in order to create elements that GWT can manipulate. GWT creates the JavaScript to manipulate the elements but will not create the elements themselves.


Now let's modify the ZipCodes class to populate the HTML page (Example 10-5).

Example 10-5. ZipCodes updated with a grid and widgets

 package com.oreilly.ajax.client; import com.google.gwt.core.client.EntryPoint; import com.google.gwt.core.client.GWT; import com.google.gwt.user.client.DOM; import com.google.gwt.user.client.Element; import com.google.gwt.user.client.rpc.AsyncCallback; import com.google.gwt.user.client.rpc.ServiceDefTarget; import com.google.gwt.user.client.ui.FocusListener; import com.google.gwt.user.client.ui.Grid; import com.google.gwt.user.client.ui.Label; import com.google.gwt.user.client.ui.RootPanel; import com.google.gwt.user.client.ui.TextBox; import com.google.gwt.user.client.ui.Widget; /**  * Entry point classes define <code>onModuleLoad( )</code>.  */ public class ZipCodes implements EntryPoint {     private Label zipCodeLabel = new Label( );     private TextBox zipCodeBox = new TextBox( );     private Label stateLabel = new Label("State:");     private TextBox stateTextBox = new TextBox( );     private Label cityLabel = new Label("City:");     private TextBox cityTextBox = new TextBox( );     private Grid grid = new Grid(3, 2);     /**      * This is the entry point method.      */     public void onModuleLoad( ) {         zipCodeLabel.setText("Zip Code:");         zipCodeBox.setVisibleLength(5);         zipCodeBox.setMaxLength(5);         stateTextBox.setVisibleLength(2);         stateTextBox.setMaxLength(2);         cityTextBox.setMaxLength(40);         cityTextBox.setVisibleLength(40);         grid.setWidget(0, 0, zipCodeLabel);         grid.setWidget(0, 1, zipCodeBox);         grid.setWidget(1, 0, cityLabel);         grid.setWidget(1, 1, cityTextBox);         grid.setWidget(2, 0, stateLabel);         grid.setWidget(2, 1, stateTextBox);         zipCodeBox.addFocusListener(new FocusListener( ) {             public void onFocus(Widget sender) {             }             public void onLostFocus(Widget sender) {                 if (zipCodeBox.getText( ).equals("")) {                     cityTextBox.setText("??");                     stateTextBox.setText("??");                     displayFormattedMessage("Try a real code", "blue");                 }                 else {                     cityTextBox.setText("");                     stateTextBox.setText("");                     displayFormattedMessage("This application has no services",                                             "red");                 }             }         });         RootPanel.get("gridholder").add(grid);     }     private void displayFormattedMessage(String message, String color) {         Element el = DOM.getElementById("status");         if (el != null) {             DOM.setStyleAttribute(el, "color", color);             DOM.setStyleAttribute(el, "font-family", "ariel, san-serif");             DOM.setInnerHTML(el, message);         }     } } 

The ZipCodes class now looks like a GUI application. It has widgets and a grid, and the widgets have methods like setText( ) and listeners like the FocusListener. GWT will translate these widgets into JavaScript, but you really don't need to worry about that while developing your code. Just treat the client like a Java GUI application.

The ZipCodes class defines widgets at the beginning of the class; for this application, TextBox and Label widgets are used within a Grid layout. The widgets are configured in the onModuleLoaded( ) method: the visible length of the text fields is set with setVisibleLength( ), the maximum length of the fields is set with setMaxLength( ), and the widgets are formatted in a grid with grid.setWidget( ).

The Grid object is initialized as a three-row, two-column array of widgets:

 private Grid grid = new Grid(3, 2); 

The DOM library that GWT supplies is used to format a message that can be sent to the client. Look at the displayFormattedMessage( ) method. The DOM object can be used to retrieve elements from the client and set styles on the elements (for example, setting the color). Those style attributes match the styles that can be set with stylesheets. Look at a good CSS reference to see the different styles that can be set on an element.

To display the message, call setInnerHTML( ). If you are familiar with dynamically changing HTML text with JavaScript, you will recognize this call. It is very similar to setting the innerHTML parameter with JavaScript.

At this point, you can run this application in hosted mode (Figure 10-10). Try entering a zip code and then pressing the Tab key to move to the next field.

Figure 10-10. ZipCodes application client


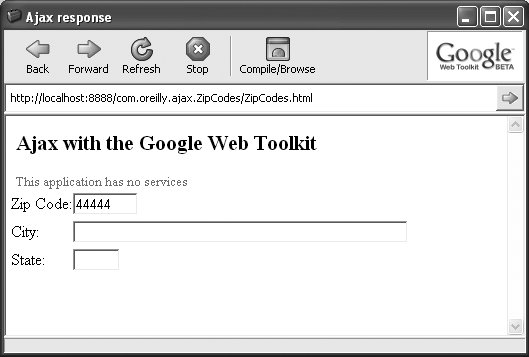
The application has no services yet, so a message is sent to the client to inform the user that the services are not yet available. The next section shows how to make a service available to the client.


Ajax on Java
Ajax on Java
ISBN: 0596101872
EAN: 2147483647
Year: 2007
Pages: 78

flylib.com © 2008-2017.
If you may any questions please contact us: flylib@qtcs.net