Using the Connection Manager Administrators Kit
| < Day Day Up > |
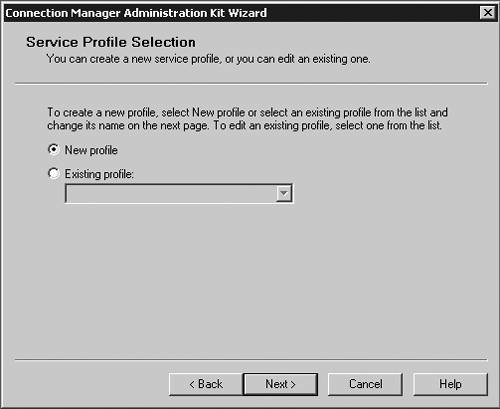
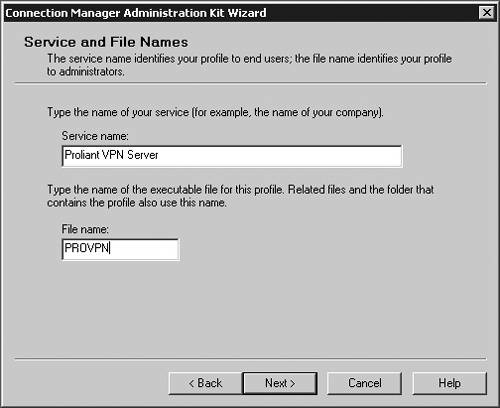
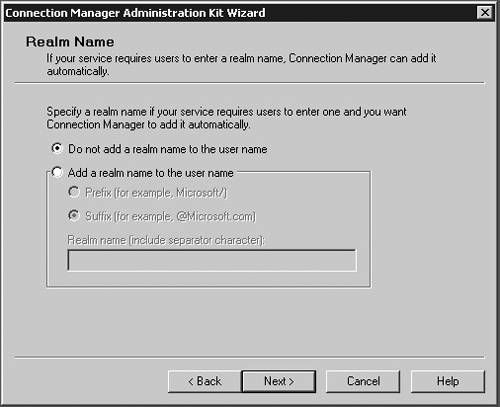
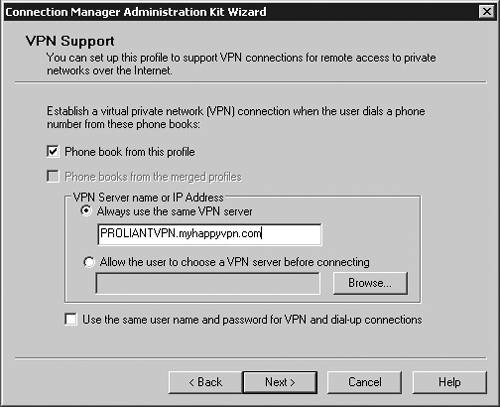
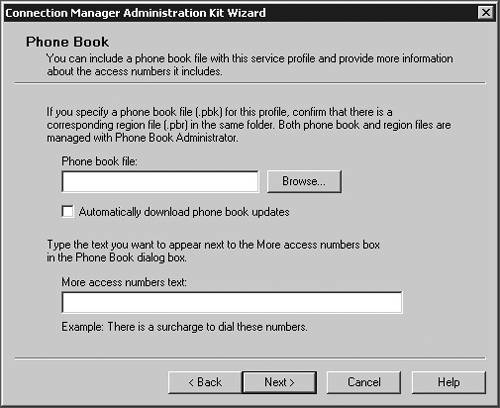
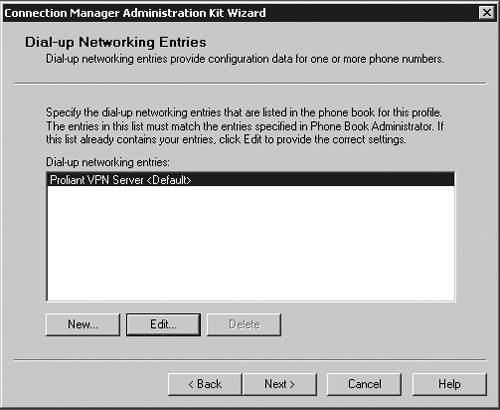
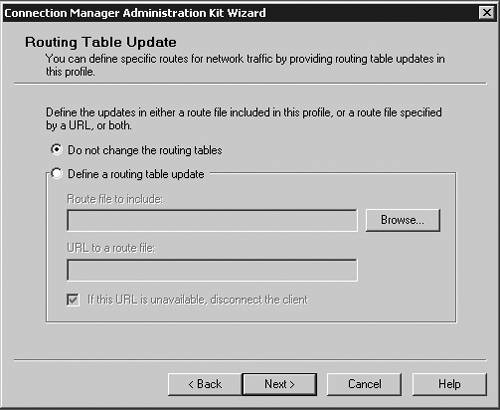
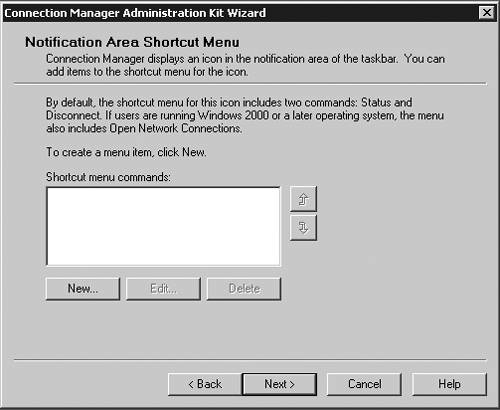
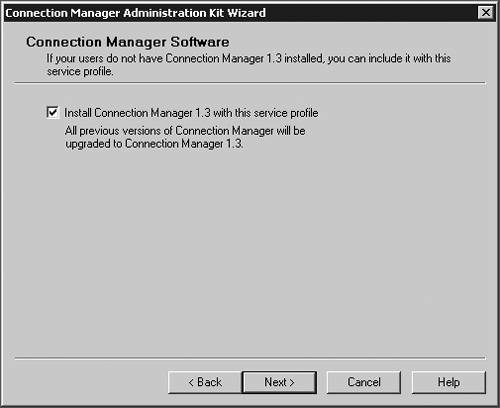
| Microsoft has included a powerful client configuration tool with Windows Server 2003 that delivers an easy-to-use client to the users. The Connection Manager kit has tremendous capabilities. This section reviews the basics of making a kit for the VPN server, but for more complicated environments, the Connection Manager kit can continue to be built upon. To get started, you need to go the Add/Remove Programs on a default Windows Server 2003 server and add the Connection Manager Administration Kit (CMAK) shown in Figure 14.23. Figure 14.23. Install the Connection Manager Administration Kit from Add/Remove Programs ”then select the Configure Windows components option to get to this dialog box.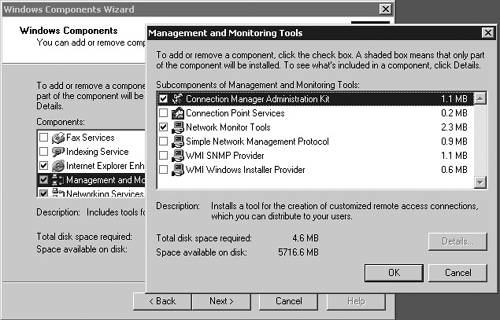 Once installed, you can start the Connection Manager Kit Creation Wizard. In the first dialog box in the wizard, select the New Profile option, as shown in Figure 14.24. Figure 14.24. The first step in the Connection Manager Wizard is to select the New Profile option. In the Service and File Names dialog box, name the service profile. The file name must be eight characters or less. In Figure 14.25, we have selected the name of PROVPN. Figure 14.25. Provide a service name of eight characters or fewer in the Service and File Names dialog box. You can include the domain as default for the logon of the VPN client. For our example, we are going to use the default, as shown in Figure 14.26. After you build a collection of Connection Manager profiles, you can merge the kits together if you need to. Because this is our first kit, we don't have any to merge. Select Next . Figure 14.26. In the Realm Name dialog box, choose the default to permit domain logon. You now can put in the VPN server you want to connect to, as shown in Figure 14.27, using the VPN Support dialog box. Windows Server 2003 gives you the ability to create a connection object for one VPN server or provide a list for a drop-down box within the Connection Manager object on the client. Figure 14.27. In the VPN Support dialog box, specify the name of the VPN server. The CMAK allows for granular settings with the VPN logon parameters. For our example, we are going to allow username/password logons and allow PPTP with MS-ChapV2, as shown in Figure 14.28. In this section, you can mandate the type of protocol the tunnel should use, the type of Windows client you will support, and the authentication process. Figure 14.28. Specify granular logon parameters for client authentication.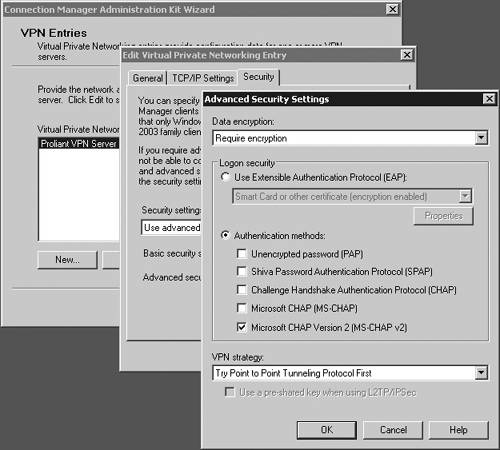 The Connection Manager profile can download a phone book of numbers , either for private phone modem banks or to connect to the Internet. The Connection Manager allows for an update process that will guarantee that the client will have an up-to-date phone book by an automated install. For this profile, we are going to assume the client is already on the Internet. In the Address Book dialog box, illustrated in Figure 14.29, do not specify any address book values. Figure 14.29. In the Address Book dialog box, you can specify an address book file or leave it blank if you want to use the Internet. You can define the dial-up parameters for the Internet. In this case, you're not defining anything specific to link to the Internet, so leave the defaults in the kit, as shown in Figure 14.30. Figure 14.30. The VPN server is the default for the dial-up networking server. In the Connection Manager kit, you can allow for split-tunnel routing in a controlled fashion by defining either a route to download from a Web service or from within the kit. This is a simple text file that lists all the internal routes in a specific format. When the client has the list of internal subnets, it can continue to use the link to the Internet as its default gateway, but still route any internal bound traffic to the VPN. This is accomplished in the Routing Table Update dialog box shown in Figure 14.31. If you choose to do this, your client's performance will tend to be much faster, but to ensure corporate network security, you should mandate security patches, service packs , and a personal firewall. Figure 14.31. Define routes for split tunneling in the Routing Table Update dialog box. If you configure the Connection Manager without split-tunnel routing, all traffic will be routed to the VPN connection, and you will probably need to have a proxy defined for the clients because the traffic bound to the Internet will have to go through the corporate network. The kit also enables you to define a proxy for the duration of the connection and then remove the configuration after the tunnel is terminated . This is accomplished via the Automatic Proxy Configuration dialog box shown in Figure 14.32. Figure 14.32. Configure the proxy if a split tunnel is not used. If your organization requires additional functionality or capabilities on the client at certain stages of the connection process, they can be added within the Custom Actions dialog box, shown in Figure 14.33. We don't require any custom actions in our basic test kit. Figure 14.33. The Custom Actions dialog box is used to define additional functionality. The next three screens allow for graphic customizations, which we are leaving as default for our kit. The CMAK allows your organization to brand the kit for the environment. The Connection Manager can include custom menu items such as defining menu shortcuts in the Notification Area of the screen, as shown in Figure 14.34. Note that the Notification Area was previously called the System Tray. This allows for a unified and well-integrated way of adding functionality. For our test kit, we do not need any menu items for a basic connection. Figure 14.34. The Notification Area Shortcut Menu allows you to configure a shortcut in the Notification Area (formerly called the System Tray in previous versions of Windows). If your organization requires a customized help file that can have company-specific data, it can be included in the Connection Manager kit, in the Help File dialog box shown in Figure 14.35. The default kit includes the basic help documents, which cover standard connection items. Figure 14.35. The Connection Manager kit permits defining custom help files to be used for the clients that contain company-specific information. The help file typically includes support information such as the phone number for the help desk. Figure 14.36 shows the Connection Manager Software dialog box. Typically it is a good idea to install the Connection Manager software on the client as part of the kit, which can be accomplished by checking the box shown in the figure. Figure 14.36. The Connection Manager Software dialog box allows you to install Connection Manager 1.3 if it isn't already installed. Next, the CMAK allows the Administrator to include a corporate license agreement to be displayed at the time of installation. That allows you to add any additional files you might want to deliver as part of the whole kit. If you have any additional customizations that are not part of the standard wizard, you need to check the Advanced Customizations box and apply them there. For a complete guide of what they are and how they should be used, select the Help button and review the complete listing under Advanced Customization. For our test kit, we can just use the default. As you can see, it's quite simple to build a standard Connection Manager kit for easy deployment to remote clients. The strength of the CMAK is the ability to easily make a kit, yet be able to support complex environments with additional customizations.
HP and Compaq Employee Remote SolutionsFirst, we performed a complete inventory of the remote connectivity offerings each company had in production. We not only found completely different VPN products offered by Compaq and HP, but also a completely different way of treating the service offering. HP treated the VPN solution as a network service, and Compaq treated the VPN solution as part of the infrastructure services. On the surface, this seemed to be a minor difference, yet we found it caused dramatic differences in surprising ways. Let's see what products and services each company offered its employees and then examine how we handled providing common VPN services to employees. HP's VPN ServiceHP had deployed a Nortel server solution that had been configured to mandate the Nortel client software to be loaded on all VPN client systems. This environment used the Nortel implementation of IPSec tunnel-mode and did not support NAT-T. The service was provided with a great amount of management and included an outsourced team, which would work directly with the employee to configure all aspects of the remote environment ”from the configuration of the client to the contract with the ISP. The clients were configured in a single-node -routing environment, meaning they could not directly communicate to any node without traversing the VPN. The clients supported were Win9x-XP, Linux, and PPC (with the Movian client), HP-UX, and some Nortel hardware clients. Perhaps the most significant difference between HP and Compaq was how each handled the accounts for remote access. Here, we will describe HP's method, whereas the following section details how Compaq handled remote access prior to the merger. The accounts were maintained in a completely separate infrastructure that was used almost exclusively for remote access. When an employee wanted remote access, he had to submit a request and have his manager approve it before he would be issued an ActivCard (One-Time-Passcode). In addition to the creation of the ActivCard account, the user was also given an account with a global ISP. The account with the ISP was another separate user database with specific accounts for the link to the Internet. Because this is a global ISP, HP was able to dramatically cut back on the number of private POPs it had to continue to maintain. Compaq's VPN ServiceCompaq chose to use its own ProLiant hardware running Windows Server 2003 to support the remote access clients. The servers supported PPTP, straight IPSec, and NAT-T IPSec. The servers were hardened by using a specific installation routine specific for VPN servers and ran a minimal set of services. Also the servers were managed by the infrastructure support teams . The VPN servers all pointed to Windows IAS/RADIUS servers. These servers then forwarded any authentication requests to the AD. Compaq's view of remote connectivity was based on the theory that it didn't matter how you got to the network, but only if you had a valid account. All employees have the ability to use remote services as long as their accounts are valid. Compaq was somewhat lax in the security requirements, tending toward flexibility instead of security. All employees were able to use their username/password to gain access to the network. Compaq supported Win9x through 2003, Mac, Linux, hardware devices, and anything else that could do MS-Chapv2. There was no mandated client required, but Microsoft provided a Connection Manager client, which created a full split-tunnel routing environment for Windows clients. Compaq did not have a unified ISP solution for the client and instead supplied only the information needed on how to connect. It was then left up to the users and/or divisional groups to select an ISP solution, configure the client, and perform basic troubleshooting if needed. Merging the HP and Compaq ServicesWe found it challenging just trying to compare the two solutions because of their radically different approaches. We decided the best thing to do was to review the costs and capabilities of each within the scope of how the two could be used to fill any gaps the premerger companies were struggling with. The Total Cost of Ownership (TCO) analysis provided us several obvious conclusions we could build upon:
In addition to the cost of the remote access solution, we also wanted to treat the merger as a way to fix some of the gaps in the remote access solution. With the facts we had, we were able to make a plan:
After the initial work was completed, we then started working on the next phase of the project, which introduced the concept of a Quarantine network. The Quarantine network causes the client to perform certain tasks as part of the logon session to show that it should be allowed full corporate access. These tasks can be anything from proving that it is running the correct version of the Connection Manager to running certain security patches. We are treating the Quarantine network as the most important next step for the remote access client at HP. ProLiant Specifications for VPN ServersHP uses ProLiant Servers for its VPN deployment worldwide. One objective of this book is to help you determine sizing of your ProLiant for various applications. HP's remote access environment serves about 2,500 connections all day, every day, varying from 56K to 54Mb connection speeds. Right now, the physical network is the bottleneck for the connections. When HP hits a connection limit at a site, we simply add another VPN server to the group . The ProLiant specification for HP's remote access servers is as follows :
note This board has been replaced by the RILOII card and allows remote access to the server thru a separate power supply, Ethernet port, and so on, as described in the section titled "Deployment Methods and Installation Requirements" in Chapter 8, "ProLiant Management Tools." Of course, your mileage will vary, depending on the size of the remote user community you support. This should give you some place to start in sizing a ProLiant VPN server. |


| < Day Day Up > |
EAN: N/A
Pages: 214