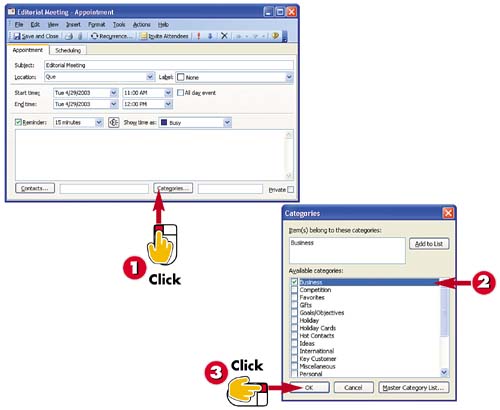
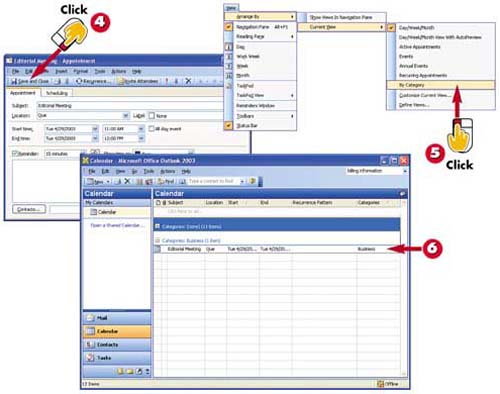
With the appointment displayed, click the Categories button in the Appointment window.
The Categories dialog box opens, displaying a list of available categories. Mark the check box next to any categories you want to assign to the appointment.
Click OK .
INTRODUCTION
To organize your appointments, you can assign each one a category (such as personal or business) . You can then view all appointments by category. Doing so can help you distinguish the various types of items in your schedule.
The category is listed with the appointment details. Click the Save and Close button.
To view your appointments by category, open the View menu, choose Arrange By , select Current View , and then click By Category .
Outlook displays a list of your appointments, arranged by category.
TIP
Expanding and Collapsing the List
You can display more (or less) information for the selected appointments for each category. Click the plus sign ( + ) next to a category to expand the item and display all appointments. Click the minus sign ( “ ) to hide the appointments.
TIP
No Category?
If you have not assigned categories to other appointments, they are all grouped together in the Category view.