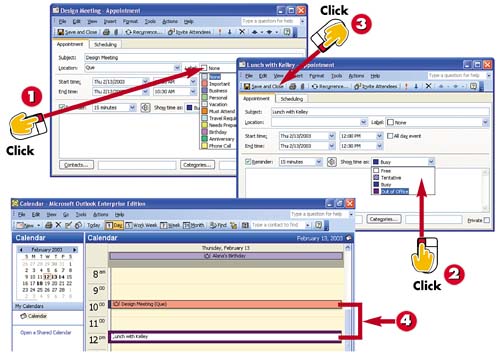
With the appointment displayed, click the down-arrow button next to the Label field and select a label from the list that appears.
To change how the time for the appointment appears, click the down-arrow next to the Show Time As field and select an option.
Click the Save and Close button in the Appointment window.
Color-coded labeled events help you see at a glance the event type; time-coded events are indicated with a border.
INTRODUCTION
You have several options for coding your scheduled appointments. First, you can label an event. You have several options ranging from importance to personal to event type (birthday, for example). Second, you can select how the time is displayed in your calendar; you can choose Free, Tentative, Busy, or Out of Office.
TIP
Editing Label
To change the label for an event, select the event, open the Edit menu and choose Label , and select the label you want to apply.
TIP
Using Other Options
You can also mark an appointment as high or low importance using the Importance: High or Importance: Low buttons in the Appointment window. To mark an appointment as private, check the Private check box.