Importing the Shader into Your Engine
To get the shader you just wrote into your graphic engine you basically do the same thing FX Composer does to display the shader. Thanks to DirectX or XNA it is easy to load a shader effect file and set all required parameters (you already did that in the last chapter for the line rendering shader). In the next chapter you are going to use a more general class that accepts many different shaders and uses a more optimized way to set all required shader parameters, but for this chapter you just want to get the SimpleShader.fx file to work in your engine.
As usual you start by defining the unit test. Create a new file called SimpleShader.cs in the Shaders namespace and write the following code:
#region Unit Testing public static void TestSimpleShader() { SimpleShader shader = null; Model testModel = null; Texture testTexture = null; TestGame.Start("Test SimpleShader.fx", delegate { shader = new SimpleShader(); testModel = new Model("Apple"); testTexture = new Texture("Marble"); }, delegate { // Render model shader.RenderModel(testModel.XnaModel, testTexture); }); } // TestSimpleShader #endregion The unit test should compile except for the RenderModel method of the new SimpleShader class, which has not been defined. Let’s quickly define that method:
public void RenderModel(XnaModel someModel, Texture texture) { } // RenderModel(someModel, texture) The unit test compiles now and you can start it just to see a blank screen.
Compiling Shaders
To get anything useful on the screen for your little unit test, you have to load and compile the shader first. To do that you use the content pipeline of XNA as you did for models and textures before. Just drop the .fx file into your project (put it into the content directory together with the rest of the textures and models) and it will get compiled automatically when the project is built. You will even get a shader compilation error in case the shader does not compile. This way you don’t have to start your game and then have to track down an exception thrown by the shader compiler at runtime; you can already make sure the shader is correct before the game is run. While you are at it, make sure the marble.dds texture is also in the content directory and gets compiled by XNA; you use this texture in your unit test.
Loading the compiled effect is as simple as loading a texture. Just define an effect variable and then load it in the SimpleShader constructor:
#region Variables Effect effect = null; #endregion #region Constructor public SimpleShader() { effect = BaseGame.Content.Load<Effect>( Path.Combine(Directories.ContentDirectory, "SimpleShader")); } // SimpleShader() #endregion If you are on the Windows platform you can also dynamically load shaders (not precompiled already by the XNA Framework), which can be useful to test and change shaders while your game is running. I usually use un-compiled shader files for most of the shader development time and then I put them into the content pipeline when the game is done or I don’t want to change the shaders anymore. The following code is used to compile and load shaders yourself.
Please note that these classes and methods are only available on the Windows platform. Use #if !XBOX360 #endif around these lines if you want the code to get compiled on the Xbox 360 (where dynamically reloading shaders is not supported and does not make so much sense anyway):
CompiledEffect compiledEffect = Effect.CompileEffectFromFile( Path.Combine("Shaders", shaderContentName + ".fx"), null, null, CompilerOptions.None, TargetPlatform.Windows); effect = new Effect(BaseGame.Device, compiledEffect.GetEffectCode(), CompilerOptions.None, null);
Using Parameters
As you learned in the process of creating your shader, the world, view, and projection matrices are really important to transform your 3D data and get everything correctly on the screen. To set all these shader parameters you just use the RenderModel method, which is called by your unit test:
BaseGame.WorldMatrix = Matrix.CreateScale(0.25f, 0.25f, 0.25f); effect.Parameters["worldViewProj"].SetValue( BaseGame.WorldMatrix * BaseGame.ViewMatrix * BaseGame.ProjectionMatrix); effect.Parameters["world"].SetValue( BaseGame.WorldMatrix); effect.Parameters["viewInverse"].SetValue( BaseGame.InverseViewMatrix); effect.Parameters["lightDir"].SetValue( BaseGame.LightDirection); effect.Parameters["diffuseTexture"].SetValue( texture.XnaTexture); The first thing that happens in this code is setting the world matrix. This is very important because if the world matrix is not set and maybe has some crazy values from any previous operation, the 3D model is rendered at some random location you don’t want it to be. Because your apple model is pretty big, you scale it down a little to fit on the screen with your default SimpleCamera class from the last chapter.
Then the worldViewProj matrix is calculated and you also set all the other matrices, the lightDir value, and even the diffuseTexture, which is important because by just loading the shader effect none of the textures are loaded automatically like in FX Composer; you still have to set these values yourself. If you load Models from the XNA content pipeline, XNA does help you out a little and will automatically load all used textures from the Model data. In your case you just set the texture you have loaded in the unit test to display the marble.dds texture like in FX Composer.
Vertex Formats
Before you can render the data used in your 3D apple model you have to make sure that your application and the shader know which vertex format to use. In DirectX it was possible to just set one of the predefined fixed function vertex formats, but these formats do not exist anymore and you can’t just set them. Instead you have to define the full vertex declaration in a similar way as you did in the shader for the VertexInput structure. Because you are just using the built-in VertexPositionNormalTexture structure you don’t have to define everything yourself, but in the next chapter you will learn how to do that with your custom TangentVertex format.
// Use the VertexPositionNormalTexture vertex format in SimpleShader.fx BaseGame.Device.VertexDeclaration = new VertexDeclaration(BaseGame.Device, VertexPositionNormalTexture.VertexElements); You don’t really have to create a new vertex declaration every time you call RenderModel, but just to keep things simple you build a new vertex declaration every call. It takes the graphics device as the first parameter and the vertex elements array from the XNA VertexPositionNormalTexture structure as the second parameter. For more information refer to Chapter 7.
Rendering with Shaders
To render the apple with your shader now you first specify the technique you want to use (which is by default set to the first technique anyway, but it is good to know how to set techniques). For rendering a shader you will always use the CurrentTechnique property of the effect class. Then you go through the technique the same way FX Composer does - you draw all 3D data for every pass you have in the technique (as I said before usually you just have one pass). Rendering the apple itself is not that easy because the only method XNA gives you to render it is to call mesh.Draw for every mesh that is in the model after setting the required shader parameters first like you saw in the last chapter when you wrote the Model class.
Another thing missing from the XNA Framework are the mesh helper methods to create boxes, spheres, or teapots. You will also notice that most of the Direct3DX namespace functionality is just non-existent in XNA. You can only access some of the methods when writing your own content processor, but that does not help you when writing your engine or wanting to test models, meshes, or shaders. You also can’t access any of the vertices or the index data of the loaded models because all the vertex and index buffers are write-only, which is good for fast hardware access, but bad if you just want to modify anything. In your little code part here you are just mimicking the behavior of the mesh.Draw method, just without the effect code that is used there because you have your own effect class here.
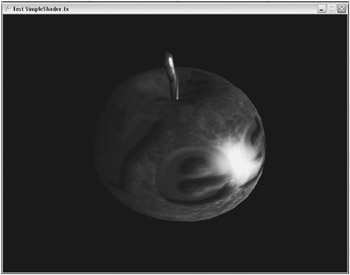
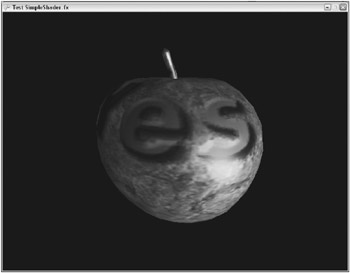
effect.CurrentTechnique = effect.Techniques["SpecularPerPixel"]; effect.Begin(); foreach (EffectPass pass in effect.CurrentTechnique.Passes) { pass.Begin(); // Render all meshes foreach (ModelMesh mesh in someModel.Meshes) { // Render all mesh parts foreach (ModelMeshPart part in mesh.MeshParts) { // Render data our own way BaseGame.Device.Vertices[0].SetSource( mesh.VertexBuffer, part.StreamOffset, part.VertexStride); BaseGame.Device.Indices = mesh.IndexBuffer; // And render BaseGame.Device.DrawIndexedPrimitives( PrimitiveType.TriangleList, part.BaseVertex, 0, part.NumVertices, part.StartIndex, part.PrimitiveCount); } // foreach } // foreach pass.End(); } // for effect.End(); In detail this means you go through every pass (again, you just have one) and draw all meshes (also just one for your apple) and then you draw all mesh parts (guess what, again only one) by setting the vertex and index buffers with help of the XNA properties of the Device class. Finally you call DrawIndexedPrimitives to render all the vertices inside the shader. Then the pass and the shader are closed and you can finally see your apple with the marble.dds texture on the screen (see Figure 6-16).

Figure 6-16
Testing the Shader
Just because everything works now, it does not mean you can’t play around a little bit with your shader and test other material settings, textures, or render modes.
To achieve the wireframe effect that you saw in Figure 6-5 previously, you can just change the FillMode before starting the shader:
BaseGame.Device.RenderState.FillMode = FillMode.WireFrame; Or you can manipulate the shader material a little bit; if you want you can load another texture or even another model. The shader class is written in a way that allows you to load any XNA model and texture and test it out. One simple way to modify the output of the shader would be to change the ambient, diffuse, and specular values to make an evil alien apple (see Figure 6-17).

Figure 6-17
effect.Parameters["ambientColor"].SetValue( Color.Blue.ToVector4()); effect.Parameters["diffuseColor"].SetValue( Color.Orange.ToVector4()); effect.Parameters["specularColor"].SetValue( Color.Orchid.ToVector4()); Please note that you have to convert the colors to Vector4 because SetValue does not have an overload for color values (seems like there was someone really lazy). When you set any effect parameters between a shader Begin and End call you should also call the Effect CommitChanges method to make sure that all your changes are sent to the GPU. If you call Begin after setting the parameters like in the SimpleShader class you don’t have to worry about that.
In the next chapter you are going to use effect parameters much more effectively because setting them by name is not really performant and it is also error prone. If you mistype one of the parameters an exception will occur and that’s never good.
EAN: 2147483647
Pages: 138