Browsing for a File
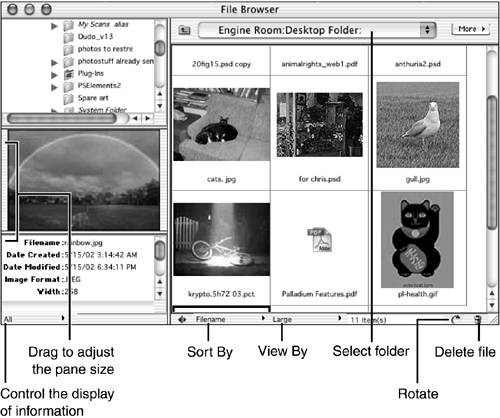
| Most of the time, though, you won't be starting with a blank image. Instead, you'll have a photo that you want to work with. If you know where it is, you can press Command-O, click on the Open icon, double-click the file, or do whatever you generally do to open a file. If you don't know where on the hard drive your picture is, you'll turn to the File Browser. Open the File Browser by clicking its tab in the palette well, by choosing it from the File menu or the Windows menu, or by typing Shift-Command-O. You can select the thumbnail size from the More menu or by clicking the View By button. The File Browser can also show you the file hierarchy and the creation data or camera file info, as well as a larger thumbnail of a selected image, as in Figure 22.3. Normally, all information about a file is displayed in the info window; to display only camera/scanner information, select EXIF from the menu on the lower right. As I mentioned the previous chapter, you can change the sort order using the options on the Sort By menu. Figure 22.3. The info window includes creation date, camera used, and so on. Use the top pop-up menu to locate the disk and folder you think the file is on, and just start scrolling through the folder list on the left until you find it. Drag it into an Elements window or double-click it, and it will open on its own. To rotate the selected image 90 degrees to the right, click the Rotate button. To delete the file from your computer, click the Delete File button. Task: Browsing and Opening an ImageTime for a little practice. The following steps will walk you through the process of browsing for some picture files on your hard drive:
|
EAN: 2147483647
Pages: 349