DVD Slideshows
| In this section, we examine how to work with DVD slideshows in iDVD. DVD slideshows are a nice way to enhance a DVD production; they enable you to add digital pictures to a DVD project that also has video in it. Or, you could make a DVD project that's nothing more than a slideshow.
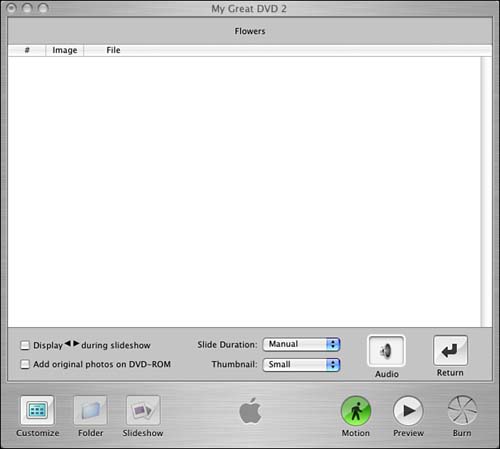
Using iDVD to create a slideshow is as simple as using other parts of the program; it's a simple matter of dragging your files directly into the iDVD window. After adding your pictures to the slideshow in your DVD project, you can make a number of adjustments if you like. Task: Creating a SlideshowBefore you can create a slideshow, you must open a new iDVD project or reopen a DVD project that you've been working on that you'd like to add a slideshow to.
When you double-click the My Slideshow icon, the slideshow editing window opens. From there, you can add slides and make adjustments to your slideshow (see Figure 19.18). Figure 19.18. The slideshow editing window. Task: Adding SlidesAdding slides to an iDVD slideshow is as easy as dragging and dropping the files into the iDVD window. You can drag files in from the desktop, or you can drag images from your iPhoto library from the Photos tab. (Remember to open the Photos tab, you need to click the Customize button at the bottom of the iDVD main window.) You can also use the File, Import, Image option.
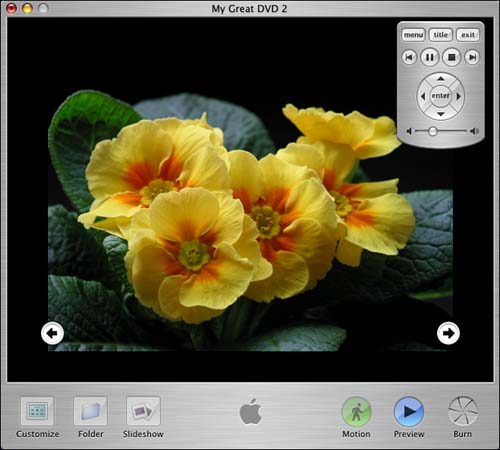
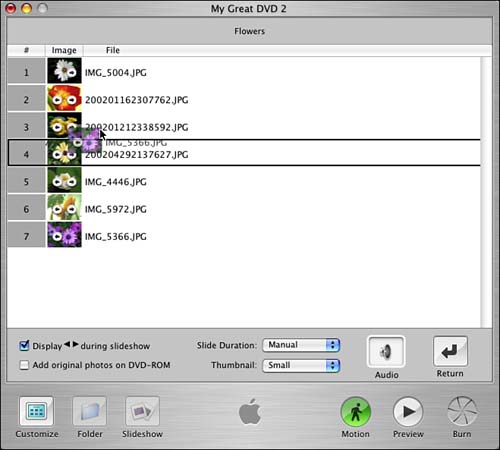
You can also drag multiple files at once into the Slideshow window. To accomplish this, place the mouse pointer near one of the file icons, click and hold the mouse button down, and drag upward and over all the icons you want to select. Then click directly on one of the selected icons and you can drag them all over at once. The slides appear and can be repositioned and adjusted according to your taste, as we'll see in just a little while. Slideshow OptionsThe Slideshow window has a variety of options that you can use to adjust both the order of slides and how the slides behave. Display Arrows During SlideshowThe Display Arrows During Slideshow option causes arrows to be displayed on your slideshow screens, as shown in Figure 19.20, that are a reminder that there are previous or remaining slides. Figure 19.20. Display arrows in a iDVD preview. They represent how a person can use the arrow keys on his DVD remote to go through slides. Adding Picture Files to DVD-ROMWhen you add a slideshow to you DVD project, the images are encoded as part of the DVD. If someone wanted to work with one of the images as a file to print or send in an email, she wouldn't be able to do this. However, the Add to DVD-ROM option enables you to add the individual slides to your DVD as graphics filesa nice option for enabling people to watch the slideshow on television, as well as being able to put the DVD in their computer to have the pictures files available. When you burn your final DVD with this option checked, the slides in your slideshow are converted into a series of individual files. They're saved on the DVD disc along with the normal DVD project and are accessible by any computer with a DVD-ROM drive. We'll talk more about DVD-ROM content in Chapter 20, "Creating DVDs with iDVD." Setting Slide DurationThe Slide Duration option enables you to set the time that a slide displays on a screen (see Figure 19.21). Figure 19.21. The Slide Duration pop-up menu controls how long a slide appears. The Manual setting basically means that the user presses the right or left arrow on her DVD remote control to advance to the next slide or go back to a previous slide. But if you want a slideshow to run on its own, you can adjust the duration. To adjust the duration of a slide, simply click the Slide Duration pop-up menu and choose a duration. Thumbnail SizeThe Thumbnail option determines the size that the mini-preview of each slide appears in the slideshow window in iDVD. There are two options for thumbnail size. The Large setting works better to see a preview of the individual slides, whereas the Small setting works better when you need to see more slides in the window at a time, such as when you're adjusting the order of slides.
AudioThe Audio option enables you to add a sound file to a slideshow. It works the same as adding audio to a menu as we discussed earlier in the chapteryou simply drag a file into the well. To delete, drag the audio file from the Audio well out of the iDVD window.
Working with SlidesOne of the most common tasks you'll undertake when working with slideshows is rearranging slides so that they appear in a different order. It's really easy to do this and can be fun to play around with as you develop your slideshow. Remember, at any time, you can click on the Preview button at the bottom of the iDVD window to preview your slideshow. Just remember that to get back out of the preview mode, you have to either close the miniature remote control by clicking Enter or click the Preview button to return to editing mode. Task: Rearranging SlidesRearranging slides is as simple as clicking and dragging:
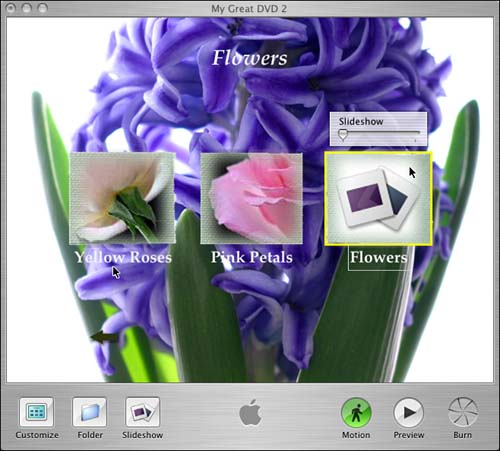
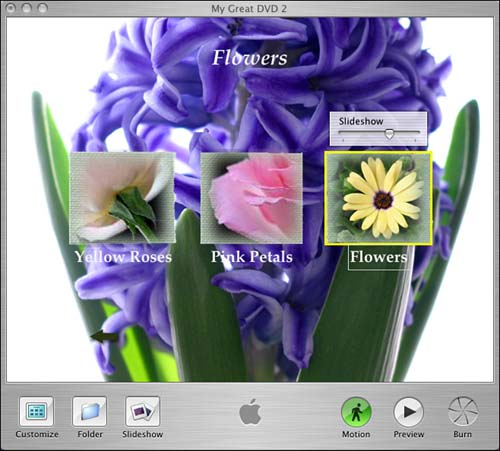
The slide snaps into position and you can continue to make adjustments to your slideshow or add new slides. Task: Changing the Slideshow Icon ImageOne of the nice things about the way that iDVD enables you to customize DVD menus is apparent when you're working with slideshows in a theme that supports video buttons . After you've added slides to your slideshow, the image on the button that leads to your slideshow can be changed to display one of the slides.
Remember, iDVD also allows you to customize buttons representing folders, or submenus, in a similar way. |


EAN: 2147483647
Pages: 349
- Chapter III Two Models of Online Patronage: Why Do Consumers Shop on the Internet?
- Chapter V Consumer Complaint Behavior in the Online Environment
- Chapter VI Web Site Quality and Usability in E-Commerce
- Chapter XV Customer Trust in Online Commerce
- Chapter XVI Turning Web Surfers into Loyal Customers: Cognitive Lock-In Through Interface Design and Web Site Usability
- Success Story #1 Lockheed Martin Creating a New Legacy
- Seeing Services Through Your Customers Eyes-Becoming a customer-centered organization
- Success Story #2 Bank One Bigger… Now Better
- Success Story #4 Stanford Hospital and Clinics At the forefront of the quality revolution
- Designing World-Class Services (Design for Lean Six Sigma)