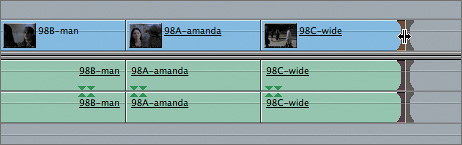
| Dragging edit points to trim a clip is a direct and easy way to change the length of a clip in the Timeline. It works much like dragging a whole clip, but when you drag an edit point, the clip itself remains stationary; just the In or Out point moves, and the length of the clip is changed. Dragging Edit Points In this exercise, you will work with the Dragging sequence you duplicated earlier. You will drag an edit point to trim a clip. To shorten a clip, you will trim inward toward the center of the clip. To lengthen a clip by dragging, you drag away from the center of the clip. 1. | In the Timeline, play the Dragging sequence to review how the clips are currently cut together.
These clips were loosely edited to create what is called a rough cut sequence.
NOTE If you want to review how this sequence was originally edited in Lesson 2, you can open and view the Amanda Finished sequence from the Browser. | 2. | In the Timeline, play the last clip in the sequence, 98C-wide.
When this clip was edited, the narration had not yet been included. Now that the narration clip is present, you can see that this clip is too short. It needs to be lengthened to cover the narration.
| 3. | Click the Out point of this clip once to select just the edit point.
The Out point becomes selected on all tracks because the video and audio portions of this clip are linked together. The line under the clip name indicates this link.
NOTE Just the edge of the clip is selected, not the body of the clip. If the entire clip were selected, you would end up moving the clip, not trimming it. | 4. | Hold the pointer over the edit point until it becomes the resize arrow, then click the edit point and drag right as far as you can, but don't release the mouse. As you drag, look at the trim amount and the new clip duration as they are being updated in the information box.
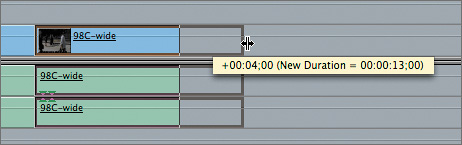
As you drag, all linked tracks are dragged together.
TIP When you are trimming, adjust the zoom control in the Timeline so the clips you are working with appear a little larger. 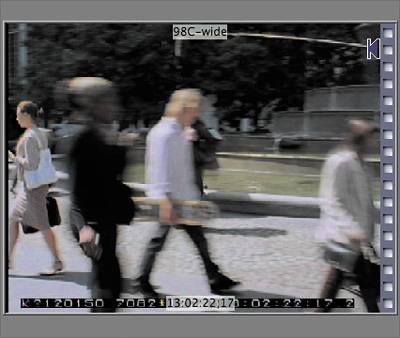
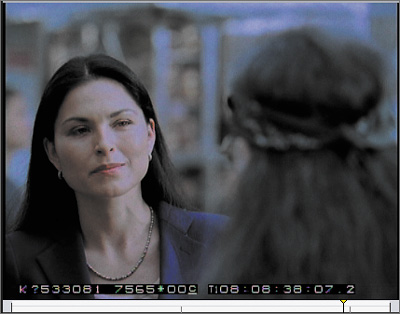
In the Canvas image area, the end-of-clip filmstrip overlay appears on the right side of the image, indicating you have reached the last available frame of the clip's media. You cannot trim the clip any further in that direction.
| 5. | Release the mouse, and play the clip to see the new edit point.
In this situation, trimming the Out point as far as possible does not make the best-looking edit because people start to move in front of the man.
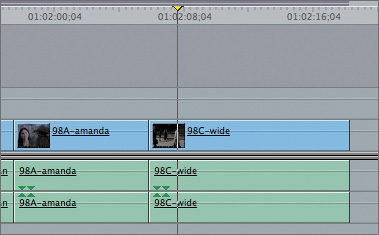
| 6. | Play this clip again, and stop the playhead just as the man finishes singing his song, which is just before the camera moves near the end of the clip.
| 7. | Drag the Out point to snap to the playhead location.
|
TIP Positioning the playhead to where you want to trim an edit point is an effective way of trimming.
Dragging Edit Points Between Clips When two clips are side by side, Final Cut Pro won't allow you to drag the edit point of one clip into its neighboring clip. You can drag away from the neighboring clip but not into it. Trimming or shortening a clip by dragging it away from a neighboring clip will leave a gap in the sequence. If you leave the gap, the sequence length will be the same as it was before you trimmed the clip. If you delete the gap, the sequence length is changed. You delete gaps just as you did in the previous lesson. 1. | Play through the edit point between the last two clips in the sequence.
Amanda starts to leave in the 98A-amanda clip. In the 98C-wide clip, you need to pick her up later, and match the action as she's starting to leave.
NOTE When working with dramatic scenes, you match the visual action first, and then finesse the audio as needed. In this situation, you will hear Amanda repeat her farewell greeting in the final clip. You can trim this away in a later exercise. | 2. | In the 98C-wide clip, position the playhead after Amanda has finished speaking and has started to walk away. This will be the new In point.
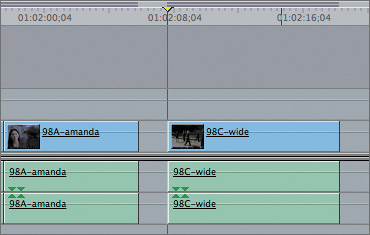
| 3. | Click and drag the In point of the 98C-wide clip to snap to the playhead. Release the mouse.
TIP If snapping is off, toggle it on by pressing N. You can toggle snapping off and on even as you drag the mouse. 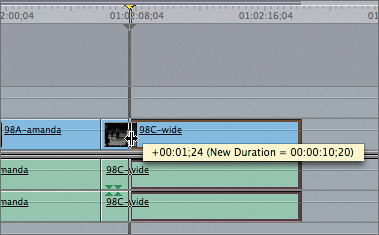
As you drag, a brown outline appears around the clip, indicating the new clip length. The new clip duration appears in the information box. When you release the mouse, a gap appears in the sequence the length of the trim.
| 4. | To remove the gap between the clips, click in the gap area, and press Delete.
When you delete the gap, the following clip is pulled up. As mentioned in Lesson 4, this is called ripple deleting because deleting the gap ripples the location of the following clip or clips earlier in the Timeline.
| 5. | Play the last 98A-amanda clip in the sequence from the head of the clip. Position the playhead after the man stops singing off-camera and just before Amanda nods her head.
| 6. | Drag the In point of this clip to snap to the playhead location. Click the gap to select it, and press Delete to delete the gap.
| 7. | Try dragging the Out point of this 98A-amanda clip to the right to make it longer.
Nothing happens because you cannot drag a clip into a neighboring clip to make it longer without a special trim tool you will use later in this lesson.
| 8. | Press Cmd-S to save your changes.
|
NOTE This method of deleting gaps works only on gaps without clips above or below the gap on other tracks.
Dragging Edit Points on V2 Dragging an edit point is an easy approach to trimming a clip except for the fact that you can't lengthen a clip when it sits next to another clip. But there is a way around this problem. It involves placing a clip onto the V2 track where, with no neighbors, you have the freedom to trim it in either direction. 1. | To find the next clip to trim in the Dragging sequence, move the playhead to the head of the sequence. Press Shift-M to move the playhead to the green marker in the ruler area of the Timeline.
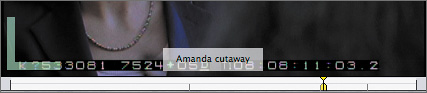
When the playhead is on a sequence marker, the name of the marker appears in the Canvas image area. You will learn to create markers in a later lesson.
| 2. | Press Option-+ to zoom into this area so you can see the clips on either side of this cutaway more clearly. Play these clips.
This is a cutaway of Amanda that was edited to help break up the long clip of the man singing. To make this clip shorter, you can use the dragging approach and drag inward on the clip. But to make it longer, you have to place it on the V2 track to drag its edit points outward.
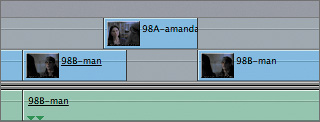
| 3. | Drag the 98A-amanda cutaway clip up onto the V2 track. Make sure you have not moved the clip left or right, but straight up. Deselect the clip after you release it.

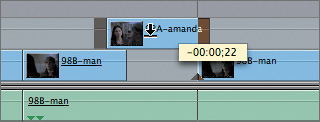
TIP To ensure you don't move the clip any frames left or right, you can hold down Shift as you move a clip to another track. This locks the movement to just a vertical move. | 4. | Drag the In point to the left about 1 second to lengthen this cutaway. Play these clips in the sequence.
When video clips are stacked on top of each other, the clip on the highest track takes precedence and will be seen. In this situation, the 98B-man clip will be seen from the beginning of the clip to the point where the cutaway appears on the V2 track. At that point, the only video you see will be the video clip on the V2 track until it stops. When the V2 clip ends, whatever video is beneath it on the V1 track will be seen.
| 5. | Drag the Out point of the 98A-amanda cutaway clip on the V2 track to lengthen it slightly.
When a clip stands alone on a separate track, both the head and tail of the clip can be trimmed to make the clip longer or shorter without being restricted by the other sequence clips.
| 6. | Click the center of the 98A-amanda cutaway clip, and drag the entire clip left until its Out point snaps to the In point of the following 98B-man clip. Play this area of the sequence again.
With the cutaway on a separate track, you can move the clip to reposition it, trim it by dragging its edit points, or even turn off the track visibility to see what the sequence looks like without it. Make sure that when you reposition the V2 clip, it covers the V1 gap in its entirety. Any uncovered areas of the gap will play as black frames.
| 7. | Press Cmd-S to save your work.
|
|