| There are several video filters that can help correct a clip's color or improve its look in some way. Some of these filters can change the color balance of an image, adjust the luminance and black levels, add more color, or take color away. In these exercises, to understand how to use the color correcting filters, you will work with the motocross racing clips and correct the bluish tint. Understanding Color Basics Before you make color adjustments to a clip, you need to understand a few basic color principles. First of all, video is an additive color system, meaning that all colors added together will create white. So your reference to white is very important. If your white balance is off, as it is in some of the racing clips, the overall balance of colors in the image will be off as well. Another aspect of color correction is the hue of the image. Hue is the color itself, sometimes represented by a name (red) but most often represented by a number on a 360-degree color wheel. Each color comes up at a different location around the wheel. For instance, the three primary colors in video are red, green, and blue, and they fall at 0 degrees, 120 degrees, and 240 degrees. 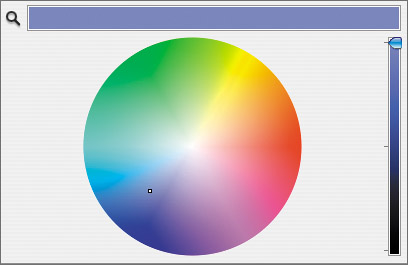
Some color wheels display more than just the hue. They reflect the saturation of a color. Saturation is the amount of hue present in an image. For all colors, 0 percent saturation shows the color as white. If red is fully saturated at 100 percent, decrease the saturation to 50 percent and you get rose. Decrease it to 25 percent and you get pink. Each of these colors is part of the red family in that they share the same hue but not the same amount of saturation. 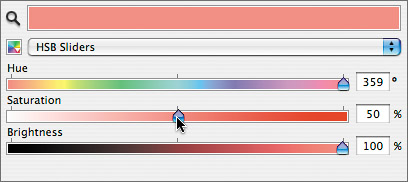
The brightness, or value, of an image is the amount of lightness or darkness present. A 100 percent value is the highest or brightest level, whereas 0 percent gives you black, regardless of the hue or saturation numbers. Using the Color Corrector 3-Way Filter In Final Cut Pro, there are different filters you can apply to correct or adjust the color in an image, each offering a different approach for the same result. For example, you could choose the Image Control > Proc Amp filter, whose parameters are similar to controls on a professional VTR. Also from the Image Control category, you could choose Brightness and Contrast, or Levels, to adjust those specific aspects of your clip. However, there is a general all-purpose filter you can use to color correct an image, and it is a real time effect. This is the Color Corrector 3-way filter. In this exercise, you will work with this filter to correct the bluish tint on the racing footage. 1. | In the current sequence, move the playhead to the marker in the last clip, biker down, and double-click to open the clip into the Viewer. Click the Filters tab, and disable the Diffuse filter so you can see the original clip.
TIP When working with multiple filters, it's helpful to hide or collapse the parameters of one filter as you focus on the parameters of another. If the colors in a clip don't appear quite right, it may be because the color balance of the image is off. That can happen if the step of white balancing a camera was skipped prior to shooting the original material, or if the lighting for the shoot was hard to control, as it was in the racing footage.
| 2. | Choose Effects > Video Filters > Color Correction > Color Corrector 3-way.
The Color Corrector 3-way filter appears in the Filters tab, but the parameter details are not in view. Instead you see a button named Visual and a separate tab called Color Corrector 3-way. There is a very good reason for this.
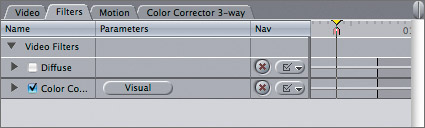
| 3. | Click the disclosure triangle next to the Color Corrector 3-way enable check box, and drag the vertical scroll bar down to see all the parameters. Then click the disclosure triangle again to hide those parameters.
These parameters control the color of an image, but there is a much easier approach a more visual approach.
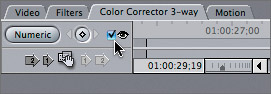
| 4. | Click the Visual button next to the Color Corrector 3-way name, or click the Color Corrector 3-way tab.
Although this filter is very complex and has lots of parameters, it also has a streamlined visual interface. Working within the visual interface lets you focus on the look of the image without getting distracted by the numbers you saw in the standard numeric interface.
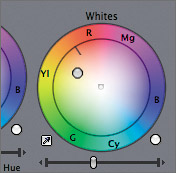
In the visual display, the Color Corrector 3-way filter has three wheels: Blacks, Mids, and Whites. Each wheel controls the color balance in those ranges, and the sliders beneath the wheels control the different level of brightness in the image pixels. The Saturation slider beneath the wheels increases or decreases the amount of color in the image.
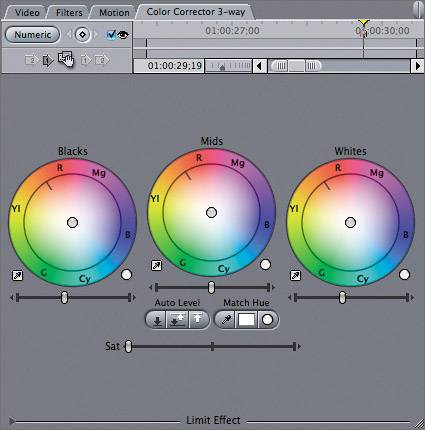
NOTE The Limit Effect area under the color wheels is used to change or control a specific color in an image. One way to improve the color of the biker down clip is to reset (or redefine) what true white is in the clip's image.
| 5. | Under the Whites color wheel, click the small Select Auto-balance Color eyedropper.
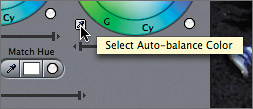
With this tool, you can select a new white reference from the image in the Canvas.
| 6. | In the Canvas, click the white shirt-sleeve of the man on the right behind the flag.
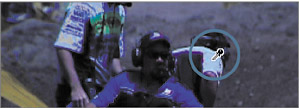
Clicking a white area of the Canvas image rebalances all the colors and resets the colors in the image as though the white you clicked was true white. Look at the Whites balance control color wheel. The indicator in the center of the wheel has moved away from blue toward yellow.
| 7. | Click the enable check box so you can see the image with and without the Color Corrector 3-way filter enabled. Leave the filter enabled.
Just changing the white balance for this image has improved it considerably. Other racing clips in this sequence also appear bluish. You can apply this Color Corrector 3-way filter, with its current settings, to another blue clip.
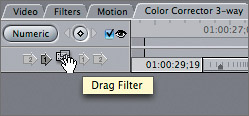
| 8. | Move the playhead to the MB high jump clip. From the Color Corrector 3-way filter tab, drag the Drag Filter icon to the MB high jump clip and release it.
The settings that improved the biker down clip also work for the MB high jump clip. There are two more bluish clips in this sequence. You can apply this filter to both of these clips at the same time.
| 9. | Move the playhead to the DS good ride clip. Select this clip, and Cmd-click the race begins clip to add it to the selection. To apply the current Color Corrector 3-way settings from the biker down clip, drag the Drag Filter icon to either selected clip and release it.
 In the Canvas, you see the DS good ride clip is much improved. If you drag the playhead to the race begins clip, it too will have a new white balance. Since the biker down color filter changes were so effective on these clips, you might want to save this filter as a favorite to use on other bluish clips. In the Canvas, you see the DS good ride clip is much improved. If you drag the playhead to the race begins clip, it too will have a new white balance. Since the biker down color filter changes were so effective on these clips, you might want to save this filter as a favorite to use on other bluish clips.
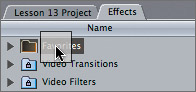
TIP Another way to copy the filters from one clip to another is to copy a clip and use the Paste Attributes option to paste all of the clip's filters to another clip. | 10. | In the Browser, select the Effects tab. From the biker down Color Corrector 3-way tab, drag the Drag Filter icon into the Effects tab and release it in the Favorites bin. Rename it Blue Correction.
|
TIP You can also choose Effects > Make Favorite Effect to save an effect. However, if there is more than one filter applied to the clip, all the filters will be saved together in a bin in the Favorites bin. You can drag this bin to any clip or group of clips if you want to apply the entire set of filters.
Viewing and Modifying Color Correction Changes Sometimes, resetting the white balance for a clip solves the problem, and sometimes it just gets you in the ballpark. If you're only in the ballpark, you will need to tweak or adjust settings in the Color Corrector 3-way filter. To help you do that, there are two tools you can use to view the color changes and other filters you apply to a clip. One is the Frame Viewer, which displays a clip in a before-and-after, split-screen configuration. The other tool is the Video Scopes tool, which displays certain properties of an image, such as amount of brightness and color, or luminance and chroma. 1. | In the Timeline, move the playhead to the marker in the biker down clip. Double-click this clip to open it in the Viewer.
| 2. | Choose Tools > Frame Viewer, or press Option-7. When the tool opens in the Tool Bench window, reposition it over the Browser.
NOTE The Tool Bench window is placed over the Viewer or at the last position it was used in the interface. In the Frame Viewer, you can choose what you want to see on each side of the frame and easily compare one clip to another or compare one clip with and without filters.
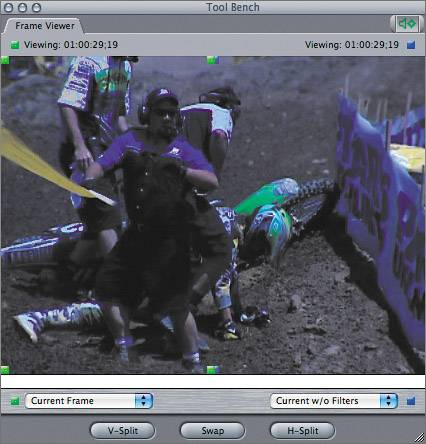
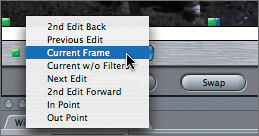
| 3. | In the lower left of the window, click the Frame Viewer pop-up, and choose Current Frame, if it's not already selected. Click the pop-up on the right side, and choose Current w/o Filters.
In this view, you see the color-corrected image on the left and the original, uncorrected image on the right. You can change the size of each frame by dragging the boundary indicator.
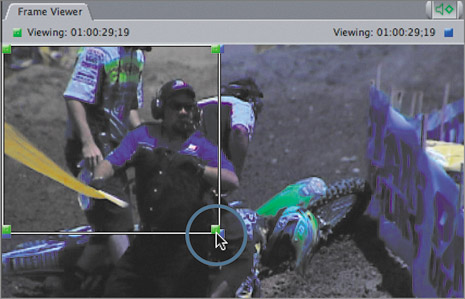
NOTE You can also click the V-Split (Vertical), Swap, or H-Split (Horizontal) buttons to divide the frame differently or swap the images. | 4. | To use video scopes to help color correct a clip, choose Tools > Video Scopes.

Now there are two tabs in the Tool Bench: Frame Viewer and Video Scopes. You can pull away either of these tabs to create its own separate window. You can also change the size of the window itself.
NOTE You don't use Video Scopes to make any adjustments, only to view your image in different ways. Another way to work with Video Scopes is to change your window layout to the preset Color Correction option. | 5. | To view just the luminance levels of your image in the Video Scopes tab, click the Layout pop-up on the left and choose waveform. Make sure the View pop-up on the right is set to Current Frame.
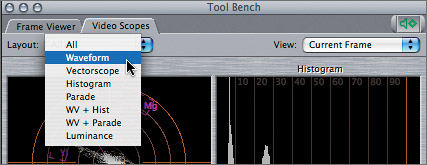
Each option in the Layout pop-up menu displays the pixels of your image differently, according to luminance, chroma, and so on. The waveform displays the luminance of the image over a 0 to 100 percent graph, with 0 being Black and 100 being White. Broadcast luminance levels should not exceed 100 percent.
| 6. | In the Viewer, experiment with the Blacks level by dragging the Blacks slider left and right, then reposition it back to center. Click the left adjustment arrow, maybe eight times, until you see the lower group of pixels in the waveform creep down toward the 0% Black line.
TIP If you're working with a scrolling mouse, you can position your pointer over one of these sliders and scroll to change the levels. The luminance of a clip is often divided into three areas, representing the darker pixels, the midrange pixels, and the brighter pixels in the image. The sliders beneath the color wheels in the Color Corrector 3-way tab are used to adjust these groups of luminance levels, and the waveform is used to monitor these levels.
| 7. | To raise the level of the middle-range pixels, click the right adjustment arrow on the Mids slider. If the uppermost pixels in the waveform are not at 100%, you can click the right adjustment arrow on the Whites slider to make the brighter pixels a little brighter.
TIP Adjusting the Mids slider is a good way to bring out more detail of an image that is too dark or underexposed, or to remove the washed-out effect of an overexposed image. In addition to changing the luminance properties of a clip, you can adjust the color balance even further by working with the three color balance control wheels.
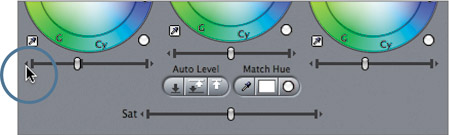
| 8. | To remove some of the blue cast in the darker dirt areas, drag anywhere within the Blacks color balance control to move the balance control indicator toward yellow. If the darker areas appear a little green, move the indicator upward away from green on the color balance control.
TIP When making adjustments in the balance control wheel, hold down the Command key as you drag to move the indicator faster. To reset a color balance control to its default setting, click the Reset button on the lower right of the wheel. 
In addition to changing the luminance and hue of a clip, you can adjust the Saturation slider beneath the wheels to increase or decrease the amount of color in the image.
| 9. | Drag the Saturation slider to the right to add more color, or chroma, to this image.
| 10. | In the Viewer, click the enable check box on the Color Corrector 3-way tab to see the image with and without the adjustments, or look at the split-frame image in the Frame Viewer tab.
|
Project Practice Open the Motion with Filters sequence from the Browser. Follow the process in the previous exercise and reset the white balance for one of the first bluish racing clips, and then apply that correction to the other bluish clips in that sequence. Then make any additional level adjustments to the Blacks, Mids, Whites, and the Saturation of each clip. You can also experiment with filters in the Image Control category, or apply the Color Corrector filter from the Color Correction category to make these same adjustments a different way. |