| Every filter has a set of parameters you can modify to fine-tune the effect you want. These parameters appear in the Filters tab in the Viewer. Here you can modify parameters, delete the filter, toggle it off or on to compare before and after, save it as a favorite, or copy the same filter to another clip in the Timeline. You can also change the priority of filters, which can change the look of the effect. But before you can make any of these changes, you open the clip from the Timeline into the Viewer. 1. | In the Timeline, move the playhead to the DS good ride clip, and double-click to open it in the Viewer.
| 2. | Click the Filters tab.
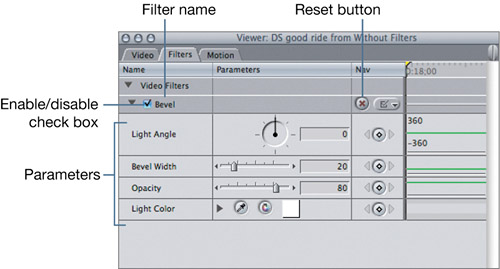 You modify the parameters as you would motion effects, using sliders, rotation angle controls, and numerical fields. Some filters use color pickers for color selection. You modify the parameters as you would motion effects, using sliders, rotation angle controls, and numerical fields. Some filters use color pickers for color selection.
| 3. | In the Filters tab, click the Video Filters disclosure triangle to hide and then display the video filters applied to this clip. Click the Bevel disclosure triangle to hide and display its parameters.
| 4. | Click the enable check box next to Bevel to toggle the filter off and on.
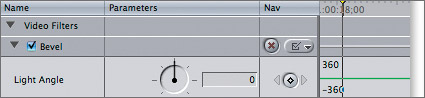
Toggling a filter off or on does not delete it from the clip. It simply allows you to view the clip with or without it.
| 5. | Make your own changes to the Bevel parameters on this clip.
TIP If you want to return a filter to its default settings, click its red Reset button. 
| 6. | Move the playhead to the race begins clip, and double-click it to open it in the Viewer. Change the Radius to 45, Ripple to 2, and Amplitude to 12.
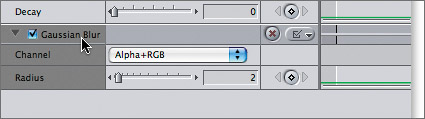
| 7. | To add an additional filter to this clip, choose Effects > Video Filters > Blur > Gaussian Blur.
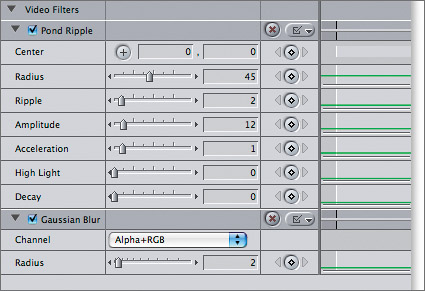
Since this clip is already open in the Viewer, the filter appears as soon as you choose it.
You can apply several different filters to one clip to create a special effect. How they affect the image depends on the parameter settings and the order in which they are applied.
NOTE The first filter is always the first applied, and the last filter will be applied to the clip as well as to the filters that are listed before it. | 8. | In the Gaussian Blur parameter, change the Radius to 10, and look at the image in the Canvas. Click the enable check box for each filter to see how it is affecting the image, then enable both filters.
When you apply the Gaussian Blur after the Pond Ripple filter, the entire image, along with the ripples, is blurred. Changing the order of these filters will give you a different result.
| 9. | To change the order of the filters, click the Gaussian Blur filter name and drag it up above Pond Ripple. When a dark bar appears above Pond Ripple, release the mouse.
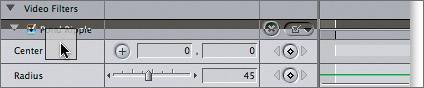
When the Gaussian Blur filter is positioned on top of the Pond Ripple filter, the blur is applied only to the image, not to the Pond Ripple effect, and the ripples are no longer blurry.
| 10. | Drag the Pond Ripple filter above the Gaussian Blur filter, to its original location, and the ripples become blurry again.
| 11. | To delete the Gaussian Blur filter from this clip, click its name in the Filters tab, and press Delete. Press Cmd-S to save your changes.
|
TIP To remove all filters for a clip, click Video Filters, and press Delete. You can always press Cmd-Z to undo the most recently applied or deleted filter or filter adjustment.
Project Practice To practice applying, modifying, and deleting filters, and to explore further the filter categories that change style, open several clips in this sequence, and disable their current filters. Apply other filters to the clips, and modify changes to that filter's parameters. For example, you can flop a clip to make it play in the opposite direction. Choose from the following Video Filter categories: Blur, Border, Distort, Perspective, and Stylize. NOTE The QuickView tool in the Tools menu is an aid to previewing effects that may need rendering, or that don't play every frame. When open, it will play a marked portion of the Timeline and render the effect to your computer's RAM without creating a separate render file. After an initial slow play of the clip while rendering, QuickView then plays an area in real time.
|