| Sometimes a transition is a blending process, as in dissolves and cross fades, and sometimes it's a replacement process, in which part of the outgoing clip is replaced by the incoming clip through the form of a geometric shape, such as a circle, box, or line. These are called wipe transitions and may be familiar to you because they have been used for many years in video and film editing. Applying Wipe Transitions You apply a wipe transition the same way you apply a dissolve or a cross fade. There are many fun and useful wipe transitions. The following steps will help you to become familiar with a few. 1. | In the Browser, duplicate the Cuts sequence and rename it My Sunset Wipes. Open the sequence and play it.
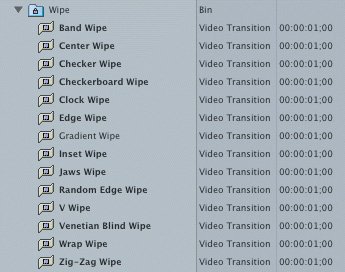
| 2. | In the Effects tab in the Browser, collapse the Dissolve bin and display the contents of the Wipe bin. Scroll down to see the complete contents of this bin.
 Remember, all the wipes you see in boldface in your own Wipe bin can play in real time on your computer.
| 3. | Look in the Length column in the Browser.
Each wipe transition has a default duration of one second. This is true for all cross fades and cross dissolves as well.
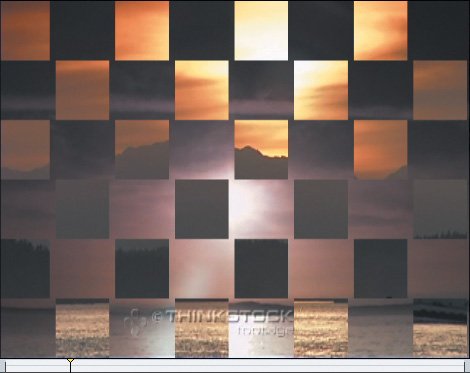
| | | 4. | Drag the Checker Wipe icon from the Wipe bin to the edit point between the first two clips, bird fly by and boat dusk, and play the transition.
 Note Depending on the processing speed of your own computer, and the current settings in the RT pop-up menu, you may see a colored render bar appear above this transition. You will learn to preview and render effects in the "Rendering Transitions" section of this lesson. | 5. | Drag the Band Wipe to the edit point between the boat dusk and distant sunset clips in the Timeline, and play it.
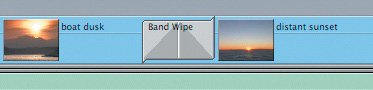 As with video dissolves, the name of the specific wipe appears on the transition icon in the Timeline.
| 6. | Drag the Jaws Wipe to the next transition point, between the distant sunset and glass lake clips.
|
Adjusting Wipes in the Transition Editor Like dissolves, wipe transitions can also be adjusted in the Transition Editor. In fact, several additional options are available because there are simply more properties that can be changed in a wipe than in a dissolve. | | 1. | Double-click the Jaws Wipe transition icon in the Timeline.
Note Wipe settings are specific to a particular wipe. But if you look at this and other wipe transitions in the Viewer, you will find that most of the settings are self-explanatory. 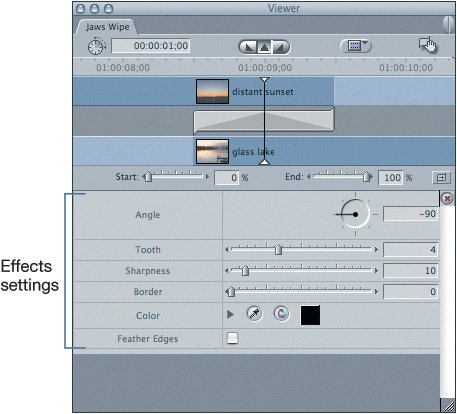 | 2. | In the Timeline, park the playhead in the middle of the wipe.
Tip Always park your playhead on the clip or transition you are adjusting so that you can see a visual display of the adjustment in the Canvas. | 3. | Drag the Angle pointer to about 8 o'clock, or enter 130 in the number box and press Return.
| 4. | Drag the Tooth slider to the far right to create 10 teeth.
| 5. | Enter a Sharpness number of 25 and press Return.
Note It doesn't matter whether you enter a number or move the slider. One always affects the other. | | | 6. | Drag the Border slider to 11 or enter 11 in the number field, and press Return.
Tip Click the tiny triangles at the end of each slider to change the numerical value of an effect by single increments.  | 7. | Click the black Color box to open the Color window. Choose the Crayons icon at the top of the window, click the brightest yellow color (named Lemon) for the wipe border, and click OK or press Return.
|
You can also pick a color for the border from an image. Choosing a color from an image involved in the transition can be very effective. 8. | Click the Select Color tool (eyedropper) in the Color parameter. In the Canvas, click the dark peach color in the glass lake clip.
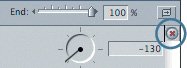
 Tip To search or preview different border colors, select the eye-dropper and click and drag around the Canvas image area without releasing the mouse. The border will reflect whatever color the eyedropper picks up. When you see the color you want, release the mouse. | 9. | Reverse the direction of this wipe by clicking the tiny Reverse Transition button to the right of the End slider.
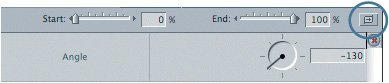 | | | 10. | To reset the Jaws Wipe parameters to their original default settings, click the Reset button (which has a red X) beneath the Reverse Transition button.
 |
|