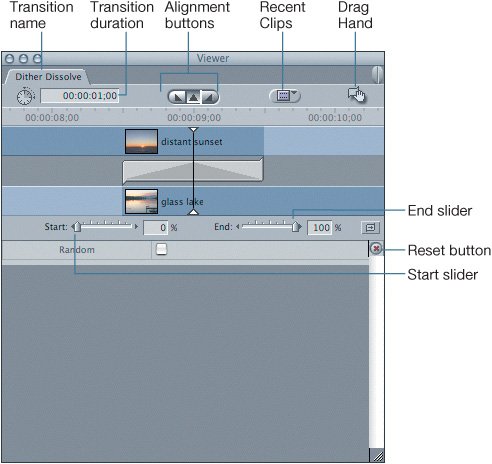
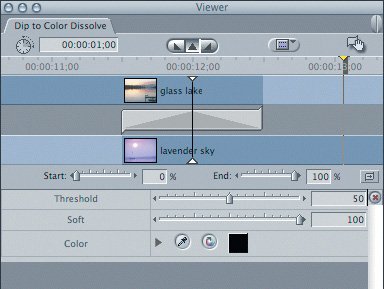
Using the Transition Editor


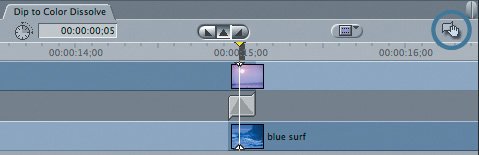
The transitions you've worked with so far have been relatively simple and have only required adjusting durations or possibly changing the transition alignment. But there are several video transitions that are much more complex and have several attributes that can be adjusted. To make these adjustments, you will work with the Transition Editor in the Viewer window. You can open the Transition Editor from the transition's shortcut menu or by double-clicking the transition in the Timeline.

1.

Ctrl-click the transition between the distant sunset and glass lake clips. Choose Open 'Dither Dissolve' from the shortcut menu.

The Transition Editor opens as a tab in the Viewer with a graphic display of the current transition. There are some familiar properties you will recognize from the Video or Audio tab, such as the Duration field for the transition length, a Recent Clips pop-up menu, and a Drag Hand icon for dragging transitions to other edit points. There is also a set of alignment buttons above the graphic display. Beneath the graphic are Start and End sliders. These determine whether the transition begins at 0% and ends at 100%, which is the default, or whether you want to have the transition begin or end as a mixture of the two sources.

2.

To see the graphical layout of the transition change, click each of the alignment buttons.

In the Viewer, the graphic changes to reflect the selected alignment. In the Timeline, the transition reflects whatever changes you make in the Viewer.

Tip

Use the Start on Edit alignment when the incoming clip doesn't have enough handle material prior to the In point to dissolve into the clip. This will start the dissolve on the In point of the incoming clip. Likewise, use End on Edit when the outgoing clip doesn't have enough handle material to transition past the Out point.

3.

Make sure the Center on Edit alignment is selected, and enter 15 frames as the new transition duration. Press Tab or Return to enter this change.

The width of the transition icon changes in the Timeline.

Another way to open the Transition Editor is to simply double-click a transition in the Timeline.

4.

Double-click the Dip to Color transition between the glass lake and lavender sky clips in the sequence. Remember to double-click the side of the transition. Double-clicking the edit point itself would open the Trim Edit window. (To work with the Trim Edit window, refer to the "Advanced Trimming" PDF on the DVD that comes with this book.)

Note

Double-clicking an audio transition opens a Duration dialog box. Double-clicking a video transition opens the Transition Editor.

Notice that additional color information appears below the Start and End sliders.

5.

To change the color the images dip to, click in the Color box.

A Colors window opens with five different color palette layouts for choosing a color. Each layout appears as an icon at the top of the window. Click each icon to familiarize yourself with the various color palette layouts.

6.

Click the Crayons icon and then click the whitish crayon in the lower-right corner. The word Snow will appear above the crayons. Click OK and play the transition.

7.

Now change the duration of this transition to 5 frames.

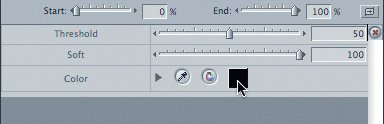
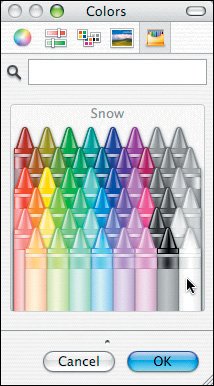
You can also make editing changes in the Transition Editor.

8.

In the Transition Editor, move your pointer over the transition icon in the graphic. When the pointer changes to a Roll tool, drag left or right.

In the Canvas, a two-up display shows the outgoing clip's new Out point and the incoming clip's new In point.

9.

Drag the Drag Hand icon (which looks like a hand on a transition icon) from the upper-right corner of the Transition Editor to the edit point between lavender sky and blue surf.

The Dip to Color transition with the properties you just set is applied to the new edit point.


Apple Pro Training Series Final Cut Express HD
Apple Pro Training Series: Final Cut Express HD
ISBN: 0321335333
EAN: 2147483647
Year: 2006
Pages: 174
Authors: Diana Weynand

flylib.com © 2008-2017.
If you may any questions please contact us: flylib@qtcs.net