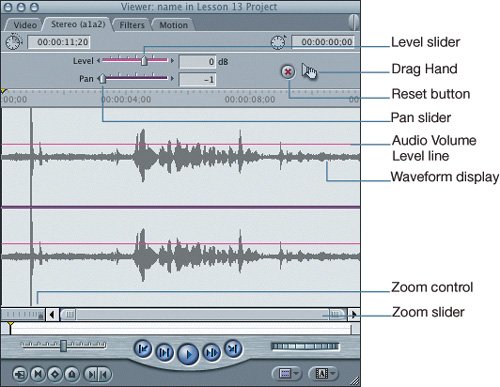
| You can also make audio adjustments in the Viewer when you first screen a clip. The Viewer contains additional options that appear on the audio tab of the window. Any audio adjustments made to a master clip in the Viewer will remain with that clip for future uses until it is changed. Working in the Audio Tab When you open a clip in the Viewer, the video portion of the clip is displayed in the Video tab. The audio attached to that clip is displayed in the Stereo or Mono audio tab, depending on whether the source audio is stereo or mono. If the audio portion of the clip is a single track of audio, a single waveform is displayed. If it is a stereo pair, two waveforms are displayed, one for each track of audio. 1. | From the Clips bin in the Browser, open the name clip into the Viewer.
| | | 2. | Select the Stereo (a1a2) tab. Click back and forth between the Video and Stereo tabs to see what parts of the Viewer are similar and what parts are different.
The two tabs share the same controls from the scrubber bar and below, as well as the Duration and Location fields in the upper part of the Viewer.
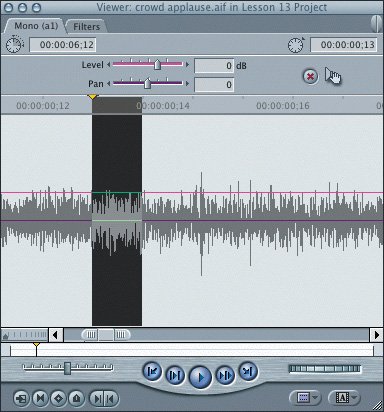
 | 3. | From the Music and Sound Effects bin, open the crowd applause.aif clip.
This clip has only one audio track so there is only one waveform display. Also, a Mono tab appears because the source audio is mono. In the Timeline, only an a1 source track control appears.
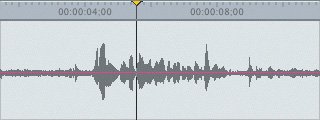
| 4. | Beneath the waveform, drag the Zoom control left to zoom in or expand the waveform display. Leave the display in an expanded view.
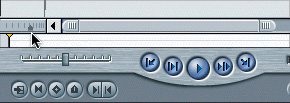 | | | 5. | Drag the Zoom slider to view a different portion of the waveform display.
The Zoom control and slider operate in the Audio tab just as they do in the Timeline.
| 6. | Drag the Zoom control to the left as far as possible to zoom in to the waveform. Then click in the scrubber-bar area to see the playhead.
When the clip's waveform is expanded, the stem of the playhead expands to indicate how much of the waveform equals a full video frame. In a fully expanded view, there is a wide black bar attached to the playhead stem to indicate the width of a single frame.
 | 7. | Press Shift-Z to bring the entire audio track of the clip into view.
| 8. | Drag the shuttle slider left and right. Drag the jog wheel left and right.
All the Viewer play keys and mark buttons are used in the same ways as in the Video tab.
|
Adjusting Audio Levels in the Viewer You can adjust audio levels in the Viewer by dragging the pink Volume Level line up or down, using the Level slider, or entering a dB value in the numerical entry box. You can also pan the channels of audio in a clip using the Pan or Spread slider beneath the Level slider. 1. | Open the name clip from the Recent Clips pop-up menu in the Viewer and select the Stereo tab.
| 2. | Move the pointer over one of the pink Volume Level lines in the waveform display area.
 Just as it did in the Timeline, the pointer changes to the up-down resize arrow to raise or lower the level.
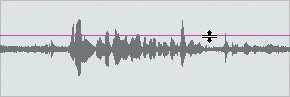
| 3. | Drag the Volume Level line up and down.
As you drag, the Level slider moves, and the numbers in the numerical entry box next to the Level control change to reflect the new adjustment. Also, the level lines in both tracks move in tandem because they are a stereo pair.
| 4. | Now click in the numerical entry box, type 6, and press Return.
 After you press Return, the Volume Level line adjusts to the new level.
| | | 5. | Drag the Level slider until the dB level is 0 (zero), and play the clip in the Viewer.
When you stop dragging the slider, the Volume Level lines in the waveform display adjust to reflect the change.
| 6. | Play the clip and watch the Audio Meters to see if the levels are within the correct range.
If you want to change the left and right channels of a stereo pair, you can adjust the Pan slider.
| 7. | Open the crowd applause.aif clip in the Viewer. Play the clip and listen for the sound.
The Pan slider should be set in the middle at 0. At this setting, you hear the sound equally distributed over both speakers.
| 8. | Drag the Pan slider to the far left and play the clip again. Then drag it to the far right and play it.
Adjusting the Pan slider places the sound of a mono track anywhere between the far left and far right, or 1 and 1. This can be used to control which speaker the sound plays through.
|
|