Section 14.3. Writing Custom Controls
14.3. Writing Custom ControlsThe Atlas Control Toolkit grows from release to release, but it also offers a framework for creating custom controls. If you find yourself using the same JavaScript effects over and over, making them available for reuse via Atlas is a good idea. In this section, you'll create an extender that restricts input into an HTML text box to a set of predefined charactersfunctionality that HTML does not offer. The Atlas Control Toolkit provides a project template for Visual Web Developer that facilitates this work. You start by installing the template, and then you change it and add the logic for the new extender. As you've probably noticed, the Atlas Control Toolkit comes as one DLL file that contains all of the controls. You will likewise need to compile code to create a custom control. Fortunately, the toolkit ships with a Visual Studio template that makes creating such extenders easy. In the AtlasControlExtender folder created by the Atlas Control Toolkit installer, you will find a VSI file (AtlasControlExtender.vsi) that installs a package you can use to implement custom extenders. To install the package, just double-click the VSI file. The package contains project templates for both C# and Visual Basic (see Figure 14-7). Figure 14-7. The Atlas control extender VSI installer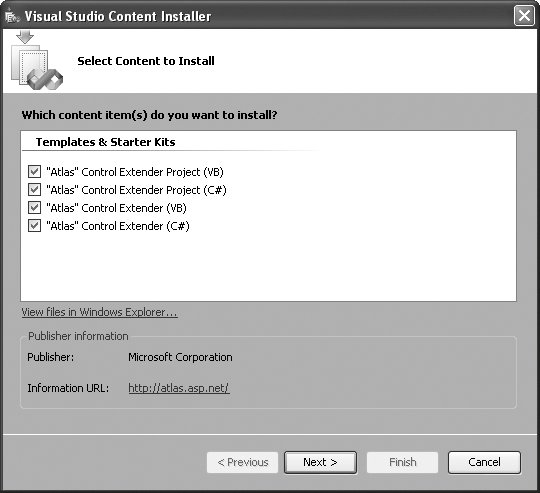
The VSI installer creates new project templates for C# and VB projects. You should add an Atlas control to your web site project so that you can develop the extender and use it on a web site within the same build environment. After loading an Atlas web site in Visual Studio, in the File menu, click Add, and then click New Project. Choose the new template, as shown in Figure 14-8. As the project name for this example, use TextBoxMask. Figure 14-8. The Atlas control extender project The new template creates a default project, using the project name (therefore, the TextBoxMask extender). It initially consists of four files:
Most of your work will go into two of these files; TextBoxMaskProperties.cs defines all of your custom control's properties, and TextBoxMaskBehavior.js is where all client-side JavaScript logic goes, the most important part of the extender. But first let's tweak the two other files for the example. The TextBoxMaskDesigner.cs file just contains an empty class. By default, it allows the extender to be used with any Control element on the page. In our specific example, however, only TextBox elements will be used with this extender. Therefore, change the Control reference to TextBox, so that it looks like the code from Example 14-2. Example 14-2. The Designer class
The TextBoxMaskExtender.cs file contains designer information about the extender. As you can see in Example 14-3, the code references the TextBoxMaskBehavior.js file and again Control is the assumed data type for elements used with this extender. As before, change Control to TextBox. Example 14-3. The Extender class
Next up is the TextBoxMaskProperties.cs file, which defines custom properties of the extender. Once again, change Control to TextBox in the following piece of code: public class TextBoxMaskProperties : TargetControlPropertiesBase<TextBox> { } By default, the template provides one property: MyProperty. Remove this class member and create a ValidChars string property instead with getter and setter methods. This property will later hold the valid characters that may be entered in the text field. For these getter and setter methods, use the helper functions GetPropertyStringValue() and SetPropertyStringValue() to access the property value. Also, use the DefaultProperty attribute to make ValidChars the default property for the extender. Example 14-4 contains the complete code. Example 14-4. The property class
One property that is available by default and does not have to be registered is TargetControlID, which references the control to which the extender is bound. Finally, you need to work on the JavaScript code that extends the functionality of the text boxes to which the control is bound. That code belongs in the file TextBoxMaskBehavior.js. Open the file and delete all MyProperty occurrences it contains (because we do not use this property), after which you can work on the actual logic. The template .js file contains some helpful comments with all the steps you have to take at the places where these steps are required. The first step is to define JavaScript variables for each property of the extender. The convention is to prefix each variable with the underscore (_) character and follow it with a lowercase letter: var _validChars; The next step covers the initialization code of the extender. This is the place where you attach JavaScript code to the control in question. In our example, we want a validation function to be executed when the user presses a particular key. If the key is an invalid one, the event must be cancelled so that the associated character does not appear in the text box. The event handler must be put in the initialize() method of the TextBoxMaskBehavior class (the template has already created both the class and the method).
We sniff the browser's capabilities ourselves to decide how to look for and handle a key press by a user. Internet Explorer calls the _onkeydown() method whenever the keydown event is raised for a text box. The implementation of the _onkeydown() method will be discussed in more detail later in this section. The code to attach the method to the event looks like this in Internet Explorer: this.control.element.attachEvent('onkeydown', Function.createDelegate(this, this._onkeydown)); For Mozilla browsers, we resort to a hack. First register the _onkeydown() method as a member of the text box control. Then add code to call this method as an anonymous function to the onkeydown event handler: this.control.element._onkeydown = this._onkeydown; this.control.element.onkeydown = function(e) { return this._onkeydown(e); }; Mozilla browsers automatically pass a parameter to the event handling function that identifies the current event. This parameter can be used to determine which key was pressed to trigger the event. The next step covers the descriptor of the extenderthe set of properties and events it supports. In the descriptor, you register all properties you defined for the extender in the TextBoxMaskProperties.cs file. (Use the C# property names, not the name of the associated JavaScript variable.) The code looks like this: this.getDescriptor = function() { var td = TextBoxMask.TextBoxMaskBehavior.callBaseMethod(this, 'getDescriptor'); td.addProperty('ValidChars', String); return td; } After that, you have to implement getters and setters for each property. This is a simple task you can do mostly with copy and paste. Just keep in mind that JavaScript is case-sensitive, therefore you have to maintain case for both the JavaScript variables and for the C# property names. this.get_ValidChars = function() { return _validChars; } this.set_ValidChars = function(value) { _validChars = value; } Note that the names that you use for these methods must follow the naming convention you see here. Finally, you must write the actual code for the extender. The following JavaScript code first determines which key has been pressed, depending on the browser type. Then the code looks for the key in the list of valid characters. If the key is not in that list, the method ends with return false, which cancels the key event, and the character does not show up in the text box. Otherwise, the method exits with return true and the key event is propagated. Note that the method also returns true when the key codes 8, 9, 16, 35, 36, 37, 38, 39, 40, 45, or 46 are detectedthese are the codes for the Backspace key, the Tab key, Shift, Home, End, the four arrow keys, insert, and delete. Another special case is the digits on the numeric keypad (key codes 96 through 105); the JavaScript method String.fromCharCode() does not convert these back to the associated digits. Therefore, any key code between 96 and 105 will be converted into the key code for the appropriate digit key on the regular keyboard. this._onkeydown = function(e) { var key = ""; if (window.Event) { key = e.keyCode; } else { key = window.event.keyCode; } if (key >= 96 && key <= 105) { key -= 48; } return (key == 8 || key == 9 || key == 16 || (key >= 35 && key <= 40) || key == 45 || key == 46 || _validChars.indexOf(String.fromCharCode(key)) != -1); } And that's it, JavaScript-wise. Example 14-5 contains the complete code for your extender. Example 14-5. The JavaScript code for the extender
Now let's build the project, which will create the TextBoxMask.dll file. Usually, the TextBoxMask extender automatically appears in the toolbox. However, you normally have to add this item to your web site project manually. To do this now, in Solution Explorer, right-click the name of your Atlas web site and choose Add Reference. In the Projects tab, load the TextBoxMask.dll assembly, which is then copied automatically to the Bin directory.
A reference to the .dll file is added to your web project. Whenever you recompile the custom control in Visual C# or Visual Basic, you need to update the reference in Visual Web Developer. To do so, in Solution Explorer, open the Bin folder. Right-click TextBoxMask.dll and then click Update Reference. If you have a page open that uses the control, you might have to close and reopen the page.
In the web site project, create a new ASP.NET page. Register a tag prefix for the extender at the top of your ASP.NET page by entering the following markup. <%@ Register Assembly="TextBoxMask" Namespace="TextBoxMask" TagPrefix="cc1"%> Finally, embed the TextBoxMask control on your page, and do not forget the ScriptManager control. Add a text box and then bind the extender to its text field. The code in Example 14-6 creates a text box that accepts only digits. This is a bit tricky to implement with pure JavaScript, so the TextBoxMask extender can really save you time and effort. Example 14-6. Using the custom extender
Figure 14-9 shows how the page looks in a browser. And although you cannot see what happens when you try to press a nondigit key (result: nothing), the screenshot does give you an idea of what this extender can be used for, namely allowing only certain content in a page. Figure 14-9. The text field now accepts only digits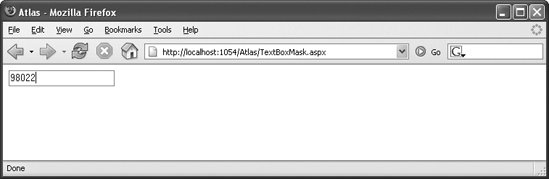 Additional features you could add to this extender (which implements a whitelist approach) include a blacklist mechanismall characters are allowed except those that you explicitly exclude. You could also implement an extender that enables you to specify a character mask, and have the extender validate the user data against the mask. Upcoming versions of the Atlas Control Toolkit will incorporate the extender in the toolkit itself. For your extender projects, the following changes will then be required: all occurrences of Microsoft.AtlasControlExtender must be replaced with AtlasControlToolkit; also, the reference to Microsft.AtlasControlExtender.dll is no longer necessary. |
