| The Adobe PDF file format provides a flexible way of sending your documents to others as comps, as soft and hard-copy proofs, and as final production files, all without the recipient's needing to have the source application and associated elements, such as fonts. The PDF file is essentially a proof of your document, albeit a very flexible one from a color management perspective. Much like a QuarkXPress or InDesign document, a PDF document can contain multiple objects, including images, vector artwork, and text, created in a page layout application. Each object in a PDF document can be in a different color space and can be tagged with a profile, as long as the file type of each embedded element supports profile embedding or tagging. In Adobe Acrobat Professional, the file can be soft proofed, printed to a hard-copy proof, or separated for press via Adobe's Common Color Architecture controls in much the same way as it can in Photoshop. Once you know how to create a color-managed PDF file, you can send it to clients, prepress providers, and printers with the assurance that the color in your document will be accurate. There are three basic ways to create a PDF file from a document: Print to PDF. Using the Adobe PDF Writer, which is part of Acrobat Professional, you can create a PDF file from virtually any file by printing it to a PDF. This option provides a good way to create PDF files from business documents such as Microsoft Word files, but because it lacks the advanced controls required for printing complex color documents such as page layouts, it isn't covered in this book. Save as or export to PDF. Applications such as Adobe Photoshop and Illustrator let you save individual images and vector artwork as PDF files. InDesign and QuarkXPress let you convert documents with multiple elements to PDF by using a Save or Export command. Convert to PDF using Acrobat Distiller. This option uses the application's color management facilities in the same way as when printing a document, except that the document is output to a file rather than a printer. Acrobat Distiller then converts the file to PDF, including embedded profiles for each element on the page. This is the best option for converting complex documents to PDF in a color-managed workflow.
Generating PDF Files Using the Save As Command Within Photoshop and Illustrator, you can use the Save As command to create PDF files that include embedded profiles. In the next exercise, you'll see how to do it in Photoshop, but keep in mind that the process is similar in Illustrator. Before you begin, make sure you have already configured Photoshop's color settings (see Chapter 5). 1. | Launch Adobe Photoshop CS2.
Note  | If you have set Photoshop's RGB working space to a profile other than Adobe RGB (1998), the Photoshop Embedded Profile Mismatch dialog box will appear when you open the file. If it does, select the Convert Document's Colors to the Working Space option and click OK. |
| 2. | Choose File > Open and then navigate to and open the file Ben at Park.jpg, located in Windows XP Color Management Project Files > Chapter 9.
Photoshop can save RGB, indexed color, CMYK, grayscale, bitmap-mode, Lab color, and duotone images in PDF. Our Ben at Park.jpg file is an RGB image, so there's no problem.
| 3. | Choose File > Save As. In the Save As dialog box, select Photoshop PDF (*.PDF, *.PDP) from the Save menu.
Figure 9.14. 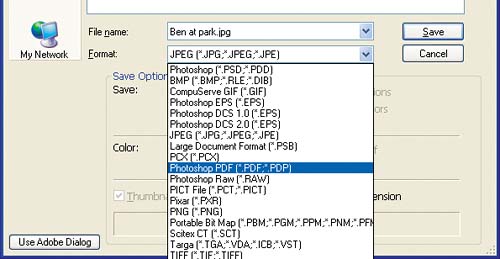
The Photoshop PDF format can contain only a single image the image being saved. A second PDF format supported by other applications, Generic PDF, can contain multiple pages and images.
| 4. | Make sure the ICC Profile check box is selected. This setting instructs Photoshop to embed the document working-space profile in this case, Adobe RGB (1998) in the PDF file.
Figure 9.15. 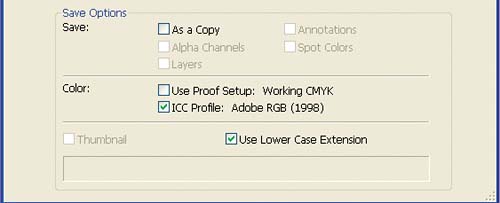
| 5. | Leave the Use Proof Setup check box deselected.
Selecting this check box instructs Photoshop to convert the image from its working space to the profile selected in the proof setup in this case, U.S. Web Coated (SWOP) v2 before saving the image as a PDF file. This option is useful only when you want to send the image to someone for the purpose of proofing it to the selected output device.
| 6. | Click Save.
Photoshop displays a warning, indicating that the settings in the Save Adobe PDF dialog box (which appears as soon as you click OK in the warning box) can override the settings in the Save As dialog box. However, none of the selections that we have made will be overridden in the following steps.
Figure 9.16. 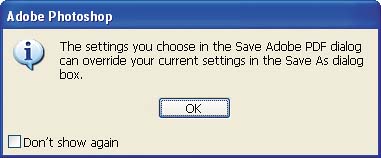
| 7. | Click OK.
The Save Adobe PDF dialog box appears.
Figure 9.17. 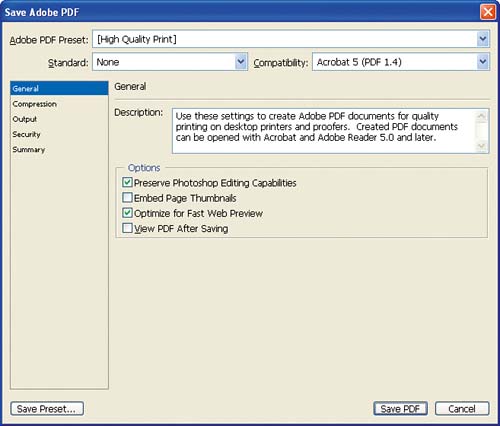
The Save Adobe PDF dialog box has three main sections. The first section contains drop-down menus for selecting preset settings to create PDFs and designate which PDF version you want to use. For the purposes of this exercise, we'll leave these set to the default settings. If you use the Photoshop PDF format to share images with colleagues or clients, you may want to save your settings as a preset, so that you don't have to make setting selections each time you save an image.
The second section, located on the left, contains a list of settings categories, which we'll configure in the next few steps. Selecting a category changes the contents of the third area, the General section, located on the right.
| 8. | Select Compression from the category box on the left.
Figure 9.18. 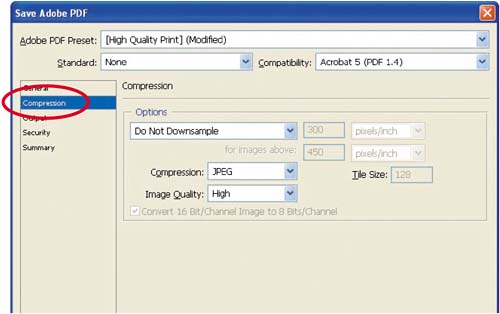
Compression options let you instruct Acrobat to compress or not compress the image, and if you do choose compression, specify how much compression you want. For the purposes of this exercise, we'll choose not to compress the image; however, if you are sending images in PDF format via e-mail, I recommend compressing them.
| 9. | Select Output from the category box on the left.
Figure 9.19. 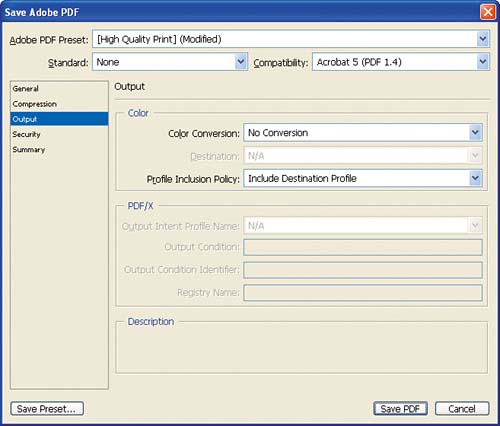
The Output options let you set color management functions used in creating the PDF. We'll do that next.
| 10. | The Color Conversion drop-down menu, located in the Color section, is where you instruct Photoshop to convert the image to a destination profile or leave it in its source color space (Adobe RGB, in our case). If you want Photoshop to convert the file to PDF without changing the color space, select No Conversion. If you want the resulting PDF file to be in a different color space, such as a printer color space or sRGB for Web viewing, select Convert to Destination. If you select Convert to Destination, you must also select the appropriate profile in the Destination drop-down menu.
Figure 9.20. 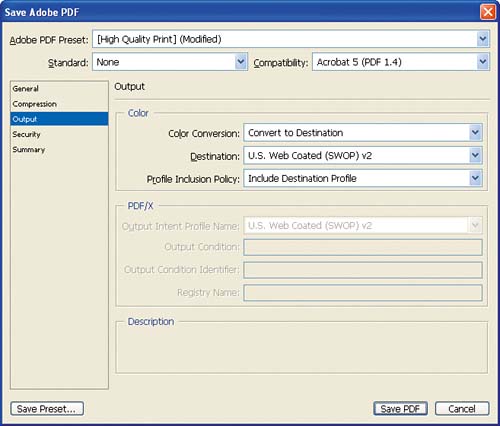
| 11. | The Profile Inclusion Policy drop-down menu, also located in the Color section, is where you instruct Photoshop to embed or not embed an ICC profile, either for the source space or the destination space, if you've selected Convert to Destination. Select Include Destination Profile.
I can't think of a good reason not to embed the profile in the resulting PDF. Without an embedded profile, the application used to view the PDF won't be able to accurately display the image, which is like trying to understand a foreign language without using a translation dictionary.
| 12. | Leave the remaining Output options at their default settings.
| 13. | Click the Save PDF button to save the image as a PDF file.
When the image is opened in Acrobat, the embedded profile, Adobe RGB (1998) in this case, will be used as the source and color managed for the display using the display profile as the destination.
| 14. | Close the image and quit Photoshop.
|
Creating PDF Files from QuarkXPress Documents QuarkXPress provides two ways to produce color-managed PDF files. The first is to use QuarkXPress's built-in PDF engine to convert the documents to PDF. This option is similar to saving the document as PDF, and it is easy and effective. The second method is to convert the document to a PostScript file, which will be converted to PDF by Acrobat Distiller. This method provides finer control over the conversion process, but requires you use Acrobat Distiller. Both methods provide similar control over color management in the process of converting to PDF. Let's first use the PDF engine in QuarkXPress to convert documents to PDF: 1. | Launch QuarkXPress.
| 2. | Choose File > Open and then navigate to and open the file Sample Quark File Finished.qxd, located in Windows XP Color Management Project Files > Chapter 9.
| 3. | Choose QuarkXPress > Preferences. The Preferences dialog box appears.
Figure 9.21. 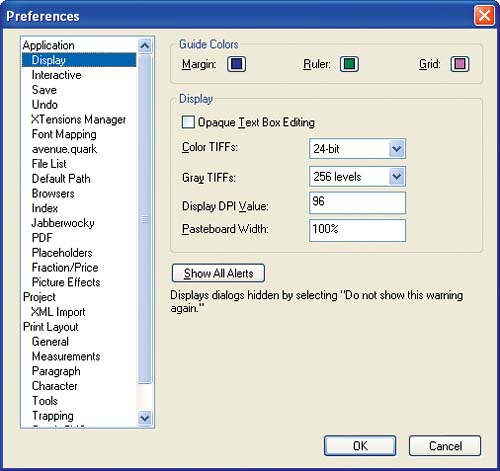
| 4. | In the list of Application options on the left, click PDF.
Figure 9.22. 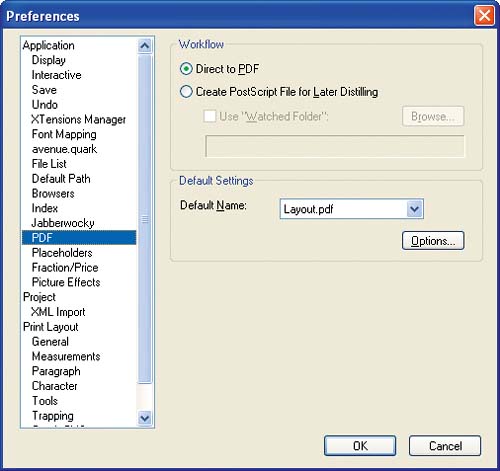
QuarkXPress provides two conversion options: Direct to PDF instructs QuarkXPress to convert the document directly to PDF using its built-in conversion option. Create PostScript File for Later Distilling instructs QuarkXPress to create a PostScript file from the document, which will be converted to PDF using Acrobat Distiller (we'll use Distiller later in this chapter).
| 5. | Select Direct to PDF and click OK to close the Preferences dialog box.
| 6. | Choose File > Export > Layout as PDF.
Figure 9.23. 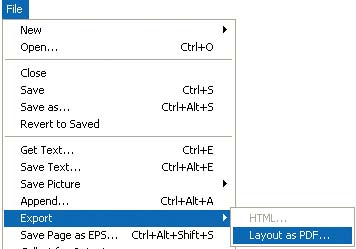
| 7. | In the Export as PDF dialog box that appears, click the Options button.
Figure 9.24. 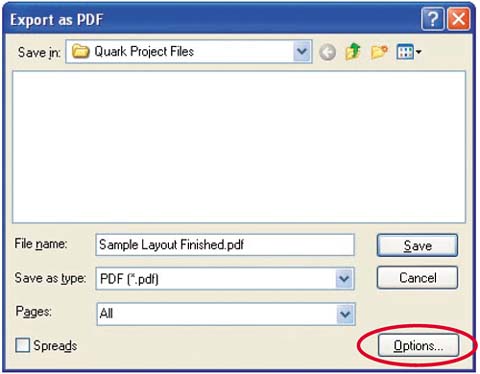
| 8. | In the PDF Export Options dialog box that appears, click the Output tab.
Figure 9.25. 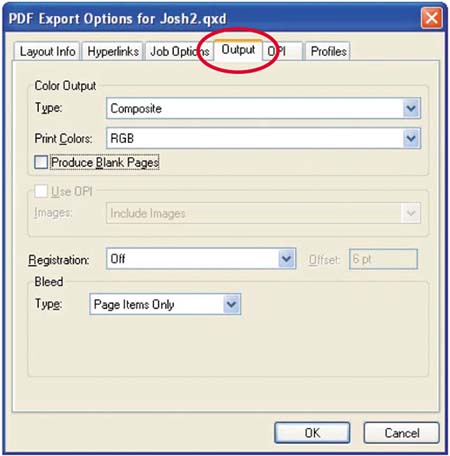
The PDF Export Output Options tab includes controls for converting color data in QuarkXPress documents to PDF.
| 9. | In the Color Output area, choose Composite from the Type drop-down menu.
Figure 9.26. 
This setting tells QuarkXPress to create a composite PDF document instead of a separated file with individual grayscale pages for each press plate.
Each time color data is converted between device profiles and color spaces, some data is lost. Therefore, you should convert data as few times as possible. The preferred workflow is to create a composite PDF file from your QuarkXPress document and separate it for press in Acrobat. This way you use the same file for both the composite proof and the color separations for press, and the color data is converted only once at output.
| 10. | From the Print Colors drop-down menu, choose the appropriate color space for your document. In the example, it's RGB.
Figure 9.27. 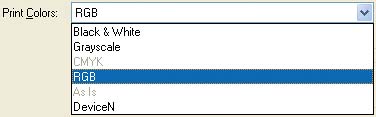
Choosing RGB instructs QuarkXPress to convert all the elements in the document from their native color spaces including RGB color spaces to the specific gamut of the RGB profile selected on the Profiles tab.
If you're working in a CMYK document, choosing CMYK instructs QuarkXPress to convert all the elements from their native color spaces to CMYK using the CMYK profile selected in the Profiles tab. Documents already in CMYK will be converted from their native color spaces to the CMYK profile selected on the Profiles tab.
If you have a mixture of RGB and CMYK elements, consider selecting RGB as the document color mode. When you convert color data from RGB to CMYK, color data is lost. If you intend to output to more than one device or to an RGB printer, it is better to leave RGB objects in RGB when the PDF file is created.
These are the other options on the Print Colors menu:
Black & White, which instructs QuarkXPress to convert all elements to black and white (1-bit color). Most monochrome printers include internal algorithms for converting color data to black and white, and these are likely to produce better results for that particular device than this option. Grayscale, which instructs QuarkXPress to convert all elements to grayscale (8-bit color). Most monochrome printers include internal algorithms for converting color data to grayscale, and these are likely to produce better results for that particular device than this option. As Is, which leaves the color data alone during the PDF conversion process. This option also strips out any embedded or tagged profiles. If you want to convert a document to PDF without any color management or conversion, select this option (you must disable the Quark CMS XTension to use this option). DeviceN, which uses the separations profile selected on the Profiles tab to produce files for in-RIP separations and for multi-ink separations such as hexachrome.
| 11. | Click the Profiles tab.
Figure 9.28. 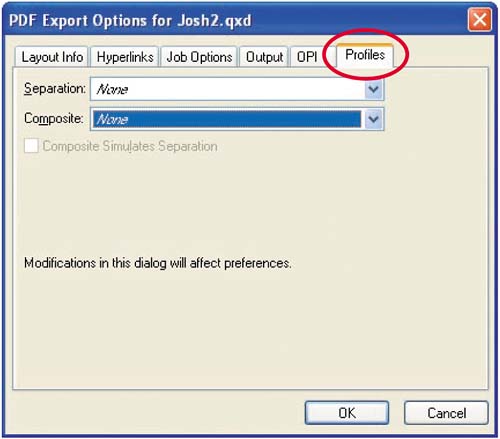
The PDF Export Options Profiles tab lets you specify the profiles used when the document is converted to PDF. The options are similar to those on the Profiles tab of QuarkXPress's Print dialog box: There are Separation and Composite drop-down menus and a Composite Simulates Separation check box.
| 12. | Leave the Separation and Composite drop-down menus set to None.
The Separation drop-down menu determines the profile used when the QuarkXPress document is converted to PDF as a single file with one grayscale page for each press color. The Composite drop-down menu determines the profile used when the QuarkXPress document is converted to PDF as a single, composite file.
QuarkXPress will convert everything on the page from its source color space to the destination space (or spaces, if you select Composite Simulates Separation), except for EPS and PDF files. QuarkXPress does not color manage these file types.
Note | EPS and PDF files should be created using color management to ensure that they contain embedded profiles. |
By selecting None, you're telling QuarkXPress to leave everything in its source or tagged space unless it's in a different color space than the option selected on the Output tab. For example, on the Output tab, if you select RGB as Print Colors, the Tulips.tif and Leaves_untagged.jpg files will be left in their respective color spaces during the PDF conversion process.
However, if you select CMYK as Print Colors, the Tulips.tif and Leaves_untagged.jpg files will be converted to the CMYK color space during the PDF conversion process. Unfortunately, this conversion is done using an internal QuarkXPress process and does not use Quark CMS or ICC profiles.
The best approach is to use images that are all in the same color space and to select that as the color mode of the document. EPS files will be passed through without conversion; color elements created in QuarkXPress can be tagged with a working-space profile in the same color mode as the document. Using the Sample Quark File Finished.qxd as an example, select RGB for the document color mode and leave the Separation and Composite profile options set to None. The following will happen:
The Tulips.tif image is tagged with Adobe RGB (1998) and will be converted to PDF with the embedded profile preserved. The Leaves_untagged.jpg image has been tagged within QuarkXPress with Adobe RGB (1998) and will be converted to PDF with the tagged profile preserved. If it were not tagged, the default RGB working-space profile selected in the Quark CMS preferences would be applied. We set this image to Adobe RGB (1998) in the previous chapter. The Logo.eps file would be passed through untouched, and its embedded profile (a CMYK profile) would be preserved. The red and green colors selected in the text boxes will be tagged with the RGB working-space profile, which will be preserved during the conversion.
The benefits of keeping as much color data in the same working space are consistency between applications and fewer color transformations.
Note | With None selected, the Composite Simulates Separation check box is unchecked and unavailable. However, when Composite Simulates Separation is selected, the color data in the resulting PDF file is converted to simulate the separation device on the composite device. |
| 13. | Click OK to close the PDF Export Options dialog box.
| 14. | Click Save to convert the file to PDF.
|
Creating PostScript Files for Use with Acrobat Distiller The following method is useful if you have existing PDF conversion workflows or settings for Acrobat Distiller. It provides finer control over the conversion process. 1. | With QuarkXPress still open from the previous exercise, choose QuarkXPress > Preferences and click PDF in the list of options on the left.
Figure 9.29. 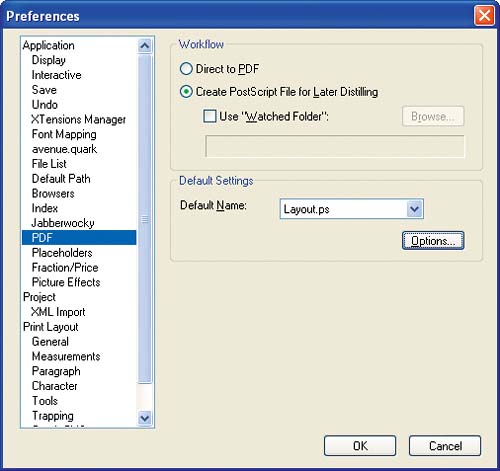
Click the Create PostScript File for Later Distilling radio button and then click OK to close QuarkXPress's Preferences dialog box.
| 2. | Repeat Steps 6 through 12 of the previous exercise. When you save the file, you will be saving a PostScript file, which we'll convert to PDF in the next exercise.
| 3. | Quit QuarkXPress.
|
Generating PDFs Files Using Acrobat Distiller Acrobat Distiller, which is a component of Adobe Acrobat Professional, provides advanced controls and greater workflow flexibility in the conversion of documents to PDF. To use Distiller, you first print your document from its originating application, such as QuarkXPress, to a PostScript or EPS file rather than to an output device. If the application supports color management if it tags the file and its components with embedded profiles Distiller will include those tags in the resulting PDF file just as if you'd printed it with color management to an actual printer. How color data is converted from the source document to the PDF document depends on how the color management preferences are set in Distiller. Distiller uses the same Color Settings file as the rest of the Adobe Creative Suite, but you configure the preferences a bit differently. In this exercise, we'll apply the Color Settings file we created in Photoshop to Distiller's Acrobat PDF settings, and then we'll create a PDF file of the QuarkXPress document that we printed to PostScript in the previous exercise. 1. | Launch Acrobat Distiller. The Acrobat Distiller window appears.
Figure 9.30. 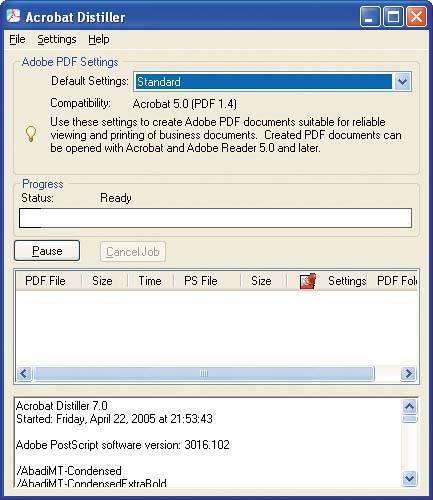
| 2. | Click the drop-down arrow beside Default Settings.
Figure 9.31. 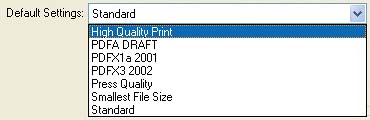
Acrobat Distiller uses a PDF settings file to determine how the conversion is made. Settings specify, for example, whether and how fonts are embedded, whether and how images are compressed, and whether and how color management is applied. Distiller ships with seven preset default settings, which range from Smallest File Size (suitable for PDF files destined for the Web) to PDFX1a and PDFX3, which are ISO standards for compliance with specific prepress characteristics, including support for ICC profiles. Let's look at how the High Quality Print PDF setting handles color management.
| 3. | Choose High Quality Print from the Default Settings menu.
| 4. | From the main menu, choose Settings > Edit Adobe PDF Settings.
| 5. | In the Standard Adobe PDF Settings dialog box that appears, select the Color folder from the Standard folders on the left.
Figure 9.32. 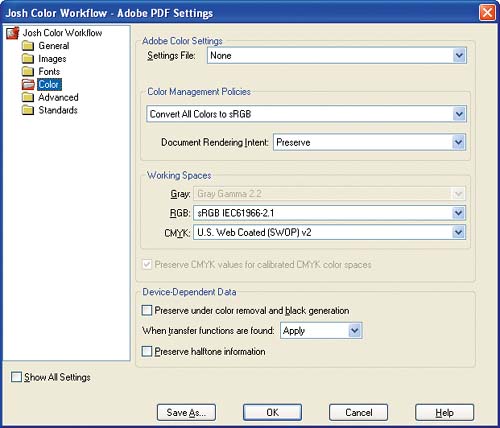
The Color panel of the Adobe PDF Settings dialog box contains settings similar to those in the Color Settings dialog boxes in Photoshop, Illustrator, and InDesign CS.
| 6. | From the Settings File drop-down menu, choose the color settings file that you created in Photoshop in Chapter 5, which you've also chosen in Illustrator and InDesign.
Figure 9.33. 
The Adobe color settings are updated to reflect these new preferences.
Figure 9.34. 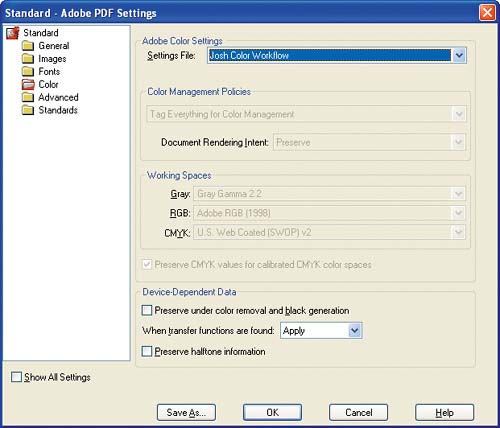
By using the same color settings file across all Adobe Creative Suite applications, you ensure that color management is handled consistently among them.
Notice that when you choose a color settings file, the options within the Color Management Policies and Working Spaces sections are dimmed. You cannot change these options in Distiller. If you want to create custom Adobe color settings, you need to choose None from the Settings File drop-down menu.
Note | Custom policies created by choosing None cannot be saved for use in other Creative Suite applications. Use this option only when you need to convert a particular file using a unique setting. |
Although Distiller's color settings policies are similar to those in other Adobe applications, they function slightly differently.
These are the four Color Management Policies options:
Leave Color Unchanged does not change the color values during the conversion process and does not embed profiles in the PDF file. This setting can be used in a tightly calibrated closed-loop environment where color is managed "by the numbers." Tag Everything for Color Management tags all objects with working-space profiles unless they contain embedded profiles. These profiles are used as the source color spaces when the PDF file is proofed or printed. No color conversion is performed during the PDF file creation. This is the ideal option if you want to create a PDF file that can be used as a comp, soft proof, or proof, or to generate separations (which we'll cover later in this chapter), and it was chosen in my custom photo workflow. Tag Only Images for Color Management works the same as Tag Everything, except that only images are tagged. All other elements are untagged. Convert All Colors to sRGB converts all color values to the sRGB space using embedded and working-space profiles as the source of the data. Although sRGB is a device-independent color space, it is not large enough to be useful for printing. This option is useful when the PDF file will be used on the Web. Convert All Colors to CMYK converts all color values to the CMYK space using embedded and working-space profiles as the source of the data. This option is useful when the PDF file will be sent to a commercial printer for printing.
The Document Rendering Intent option determines how out-of-gamut colors will be mapped during the PDF conversion process. This option can be overridden by the selection of a rendering intent in the Print dialog box of an application.
The Gray, RGB, and CMYK Working Spaces selections are the profiles that will be used when an object lacks an embedded profile. Using the same color settings file across all Adobe applications ensures that all untagged data is consistently tagged with working-space profiles.
| 7. | In the Device Dependent Data area, use the default settings. These options, which we didn't see in Photoshop, Illustrator, or InDesign, determine how data that is already in the color space of a particular device is converted. They do not apply to objects tagged with ICC profiles, but they do apply to EPS files.
| 8. | Click the Save As button. Acrobat Distiller displays the Save Adobe PDF Settings As dialog box to prompt you to save your settings.
Figure 9.35. 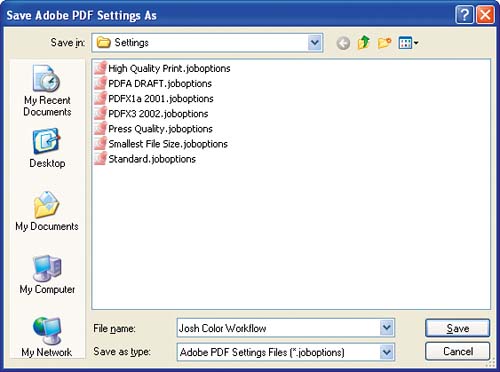
| 9. | Name your new Adobe PDF settings file and save it in the default location.
Figure 9.36. 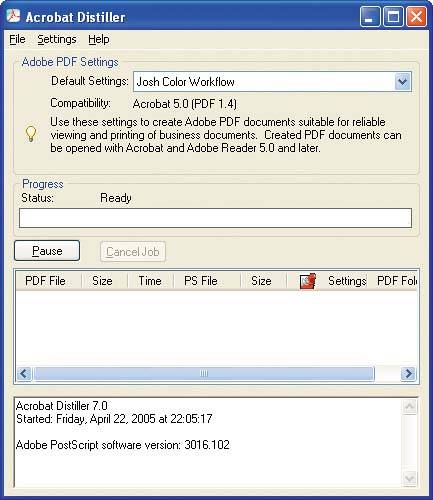
Congratulations! You now have a custom Adobe PDF settings configuration that applies color management to your Distilled Adobe PDF files in a manner consistent with other Adobe Creative Suite applications. The new settings are chosen in Distiller's Default Settings menu and will be used to create your next PDF file. Now we're ready to distill a PDF file from the QuarkXPress file we printed to PostScript in the previous exercise.
Tip  | If you also create lower-quality PDF files, such as for use on the Web, customize the PDF color settings in Distiller. For the Web, you may want to use sRGB rather than Adobe RGB (1998) as the RGB working-space profile. |
| 10. | Choose File > Open.
| 11. | Navigate to the Sample Quark File Finished.ps file we created earlier in this chapter when we printed the sample Quark document to a file and click Open.
Acrobat Distiller processes the file. The resulting PDF file is saved in the same directory as the source file.
| 12. | Quit Acrobat Distiller.
|
|