You can use Acrobat Professional to view, soft proof, print, and separate PDF files in much the same way you performed similar color management functions in Photoshop.
Acrobat Professional uses the Windows XP display properties to determine the display profile. When a PDF file is opened, Acrobat Professional automatically color manages the PDF to the display, using the embedded profiles as the source color space and the display profile as the destination. Let's see how to use Acrobat Professional to soft proof our QuarkXPress PDF file.
1. | Launch Acrobat Professional.
|
2. | Choose File > Open and navigate to the Sample Quark File Finished.pdf document that we created earlier in this chapter. Click Open.
|
3. | Choose Advanced > Output Preview. The Output Preview dialog box appears.
Figure 9.37. 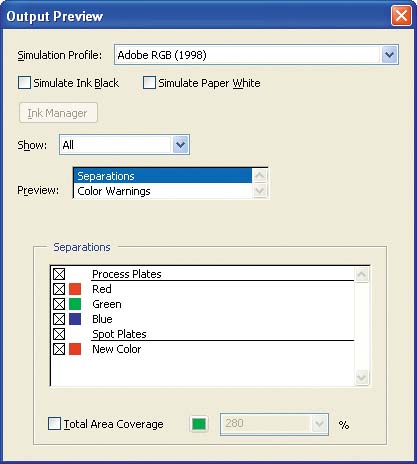
|
4. | From the Simulation Profile drop-down menu, choose the profile for the output device that you wish to soft proof. For example, I selected U.S. Web Coated (SWOP) v2 to simulate the document on press.
Each time you select a new profile, Acrobat Professional updates the soft proof in real time.
|
5. | If the Simulate Paper White option is available, select it. Selecting this option automatically selects the Ink Black option. These options are not available with all profiles.
|
6. | Two additional options are available in the Output Preview dialog box should you need them. You can use the Show menu to select different types of objects on the page, such as all RGB objects and display only those items. Use the Preview options to view individual press plates, by selecting Separations, or to view color warnings.
|
7. | Toggle the soft proof off and on by opening and closing the Output Preview dialog box to see the differences.
Now that you've viewed a soft proof in Acrobat, let's print a hard-copy proof.
|
8. | Choose File > Print.
|
9. | In the Acrobat Print dialog box that appears, choose your printer from the Printer drop-down menu and then click the Advanced button.
Figure 9.38. 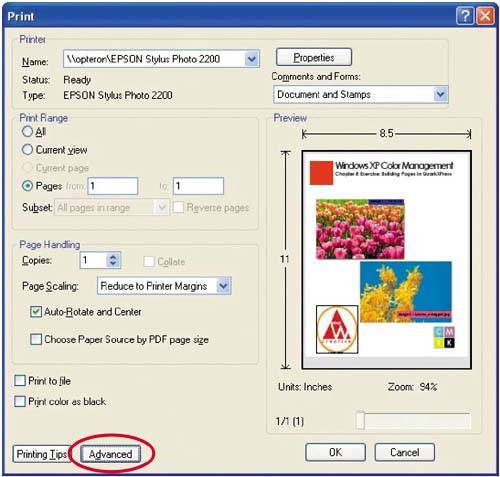
The Advanced Print Setup dialog box appears.
Figure 9.39. 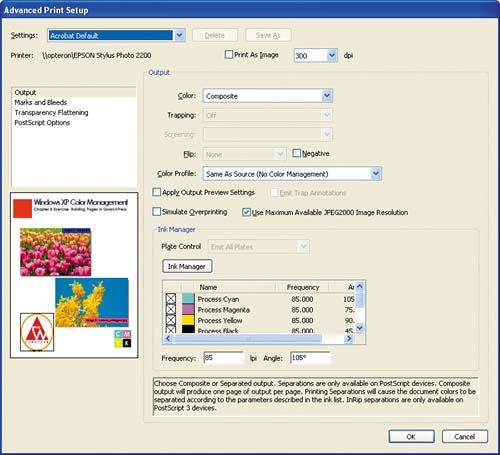
The Advanced Print Setup dialog box is where you control how Acrobat Professional applies color management to the PDF file at print time.
|
10. | Click the drop-down arrow beside the Color menu.
Figure 9.40. 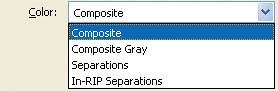
There are four Color options, which control the type of color conversion Acrobat Professional applies during print time:
Composite instructs Acrobat Professional to print the document as a composite file. Composite Gray instructs Acrobat Professional to print the document as a composite grayscale file. Separations instructs Acrobat Professional to separate the document into the color space selected in Acrobat Professional's Color Settings dialog box, which is U.S. Web Coated (SWOP) v2 in our example, and to produce one grayscale page for each color. This option is available only for PostScript and PostScript-compatible devices. In-RIP Separations sends a composite file to the output device (presumably an imagesetter, platesetter, or digital press) with instructions on how to separate the colors. This option is available only for PostScript 3 and PostScript 3 compatible devices.
|
11. | If you are printing to a desktop printer or composite proofer, such as my Epson Photo Stylus 2200, select Composite. If you are making separations, select the appropriate option for your output workflow.
|
12. | Choose a profile for your output device from the Printer Profile drop-down menu. For example, I chose the custom profile for my Epson that I created in Chapter 3.
Figure 9.41. 
All color data will be converted from its source color space to the output profile color space during printing. If you were creating separations, you would select the appropriate printing-process profile, such as U.S. Web Coated (SWOP) v2.
You may notice that there are two non-device-specific options that appear in the Printer Profile drop-down menu: Same as Source (No Color Management) and Printer/PostScript Color Management.
Same as Source (No Color Management) instructs Acrobat Professional to send the file to the printer without color management. Embedded profiles are not used; the color values in the file are sent to the printer without conversion.
Printer/PostScript Color Management instructs Acrobat Professional to convert embedded and output ICC profiles into PostScript color-management commands. These are embedded in the data sent to a PostScript printer. When the printer interprets the file, the commands instruct it to apply color management in the printer. This option applies only to PostScript printers.
|
13. | If you want to simulate the output of one device on another, check the Apply Output Preview Settings box.
Figure 9.42. 
When Apply Proof Settings is checked, Acrobat Professional will use the output profile selected in the proof setup as the device to be simulated, and the output profile selected in the Printer Profile drop-down menu as the output device on which the file will be printed. I don't want to simulate the proof settings, so I'm leaving this box unchecked.
|
14. | Click OK to close the Advanced Print Setup dialog box and return to the main Acrobat Print dialog box.
|
15. | In the Print dialog box that appears, choose your printer from the Name drop-down menu.
Figure 9.43. 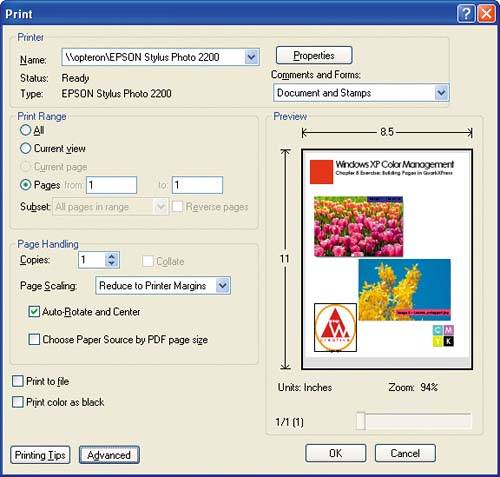
|
16. | Click the Properties button to locate your printer's properties and then choose the correct paper for your device. Be sure to select the same resolution (and other related settings) as were used in creating the profile.
Figure 9.44 shows the Epson Properties menu, with Premium Luster Photo Paper chosen as the paper type.
Figure 9.44. 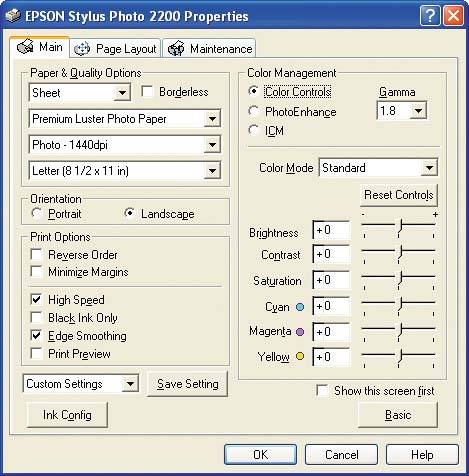
|
17. | Locate your printer's color management options and turn them off. The location of these options varies with each printer; look for them under a heading such as Custom, Advanced, or Color Management.
Figure 9.45 shows the Color Management option for the Epson Stylus Photo 2200 printer driver, with No Color Adjustment selected.
Figure 9.45. 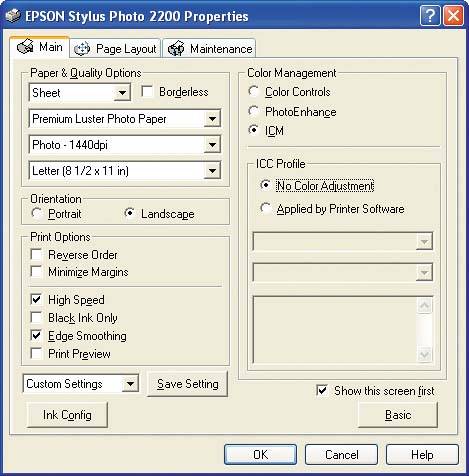
Note  | Adobe Acrobat Reader does not support color management. |
|
18. | Click OK to close the Properties dialog box and then click Print to start printing.
|