| Applications often rely on the color management system within the operating system to identify the default color profile to use for a particular device. So that ICM can provide this instruction to an application, you need to first set the device-profile preferences for the operating system. Assigning the Default Profile for a Display Your display is where you spend most of your time viewing color. Let's begin setting up color profile preferences by assigning a default profile for your display. 1. | Choose Start > Control Panel > Display. The Display Properties window appears.
| 2. | Click the Settings tab.
This is where you assign a profile for your display. ICM2 supports the automatic assignment of a profile when a device, such as a display, is connected to the PC if the device manufacturer provides a default profile along with the device driver.
Figure 2.1. 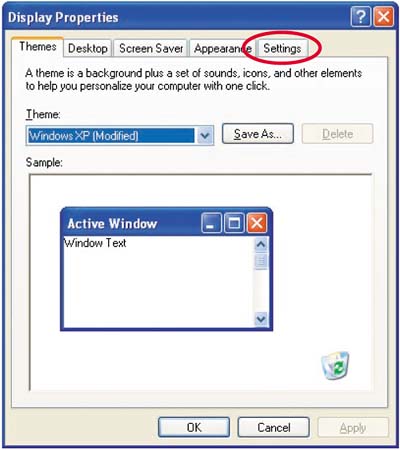
| 3. | On the Settings tab, click the Advanced button.
Figure 2.2. 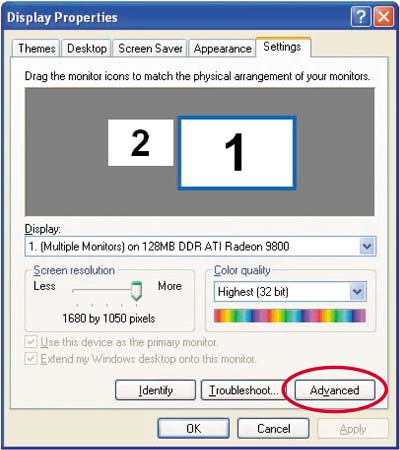
| 4. | Click the Color Management tab.
Figure 2.3. 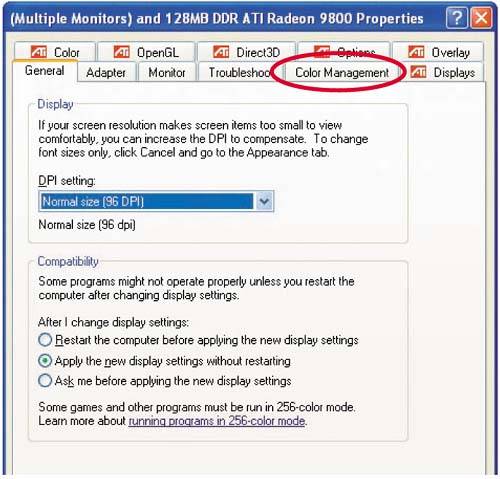
The Color Management dialog box lets you select a profile for your display. However, in many cases, such as when you use a display calibrator, a default monitor profile may already be set.
| 5. | Click the Add button to select an ICC-compliant profile for your display.
Figure 2.4. 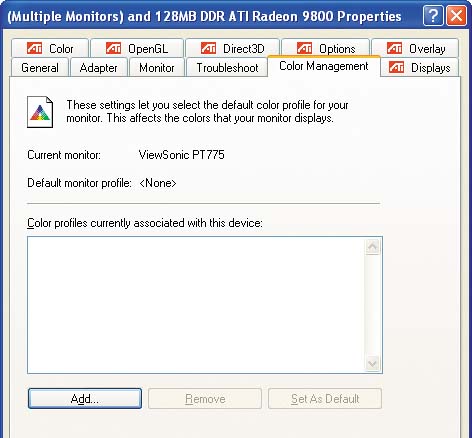
Most, if not all, of the profile-creation tools on the market support the ICC profile format, as it's the most broadly supported format.
Note  | Profile creation is covered in Chapter 4. |
| 6. | In the Add Profile Association dialog box, select the profile for your display. In this example, I have selected Josh_display_3-1-05.icc, a profile that I created for my monitor. Select the appropriate profile for your monitor and click the Add button.
Figure 2.5. 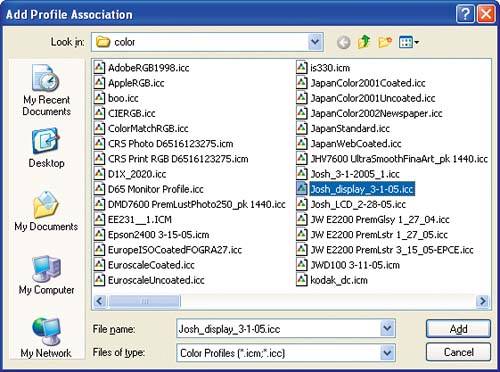
The Color Management properties page is updated with the profile selection.
Figure 2.6. 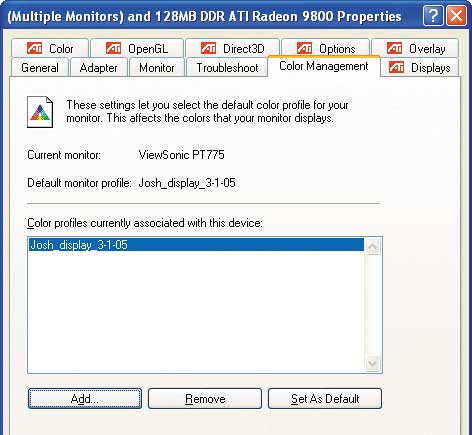
Note | Windows XP does not support selection of profiles for each display on multiple computers with multiple displays. The profile selected for the primary display is the default color profile for all displays. |
Applications, including Adobe Photoshop, will use the default color profile selected in this dialog box when applying color management for your primary display.
| 7. | Click OK to close the Display Properties dialog box.
|
Assigning the Default Profile for a Printer Now that we've assigned a profile to your display, we'll perform the same setup for your color printer. This process is slightly different than the one we used in the previous exercise in that it presents more options. 1. | Choose Start > Control Panel > Printers and Faxes to display a list of printers on your system.
Figure 2.7. 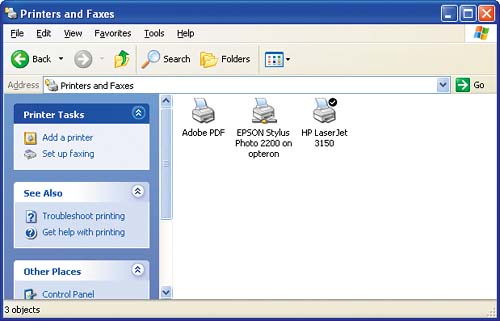
| 2. | Right-click the icon for the printer you use to print color images and documents, and from the pop-up menu that appears, select Properties.
Figure 2.8. 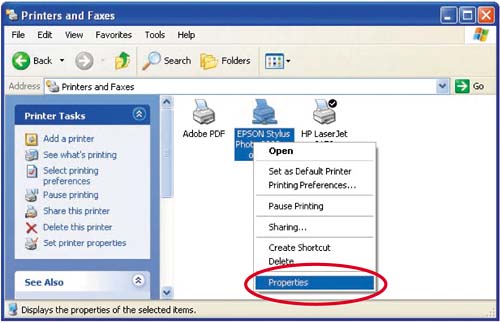
| 3. | In the designated printer's Properties dialog box, click the Color Management tab.
Figure 2.9. 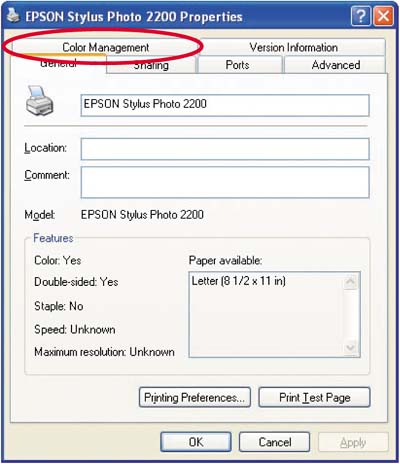
The Color Management tab of the printer's Properties dialog box works much the same as the Display Properties dialog box, with a few exceptions:
Sometimes, as in the case of my Epson Stylus Photo 2200,several profiles will have been installed for different ink and paper types. You can also select additional profiles for a printer in the same manner that you added a profile for your monitor in the previous exercise. You can have Windows automatically choose the profile to use when printing, or you can select it manually. Whichever method you use, the setting will be used by applications that use ICM 2.0 when printing, such as Microsoft's Digital Image Pro.I recommend choosing Automatic so that a profile will be selected automatically (when the supporting application uses ICM2 to print). Applications that integrate their own color management, such as Adobe Photoshop, will ignore this setting.
| 4. | If you want Windows to automatically choose the profile for you, leave the Automatic radio button selected. To manually select a profile, select the Manual radio button and then choose a profile to be the default profile for your printer.
Figure 2.10. 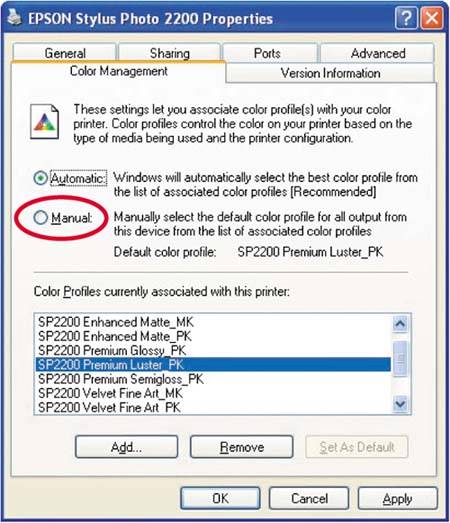
| 5. | Once you have selected the default profile, click the Set As Default button to instruct Windows to use the selected profile as the default.
Figure 2.11. 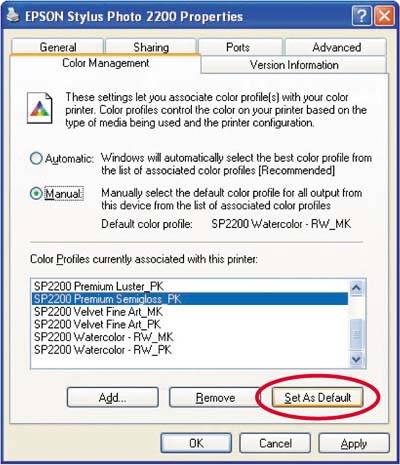
| 6. | Click OK to close the dialog box.
|
Adding ICC Profiles to the Default Windows Directory By default, Windows XP stores color profiles in the C:\windows\system32\spool\drivers\color directory. While many applications look in this directory for profiles, others often store them in their own directories. The advantage of having the profiles in the default Windows XP directory is that a profile in this directory is available to all applications that check for profiles in that location. Profiles stored in application-specific directories will likely not be available to most other applications. You can add any ICC profile to this directory simply by right-clicking it and selecting Install Profile. (Windows XP recognizes profiles with the .ICM and .ICC extensions.)
Figure 2.12. 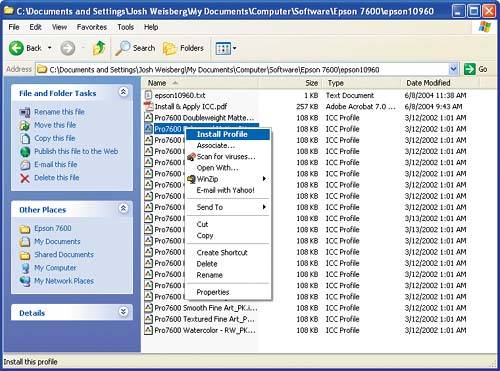
The profile is then copied to the C:\windows\system32\spool\drivers\color directory. The settings we have just covered control the device profiles that Windows XP uses in your workflow. You normally will set these only once, unless you're adding devices to your system. |