Chapter 11. Creating Interactive SVG Graphics
| CONTENTS |
In this chapter:
- Defining Interactive
- SVG Events
- Sample SVG Images and Components Using Interactivity
- Zooming, Panning and Scrolling SVG Images
Defining Interactive
SVG graphics can be interactive, where they respond to a variety of user-initiated events, such as clicking a mouse button, moving the mouse over a particular part of an image, or zooming and panning an SVG image.
You can create interactivity on an SVG image by using events, such as a mouse click, to initiate SVG declarative animation or to initiate scripts. This chapter demonstrates the use of declarative SVG to create interactivity based on the SVG events that are accessible to declarative syntax.
One specific type of interactivity, linking to other pages, was described in Chapter 5, "Creating Navigation Bars," in connection with the use of the SVG <a> element in navigation bars.
SVG Events
SVG provides an extensive range of events, which are listed in Chapter 16 of the SVG specification at http://www.w3.org/TR/SVG/. The most useful events are the click, mouseover, and mouseout events. You can also use the mousedown and mouseup events, but I find that I rarely use them.
Listing 11.1 shows the syntax for using a click event to begin an animation that uses a <set> element.
Listing 11.1 (BasicEvents01.svg)
<?xml version="1.0" standalone="no"?> <!DOCTYPE svg PUBLIC "-//W3C//DTD SVG 1.0//EN" "http://www.w3.org/TR/2001/PR-SVG-20010719/ DTD/svg10.dtd"> <svg> <defs> <linearGradient id="MyGreenGradient"> <stop offset="5%" style="stop-color:#006600"/> <stop offset="95%" style="stop-color:#99FFCC"/> </linearGradient> </defs> <rect x="20" y="20" width="100" height="50" rx="10" ry="10" style="fill:url(#MyGreenGradient)"> <set begin="click" dur="3s" attributeName="fill" from="url(#MyGreenGradient)" to="#006600"/> </rect> </svg>
A click event, formally speaking, follows a mousedown event and a mouseup event. If you want to have separate color changes, for example, on an SVG object on mousedown and mouseup, you can use code as shown in Listing 11.2.
Listing 11.2 (BasicEvents02.svg)
<?xml version="1.0" standalone="no"?> <!DOCTYPE svg PUBLIC "-//W3C//DTD SVG 1.0//EN" "http://www.w3.org/TR/2001/PR-SVG-20010719/ DTD/svg10.dtd"> <svg> <defs> <linearGradient id="MyGreenGradient"> <stop offset="5%" style="stop-color:#006600"/> <stop offset="95%" style="stop-color:#99FFCC"/> </linearGradient> <linearGradient id="MyRedGradient"> <stop offset="5%" style="stop-color:#FF9999"/> <stop offset="95%" style="stop-color:#660000"/> </linearGradient> </defs> <rect x="20" y="20" width="100" height="50" rx="10" ry="10" style="fill:url(#MyGreenGradient)"> <set begin="mousedown" end="mouseup" attributeName="fill" from="url(#MyGreenGradient)" to="#006600"/> <set begin="mouseup" dur="3s" attributeName="fill" from="#006600" to="url(#MyRedGradient)"/> </rect> </svg>
The code shown in Listing 11.2 causes the rectangle on mousedown to change its fill to plain green, which lasts until the mouseup event, when the fill changes to a reddish gradient, which lasts three seconds.
Watch out for one potential trap in the wording of the SVG specification. For the click event, for example, the specification refers to the event attribute name as onclick. If you attempt to use that term as the attribute name on an SVG element, you don't achieve the interactivity you want. You need to use click as the attribute name on the SVG element.
Sample SVG Images and Components Using Interactivity
In this section, I want to show you some examples of constructing SVG Web page "furniture" that demonstrates interactivity.
A mailto graphic
A mailto link on a Web page can be as simple as plain text or, in some cases, a hyperanimated irritation. In this section, you create an interactive, animated mailto graphic one that doesn't intrude on the user experience.
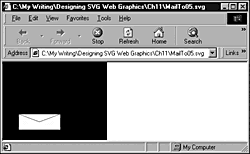
The graphic looks like an envelope. When you mouse over the graphic, the "flap" opens and the text "Email me" is animated (see Figure 11.01).
Figure 11.01. The completed mailto graphic when it is not moused.
First, create a static version of the graphic. I chose to create it against a black background because that seemed to give a better overall effect. Here is the code for the first static version:
Listing 11.3 (MailTo01.svg)
<?xml version="1.0" standalone="no"?> <!DOCTYPE svg PUBLIC "-//W3C//DTD SVG 1.0//EN" "http://www.w3.org/TR/2001/PR-SVG-20010719/ DTD/svg10.dtd"> <svg> <svg x="0" y="0" width="200" height="150"> <rect x="0" y="0" width="200" height="150" /> <a id="MailTo" xlink:href="mailto:consulting@andrewwatt.com"> <rect x="30" y="100" width="80" height="30" style="fill:#FEFEFE; stroke:black; stroke-width:0.05"/> <line id="LeftLine" x1="30" y1="100" x2="70" y2="115" style="stroke:black; stroke-width:0.05"/> <line id="RightLine" x1="70" y1="115" x2="110" y2="100" style="stroke:black; stroke-width:0.05"/> </a> </svg> </svg>
Notice that I have created the graphic within its own <svg> element, which allows you to move it later to a suitable location on the page, if you use it as part of a larger SVG graphic. If you were planning to simply place a single SVG graphic on an HTML or XHTML Web page, you could omit the nested <svg> element and, most likely, center the envelope within tighter borders.
Apart from the black background rectangle, all of the graphical image is nested within an <a> element whose xlink:href attribute provides the mailto link to consulting@AndrewWatt.com. The remaining shapes are <rect> and <line> elements.
As the next step, you add an animation that begins when you mouse over the envelope. You create the flap of the envelope using a <path> element, although you could use two <line> elements instead:
<path id="OpenFlap" d="M30,100 L70,85 110,100" style="fill:#FFFFFF; stroke:black; stroke-width:0.1" visibility="hidden"> <animate begin="MailTo.mouseover" attributeName="visibility" from="hidden" to="visible" dur="0.1s" fill="freeze"/> <animate begin="MailTo.mouseout" attributeName="visibility" from="visible" to="hidden" dur="0.1s" fill="freeze"/> </path>
Note that the visibility attribute for the <path> element is set to a value of hidden.
Notice that the events you make use of for animations are mouseover and mouseout. You use a pair of <animate> elements. The first one defines what happens when you mouse the envelope. The second defines the animation when you remove the mouse from that part of the screen.
An alternative approach is to use the <set> element, like this:
<set attributeName="visibility" begin="MailTo.mouseover" end="MailTo.mouseout" to="visible"/>
The begin attribute of the first <animate> element has a value of MailTo.mouseover. Recall that the <a> element has an id of value MailTo, so mousing any of the elements nested within the <a> element should cause the flap of the envelope to open. However, if you slowly move the mouse pointer over the graphic, you see that when it rests over either of the <line> elements, the flap closes. To avoid that problem, you need to modify the <line> elements by adding the pointer-events attribute set to a value of none, as shown here:
<line id="LeftLine" x1="30" y1="100" x2="70" y2="115" style="stroke:black; stroke-width:0.05" pointer-events="none"/> <line id="RightLine" x1="70" y1="115" x2="110" y2="100" style="stroke:black; stroke-width:0.05" pointer-events="none"/>
If you want the flap of the envelope to close when you stray outside the original outline of the envelope, you can also use pointer-events="none" to achieve that effect:
<path id="OpenFlap" d="M30,100 L70,85 110,100" style="fill:#FFFFFF; stroke:black; stroke-width:0.1" visibility="hidden" pointer-events="none">
Having made all those changes, you have an envelope that "opens" when any part of it is moused, but closes when the mouse goes outside the original outline of the envelope. The code at this stage looks like this:
Listing 11.4 (MailTo02.svg)
<?xml version="1.0" standalone="no"?> <!DOCTYPE svg PUBLIC "-//W3C//DTD SVG 1.0//EN" "http://www.w3.org/TR/2001/PR-SVG-20010719/ DTD/svg10.dtd"> <svg> <svg x="0" y="0" width="200" height="150"> <rect x="0" y="0" width="200" height="150" /> <a id="MailTo" xlink:href="mailto:consulting@andrewwatt.com"> <rect x="30" y="100" width="80" height="30" style="fill:#FEFEFE; stroke:black; stroke-width:0.05"/> <line id="LeftLine" x1="30" y1="100" x2="70" y2="115" style="stroke:black; stroke-width:0.05" pointer-events="none"/> <line id="RightLine" x1="70" y1="115" x2="110" y2="100" style="stroke:black; stroke-width:0.05" pointer-events="none"/> <path id="OpenFlap" d="M30,100 L70,85 110,100" style="fill:#FFFFFF; stroke:black; stroke-width:0.1" visibility="hidden" pointer-events="none"> <animate begin="MailTo.mouseover" attributeName="visibility" from="hidden" to="visible" dur="0.1s" fill="freeze"/> <animate begin="MailTo.mouseout" attributeName="visibility" from="visible" to="hidden" dur="0.1s" fill="freeze"/> </path> </a> </svg> </svg>
Now add several further animations, which I explain individually. After that, you see all of them put together with the code, as shown in the preceding example.
If you look closely at a real paper envelope, the inside of the envelope when the flap is open doesn't quite meet the corner. The next animation you add is to move down the outer edges of the two <line> elements:
<line id="LeftLine" x1="30" y1="100" x2="70" y2="115" style="stroke:black; stroke-width:0.05" pointer-events="none"> <animate begin="MailTo.mouseover" attributeName="y1" from="100" to="102" dur="0.1s" fill="freeze"/> <animate begin="MailTo.mouseout" attributeName="y1" from="102" to="100" dur="0.1s" fill="freeze"/> </line> <line id="RightLine" x1="70" y1="115" x2="110" y2="100" style="stroke:black; stroke-width:0.05" pointer-events="none"> <animate begin="MailTo.mouseover" attributeName="y2" from="100" to="102" dur="0.1s" fill="freeze"/> <animate begin="MailTo.mouseout" attributeName="y2" from="102" to="100" dur="0.1s" fill="freeze"/> </line>
As before, you use <animate> elements in pairs one <animate> for the mouseover event and the other on mouseout. That looks like lots of code for such a tiny movement, but the animation now looks, to my eye, more lifelike.
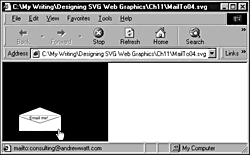
Next, you add some text to the envelope so that when the envelope is moused, the graphic looks like the one shown in Figure 11.02. (I discuss one issue relating to this text a little later in this section.)
Figure 11.02. The envelope with the first text animation implemented.
<text x="50" y="130" style="font-size:8; fill:green; font-fami- ly:Arial, sans-serif;" visibility="hidden" > <animate begin="MailTo.mouseover" attributeName="y" from="130" to="108" dur="0.5s" fill="freeze"/> <animate begin="MailTo.mouseout" attributeName="y" from="108" to="130" dur="0.1s" fill="freeze"/> <animate begin="MailTo.mouseover" attributeName="visibility" from="hidden" to="visible" dur="0.1s" fill="freeze"/> <animate begin="MailTo.mouseout" attributeName="visibility" from="visible" to="hidden" dur="0.1s" fill="freeze"/> Email me!</text>
The text in this code is hidden except when the envelope is moused, as reflected by the visibility attribute of the <text> element having a value of hidden. The code contains two pairs of animations. The first one moves the text up from the bottom of the envelope to a position nicely nested within the flap over a period of a half-second by animating the y attribute of the <text> element. When the mouse is removed, it snaps back to its position more quickly. However, the visibility of the text is being animated at the same time. The second pair of animate elements makes the text visible when the envelope is moused, and makes it hidden when the mouse is removed.
You might be quite happy with that effect as a simple mailto graphic, but now you add further animations to it. In Chapter 8, "Animation: SVG and SMIL Animation," I demonstrated chained animations, a technique you can make use of here.
First, you need to add an id attribute to the <animate> element from which you want to chain the new animations:
<animate id="TextUp" begin="MailTo.mouseover" attributeName="y" from="130" to="108" dur="0.5s" fill="freeze"/>
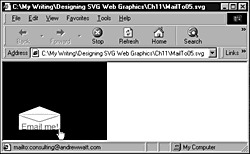
After the text is animated upward, you can animate it down and increase its size so that it fills the envelope. When that task is done, the final appearance of the envelope looks like the one shown in Figure 11.03.
Figure 11.03. The envelope after the second text animation has been added.
<animate id="TextDownAgain" begin="TextUp.end+0.1s" attributeName="y" from="108" to="130" dur="0.5s" fill="freeze"/> <animate id="TextAcross" begin="TextUp.end+0.1s" attributeName="x" from="50" to="35" dur="0.5s" fill="freeze"/> <animate id="TextGrow" begin="TextUp.end+0.1s" attributeName="font-size" from="8" to="16" dur="0.5s" fill="freeze"/> <animate id="TextBackAcross" begin="MailTo.mouseout" attributeName="x" from="35" to="50" dur="0.01s" fill="freeze"/> <animate id="TextShrink" begin="MailTo.mouseout" attributeName="font-size" from="16" to="8" dur="0.01s" fill="freeze"/>
Each of the first three <animate> elements has a begin attribute with a value of TextUp.end+0.1s. In other words, after the text animates the envelope, a pause of 0.1 second occurs, and these three animations begin. Each has a duration of 0.5 second, and simultaneously the text is animated down to the bottom of the envelope. It is moved across to the left a little, to allow for the effect of the third animation, which increases the font size from 8 to 16.
The final two of the five <animate> elements help you restore the original state of the text so that it is ready for another mouseover to happen. With those two pieces of code, you move the text back across to the right a little and shrink it back to a font size of 8. Remember that you separately have a mouseout event that sets the visibility back to hidden:
<animate begin="MailTo.mouseout" attributeName="visibility" from="visible" to="hidden" dur="0.01s" fill="freeze"/>
and one that returns the y attribute of the <text> element to 130:
<animate id="TextDown" begin="MailTo.mouseout" attributeName="y" from="108" to="130" dur="0.01s" fill="freeze"/>
That final mouseout animation isn't necessary if all the animations are allowed to complete, but a visitor to the site might mouse out before the animation is complete. Even if the visitor does that, you know that with all these mouseout animations you return the <text> element to the state it was in before the mouseover event.
If you have been following this example step-by-step, you might have encountered weird behavior as you use this animation, and you might have noticed that the behavior is not consistent. What is probably happening is that the animated text is crossing the mouse pointer and causing the same problem as the <line> elements did earlier in this chapter. If you add to the <text> element a pointer-events attribute with a value of none, that problem is solved and the animation works nicely.
You might have been struggling to visualize how all the animations interact and interrelate in this latter part of the example. When you are chaining animations, the situation can become complex. Therefore, I encourage you to work through the example step-by-step and observe exactly what happens as you make each change. You can learn a great deal about how to put together visual components, which is what SVG animations are.
Many changes are made in this last part of the example, so you should see the code in full so that you are clear about how it all fits. Feel free to experiment with it, changing attributes and timings, for example, to produce different visual effects. Keep a copy of the original, though, just in case you get in a tangle from which you can't free yourself.
Listing 11.5 (MailTo05.svg)
<?xml version="1.0" standalone="no"?> <!DOCTYPE svg PUBLIC "-//W3C//DTD SVG 1.0//EN" "http://www.w3.org/TR/2001/PR-SVG-20010719/ DTD/svg10.dtd"> <svg> <svg x="0" y="0" width="200" height="150"> <rect x="0" y="0" width="200" height="150" /> <a id="MailTo" xlink:href="mailto:consulting@andrewwatt.com"> <animate begin="mouseover" /> <rect x="30" y="100" width="80" height="30" style="fill:#FEFEFE; stroke:black; stroke-width:0.05"/> <text x="50" y="130" style="font-size:8; fill:green; font-family:Arial, sans-serif;" pointer-events="none" visibility="hidden"> <animate id="TextUp" begin="MailTo.mouseover" attributeName="y" from="130" to="108" dur="0.5s" fill="freeze"/> <animate id="TextDown" begin="MailTo.mouseout" attributeName="y" from="108" to="130" dur="0.01s" fill="freeze"/> <animate begin="MailTo.mouseover" attributeName="visibility" from="hidden" to="visible" dur="0.1s" fill="freeze"/> <animate begin="MailTo.mouseout" attributeName="visibility" from="visible" to="hidden" dur="0.01s" fill="freeze"/> <animate id="TextDownAgain" begin="TextUp.end+0.1s" attributeName="y" from="108" to="130" dur="0.5s" fill="freeze"/> <animate id="TextAcross" begin="TextUp.end+0.1s" attributeName="x" from="50" to="35" dur="0.5s" fill="freeze"/> <animate id="TextGrow" begin="TextUp.end+0.1s" attributeName="font-size" from="8" to="16" dur="0.5s" fill="freeze"/> <animate id="TextBackAcross" begin="MailTo.mouseout" attributeName="x" from="35" to="50" dur="0.01s" fill="freeze"/> <animate id="TextShrink" begin="MailTo.mouseout" attributeName="font-size" from="16" to="8" dur="0.01s" fill="freeze"/> Email me! </text> <line id="LeftLine" x1="30" y1="100" x2="70" y2="115" style="stroke:black; stroke-width:0.05" pointer-events="none"> <animate begin="MailTo.mouseover" attributeName="y1" from="100" to="102" dur="0.1s" fill="freeze"/> <animate begin="MailTo.mouseout" attributeName="y1" from="102" to="100" dur="0.1s" fill="freeze"/> </line> <line id="RightLine" x1="70" y1="115" x2="110" y2="100" style="stroke:black; stroke-width:0.05" pointer-events="none"> <animate begin="MailTo.mouseover" attributeName="y2" from="100" to="102" dur="0.1s" fill="freeze"/> <animate begin="MailTo.mouseout" attributeName="y2" from="102" to="100" dur="0.1s" fill="freeze"/> </line> <path id="OpenFlap" d="M30,100 L70,85 110,100" style="fill:#FFFFFF; stroke:black; stroke-width:0.1" visibility="hidden" pointer-events="none"> <animate begin="MailTo.mouseover" attributeName="visibility" from="hidden" to="visible" dur="0.1s" fill="freeze"/> <animate begin="MailTo.mouseout" attributeName="visibility" from="visible" to="hidden" dur="0.1s" fill="freeze"/> </path> </a> </svg> </svg>
Simple text rollovers
On Web sites where simplicity of design is employed creatively, a navigation "bar" might consist simply of a series of appropriately placed words that have attached rollover capability and are linked to the appropriate pages.
Suppose that you are creating a nostalgia photos-and-paintings site named RootsPics.com and you want to create simple text links, including rollovers, from the home page to pages such as Photographs, Paintings, Order Tracking, and Contact Details. You might attempt to lay the foundation for creating a simple text-navigation bar like this:
Listing 11.6 (RootsPics01.svg)
<?xml version="1.0" standalone="no"?> <!DOCTYPE svg PUBLIC "-//W3C//DTD SVG 1.0//EN" "http://www.w3.org/TR/2001/PR-SVG-20010719/ DTD/svg10.dtd"> <svg width="800" height="150"> <svg x="0" y="0" width="800" height="150"> <text x="10" y="25" style="font-family: Arial, sans-serif; font-size:24; fill:#990066; stroke:#990066;"> RootsPics.com </text> <text x="10" y="50" style="font-family: Arial, sans-serif; font-size:14; fill:#990066; stroke:none;"> Photographs Paintings Order Tracking Contact Details </text> </svg> </svg>
A problem exists, however, if you want to create separate rollovers for each page. If you do, you need separate animations for each link, so you need to split up the second <text> element into four <tspan> elements. Later, you add to each <tspan> element rollovers and links to the appropriate pages.
Listing 11.7 (RootsPics02.svg)
<?xml version="1.0" standalone="no"?> <!DOCTYPE svg PUBLIC "-//W3C//DTD SVG 1.0//EN" "http://www.w3.org/TR/2001/PR-SVG-20010719/ DTD/svg10.dtd"> <svg width="800" height="150"> <svg x="0" y="0" width="800" height="150"> <text x="10" y="25" style="font-family: Arial, sans-serif; font-size:24; fill:#990066; stroke:#990066;"> RootsPics.com </text> <text> <tspan x="10" y="50" style="font-family: Arial, sans-serif; font-size:14; fill:#990066; stroke:none;"> Photographs </tspan> <tspan dx="1em" style="font-family: Arial, sans-serif; font-size:14; fill:#990066; stroke:none;"> Paintings </tspan> <tspan dx="1em" style="font-family: Arial, sans-serif; font-size:14; fill:#990066; stroke:none;"> Order Tracking </tspan> <tspan dx="1em" style="font-family: Arial, sans-serif; font-size:14; fill:#990066; stroke:none;"> Contact Details </tspan> </text> </svg> </svg>
Notice that you need to state an absolute position for the first <tspan> element and then link the position of all the others to that position by using the dx attribute, which basically indicates that other <tspan> elements are positioned a little further along the same horizontal line. Note that you repeat the style information for each <tspan> element; otherwise, they are displayed as the default color, which is black.
You next need to add the rollover effect for each piece of text. That task involves recognizing the mouseover and the mouseout events and changing the color appropriately. For this example, choose bright green as the rollover color. After changing the color, you animate the stroke from a value of none to the same green color as the fill. This action gives a heavier weight to the text that is moused. An alternative approach is to change the font-weight attribute.
The rollover effect is the same for each of the four pieces of text, so after you have correctly created the rollover for one piece of text, you have a visual component you can reuse on the other three.
Listing 11.8 (RootsPics04.svg)
<?xml version="1.0" standalone="no"?> <!DOCTYPE svg PUBLIC "-//W3C//DTD SVG 1.0//EN" "http://www.w3.org/TR/2001/PR-SVG-20010719/ DTD/svg10.dtd"> <svg width="800" height="150"> <svg x="0" y="0" width="800" height="150"> <text x="10" y="25" style="font-family: Arial, sans-serif; font-size:24; fill:#990066; stroke:#990066;"> RootsPics.com </text> <text> <tspan x="10" y="50" style="font-family: Arial, sans-serif; font-size:14; fill:#990066; stroke:none;"> <animate begin="mouseover" dur="0.1s" attributeName="fill" from="#990066" to="#00CC00" fill="freeze"/> <animate begin="mouseover" dur="0.1s" attributeName="stroke" from="none" to="#00CC00" fill="freeze"/> <animate begin="mouseout" dur="0.1s" attributeName="fill" from="#00CC00" to="#990066" fill="freeze"/> <animate begin="mouseout" dur="0.1s" attributeName="stroke" from="#00CC00" to="none" fill="freeze"/> Photographs </tspan> <tspan dx="1em" style="font-family: Arial, sans-serif; font-size:14; fill:#990066; stroke:none;"> <animate begin="mouseover" dur="0.1s" attributeName="fill" from="#990066" to="#00CC00" fill="freeze"/> <animate begin="mouseover" dur="0.1s" attributeName="stroke" from="none" to="#00CC00" fill="freeze"/> <animate begin="mouseout" dur="0.1s" attributeName="fill" from="#00CC00" to="#990066" fill="freeze"/> <animate begin="mouseout" dur="0.1s" attributeName="stroke" from="#00CC00" to="none" fill="freeze"/> Paintings </tspan> <tspan dx="1em" style="font-family: Arial, sans-serif; font-size:14; fill:#990066; stroke:none;"> <animate begin="mouseover" dur="0.1s" attributeName="fill" from="#990066" to="#00CC00" fill="freeze"/> <animate begin="mouseover" dur="0.1s" attributeName="stroke" from="none" to="#00CC00" fill="freeze"/> <animate begin="mouseout" dur="0.1s" attributeName="fill" from="#00CC00" to="#990066" fill="freeze"/> <animate begin="mouseout" dur="0.1s" attributeName="stroke" from="#00CC00" to="none" fill="freeze"/> Order Tracking </tspan> <tspan dx="1em" style="font-family: Arial, sans-serif; font-size:14; fill:#990066; stroke:none;"> <animate begin="mouseover" dur="0.1s" attributeName="fill" from="#990066" to="#00CC00" fill="freeze"/> <animate begin="mouseover" dur="0.1s" attributeName="stroke" from="none" to="#00CC00" fill="freeze"/> <animate begin="mouseout" dur="0.1s" attributeName="fill" from="#00CC00" to="#990066" fill="freeze"/> <animate begin="mouseout" dur="0.1s" attributeName="stroke" from="#00CC00" to="none" fill="freeze"/> Contact Details </tspan> </text> </svg> </svg>
An alternative approach to the mouseover and mouseout animations using the <animate> element is to use <set> elements.
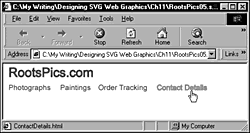
You now should have the rollovers working correctly on each of the four linking pieces of text, so you can complete the functionality by adding links to each of the pieces of text. This time, because the pieces of text need to be nested within the linking <a> elements, you have to be careful to create the correct nesting (see Figure 11.04). An alternative approach is to create the containing <a> element first, and then nest the static elements, and then nest the animation elements within those <a> elements. Be careful to nest the first <a> element immediately after the opening <text> element and before the first <tspan> element. The first closing </a> element follows the closing </tspan> element. Also, if you are cutting and pasting the <a> tags with their xlink:href attributes in place, be sure to customize the value of the xlink:href attribute to suit each link.
Figure 11.04. The completed text-navigation bar with rollover.
Listing 11.9 (RootsPics05.svg)
<?xml version="1.0" standalone="no"?> <!DOCTYPE svg PUBLIC "-//W3C//DTD SVG 1.0//EN" "http://www.w3.org/TR/2001/PR-SVG-20010719/ DTD/svg10.dtd"> <svg width="800" height="150"> <svg x="0" y="0" width="800" height="150"> <text x="10" y="25" style="font-family: Arial, sans-serif; font-size:24; fill:#990066; stroke:#990066;"> RootsPics.com </text> <text> <a xlink:href="Photographs.html"> <tspan x="10" y="50" style="font-family: Arial, sans-serif; font-size:14; fill:#990066; stroke:none;"> <animate begin="mouseover" dur="0.1s" attributeName="fill" from="#990066" to="#00CC00" fill="freeze"/> <animate begin="mouseover" dur="0.1s" attributeName="stroke" from="none" to="#00CC00" fill="freeze"/> <animate begin="mouseout" dur="0.1s" attributeName="fill" from="#00CC00" to="#990066" fill="freeze"/> <animate begin="mouseout" dur="0.1s" attributeName="stroke" from="#00CC00" to="none" fill="freeze"/> Photographs </tspan> </a> <a xlink:href="Paintings.html"> <tspan dx="1em" style="font-family: Arial, sans-serif; font-size:14; fill:#990066; stroke:none;"> <animate begin="mouseover" dur="0.1s" attributeName="fill" from="#990066" to="#00CC00" fill="freeze"/> <animate begin="mouseover" dur="0.1s" attributeName="stroke" from="none" to="#00CC00" fill="freeze"/> <animate begin="mouseout" dur="0.1s" attributeName="fill" from="#00CC00" to="#990066" fill="freeze"/> <animate begin="mouseout" dur="0.1s" attributeName="stroke" from="#00CC00" to="none" fill="freeze"/> Paintings </tspan> </a> <a xlink:href="OrderTracking.html"> <tspan dx="1em" style="font-family: Arial, sans-serif; font-size:14; fill:#990066; stroke:none;"> <animate begin="mouseover" dur="0.1s" attributeName="fill" from="#990066" to="#00CC00" fill="freeze"/> <animate begin="mouseover" dur="0.1s" attributeName="stroke" from="none" to="#00CC00" fill="freeze"/> <animate begin="mouseout" dur="0.1s" attributeName="fill" from="#00CC00" to="#990066" fill="freeze"/> <animate begin="mouseout" dur="0.1s" attributeName="stroke" from="#00CC00" to="none" fill="freeze"/> Order Tracking </tspan> </a> <a xlink:href="ContactDetails.html"> <tspan dx="1em" style="font-family: Arial, sans-serif; font-size:14; fill:#990066; stroke:none;"> <animate begin="mouseover" dur="0.1s" attributeName="fill" from="#990066" to="#00CC00" fill="freeze"/> <animate begin="mouseover" dur="0.1s" attributeName="stroke" from="none" to="#00CC00" fill="freeze"/> <animate begin="mouseout" dur="0.1s" attributeName="fill" from="#00CC00" to="#990066" fill="freeze"/> <animate begin="mouseout" dur="0.1s" attributeName="stroke" from="#00CC00" to="none" fill="freeze"/> Contact Details </tspan> </a> </text> </svg> </svg>
A more complex text rollover
Now that you're building up step-by-step, you can follow the techniques in this section to create a significantly more complex text rollover.
Imagine (or, in my case, fantasize) that XMML.com is a design company with offices in New York, Amsterdam, San Francisco, and Tokyo and that you want to create a suitably sophisticated, understated banner or logo on the corporate Web page.
When viewed statically, the banner might look pretty much like the one shown in Figure 11.05.
Figure 11.05. The unmoused state of the XMML.com text rollover.
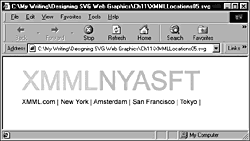
However, you still want the banner to have interesting and intriguing built-in interactivity. You want to achieve a design where the letters indicating each major office have their own rollover capability. Incorporated into that rollover is not only a color change in the letter but also the display of contact details for that office.
If you want to animate each office separately, you need to nest the initials for each office separately in their own <tspan> elements because you need to have SVG elements to which you can apply selected animations.
If you choose to animate both the stroke and fill properties for each office, you need two <animate> or <animateColor> elements for mouseover and an additional two elements for mouseout. So your first step toward the final interactive banner looks like this, with the mouseover and mouseout animations inserted for the company initials, XMML:
Listing 11.10 (XMMLLocations01.svg)
<?xml version="1.0" standalone="no"?> <!DOCTYPE svg PUBLIC "-//W3C//DTD SVG 1.0//EN" "http://www.w3.org/TR/2001/PR-SVG-20010719/ DTD/svg10.dtd"> <svg width="800" height="300"> <text x="40" y="70" style="font-size:48; font-family:Arial, sans-serif; stroke:#CCCCCC; fill:#CCCCCC;"> <tspan id="XMML" style="stroke:#FFCCCC; fill:#FFCCCC;"> <animateColor begin="mouseover" dur="0.1s" attributeName="fill" from="#FFCCCC" to="#FF3333" fill="freeze"/> <animateColor begin="mouseover" dur="0.1s" attributeName="stroke" from="#FFCCCC" to="#FF3333" fill="freeze"/> <animateColor begin="mouseout" dur="0.1s" attributeName="fill" from="#FF3333" to="#FFCCCC" fill="freeze"/> <animateColor begin="mouseout" dur="0.1s" attributeName="stroke" from="#FF3333" to="#FFCCCC" fill="freeze"/> XMML </tspan> <tspan id="NY"> NY </tspan> <tspan id="A"> A </tspan> <tspan id="SF"> SF </tspan> <tspan id="T">T </tspan> </text> <text x="40" y="100" style="font-family:Arial, sans-serif; font-size:14;" > XMML.com | New York | Amsterdam | San Francisco | Tokyo | </text> </svg>
When you place the mouse over the text XMML, both the fill and stroke are animated to a red color from a grayish pink. When you mouse out the red, color returns to its original grayish pink color.
Because you want to have the same mouseover and mouseout functionality on each of the letters representing the branch offices, you have a visual component for the animation you want:
<animateColor begin="mouseover" dur="0.1s" attributeName="fill" from="#FFCCCC" to="#FF3333" fill="freeze"/> <animateColor begin="mouseover" dur="0.1s" attributeName="stroke" from="#FFCCCC" to="#FF3333" fill="freeze"/> <animateColor begin="mouseout" dur="0.1s" attributeName="fill" from="#FF3333" to="#FFCCCC" fill="freeze"/> <animateColor begin="mouseout" dur="0.1s" attributeName="stroke" from="#FF3333" to="#FFCCCC" fill="freeze"/>
You can create an individualized color change on mouseover by simply adapting the to attribute on the "mouseover" <animateColor> element to a specific color and then change the "mouseout" <animateColor> element to start at the correct color.
Remember that you need to change all the from and to attributes because the XMML has a different start and mouseover color in both stroke and fill.
After you have added the mouseover and mouseout visual components to each location, the code looks like this:
Listing 11.11 (XMMLLocations02.svg)
<?xml version="1.0" standalone="no"?> <!DOCTYPE svg PUBLIC "-//W3C//DTD SVG 1.0//EN" "http://www.w3.org/TR/2001/PR-SVG-20010719/ DTD/svg10.dtd"> <svg width="800" height="300"> <text x="40" y="70" style="font-size:56; font-family:Arial, sans-serif; stroke:#CCCCCC; fill:#CCCCCC;"> <tspan id="XMML" style="stroke:#FFCCCC; fill:#FFCCCC;"> <animateColor begin="mouseover" dur="0.1s" attributeName="fill" from="#FFCCCC" to="#FF3333" fill="freeze"/> <animateColor begin="mouseover" dur="0.1s" attributeName="stroke" from="#FFCCCC" to="#FF3333" fill="freeze"/> <animateColor begin="mouseout" dur="0.1s" attributeName="fill" from="#FF3333" to="#FFCCCC" fill="freeze"/> <animateColor begin="mouseout" dur="0.1s" attributeName="stroke" from="#FF3333" to="#FFCCCC" fill="freeze"/> XMML </tspan> <tspan id="NY"> <animateColor begin="mouseover" dur="0.1s" attributeName="fill" from="#CCCCCC" to="#33FF33" fill="freeze"/> <animateColor begin="mouseover" dur="0.1s" attributeName="stroke" from="#CCCCCC" to="#33FF33" fill="freeze"/> <animateColor begin="mouseout" dur="0.1s" attributeName="fill" from="#33FF33" to="#CCCCCC" fill="freeze"/> <animateColor begin="mouseout" dur="0.1s" attributeName="stroke" from="#33FF33" to="#CCCCCC" fill="freeze"/> NY </tspan> <tspan id="A"> <animateColor begin="mouseover" dur="0.1s" attributeName="fill" from="#CCCCCC" to="#FF9900" fill="freeze"/> <animateColor begin="mouseover" dur="0.1s" attributeName="stroke" from="#CCCCCC" to="#FF9900" fill="freeze"/> <animateColor begin="mouseout" dur="0.1s" attributeName="fill" from="#FF9900" to="#CCCCCC" fill="freeze"/> <animateColor begin="mouseout" dur="0.1s" attributeName="stroke" from="#FF9900" to="#CCCCCC" fill="freeze"/> A </tspan> <tspan id="SF"> <animateColor begin="mouseover" dur="0.1s" attributeName="fill" from="#CCCCCC" to="#9900FF" fill="freeze"/> <animateColor begin="mouseover" dur="0.1s" attributeName="stroke" from="#CCCCCC" to="#9900FF" fill="freeze"/> <animateColor begin="mouseout" dur="0.1s" attributeName="fill" from="#9900FF" to="#CCCCCC" fill="freeze"/> <animateColor begin="mouseout" dur="0.1s" attributeName="stroke" from="#9900FF" to="#CCCCCC" fill="freeze"/> SF </tspan> <tspan id="T"> <animateColor begin="mouseover" dur="0.1s" attributeName="fill" from="#CCCCCC" to="#FFFF00" fill="freeze"/> <animateColor begin="mouseover" dur="0.1s" attributeName="stroke" from="#CCCCCC" to="#FFFF00" fill="freeze"/> <animateColor begin="mouseout" dur="0.1s" attributeName="fill" from="#FFFF00" to="#CCCCCC" fill="freeze"/> <animateColor begin="mouseout" dur="0.1s" attributeName="stroke" from="#FFFF00" to="#CCCCCC" fill="freeze"/> T </tspan> </text> <text x="40" y="100" style="font-family:Arial, sans-serif; font-size:14;" > XMML.com | New York | Amsterdam | San Francisco | Tokyo | </text> </svg>
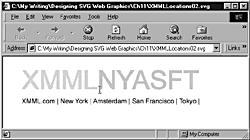
At rest, the appearance is no different from the original code; when any of the locations is moused, however, it changes color on both mouseover and mouseout, such as the green color for the New York location, as shown in Figure 11.06.
Figure 11.06. Mouseover of the letters NY causes a color change.
When the large-font initials are moused, you want them to not only change color but also to replace the general location list underneath with contact information that is specific to that location. To achieve that effect, you need to add interactive functionality to hide the general text information as well as to show location-specific contact information.
First, you add an animation to the general locations list contained in this code:
<text x="40" y="100" style="font-family:Arial, sans-serif; font-size:14;" > XMML.com | New York | Amsterdam | San Francisco | Tokyo | </text>
Suppose that you want to hide the locations list when individual locations are moused and show it again when the mouse is removed. You need eight <animate> elements, therefore: four to hide the information when a location is moused and four to reveal it again when the mouse is moved away. First, you create two animations that hide the location information when NY is moused and show it again when the mouse moves away:
<text x="40" y="100" style="font-family:Arial, sans-serif; font-size:14;" > <animate attributeName="visibility" begin="NY.mouseover" dur="0.1s" from="visible" to="hidden" fill="freeze"/> <animate attributeName="visibility" begin="NY.mouseout" dur="0.1s" from="hidden" to="visible" fill="freeze"/> XMML.com | New York | Amsterdam | San Francisco | Tokyo | </text>
Note that the begin attribute for the <animate> element is NY.mouseover, meaning that when the element with an id of value NY is moused, the animation should begin. Correspondingly, the other <animate> element has a begin attribute of value NY.mouseout. Because all the text you want to hide is contained in one <text> element, you animate the visibility property from visible to hidden and back again. In a moment, you see how to achieve a similar effect for groups of elements.
You need to apply similar animations to correspond to each of the other locations, so that section of code expands to this:
<text x="40" y="100" style="font-family:Arial, sans-serif; font-size:14;" > <animate attributeName="visibility" begin="NY.mouseover" dur="0.1s" from="visible" to="hidden" fill="freeze"/> <animate attributeName="visibility" begin="NY.mouseout" dur="0.1s" from="hidden" to="visible" fill="freeze"/> <animate attributeName="visibility" begin="A.mouseover" dur="0.1s" from="visible" to="hidden" fill="freeze"/> <animate attributeName="visibility" begin="A.mouseout" dur="0.1s" from="hidden" to="visible" fill="freeze"/> <animate attributeName="visibility" begin="SF.mouseover" dur="0.1s" from="visible" to="hidden" fill="freeze"/> <animate attributeName="visibility" begin="SF.mouseout" dur="0.1s" from="hidden" to="visible" fill="freeze"/> <animate attributeName="visibility" begin="T.mouseover" dur="0.1s" from="visible" to="hidden" fill="freeze"/> <animate attributeName="visibility" begin="T.mouseout" dur="0.1s" from="hidden" to="visible" fill="freeze"/> XMML.com | New York | Amsterdam | San Francisco | Tokyo | </text>
As you can see in Figure 11.07, when the NY abbreviation is moused, the color of the initials changes and the general location information is hidden.
Figure 11.07. Mousing the letters NY causes the general location information to be hidden.
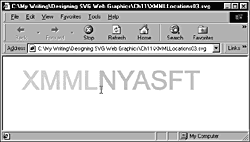
Finally, you need to add more animations so that when the initials for the location are moused, the specific location information is displayed. You create the specific location information in a grouping <g> element so that you can look at how to use animation of the display property here (rather than the visibility property you used earlier in this example).
So, for the New York office, you need the following code:
<g id="NYSpecificLocationInformation" display="none"> <animate attributeName="display" begin="NY.mouseout" dur="0.1s" from="visible" to="none" fill="freeze"/> <animate attributeName="display" begin="NY.mouseover" dur="0.1s" from="none" to="visible" fill="freeze"/> <text> <tspan x="40" y="100" style="font-family:Arial, sans-serif; font-size:14;" > New York Office Address Information </tspan> <tspan x="40" dy="1em" style="font-family:Arial, sans-serif; font-size:14;" > New York Office Email: NewYork@XMML.com </tspan> </text> </g>
Remember that you want the general information to be hidden unless the NY initials are moused, so the default value of the display attribute on the grouping <g> element is none. When the NY initials are moused, the specific location information is displayed; when the mouse moves away, the value of the display attribute returns to its default value of none; and so the specific location information is again hidden.
The same interactivity is created for each of the other locations.
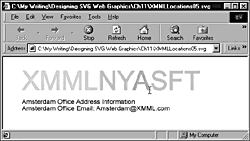
As you can see in Figure 11.08, when the A initial is moused, the general location information is hidden and the specific location contact information is made visible.
Figure 11.08. Mousing the letter A causes a color change in the letters, the general location information to be hidden, and the specific location information for Amsterdam to become visible.
Take a look at the final code for the animation. Now is the best time to do it when it is (I hope) fresh in your mind.
Listing 11.12 (XMMLLocations05.svg)
<?xml version="1.0" standalone="no"?> <!DOCTYPE svg PUBLIC "-//W3C//DTD SVG 1.0//EN" "http://www.w3.org/TR/2001/PR-SVG-20010719/ DTD/svg10.dtd"> <svg width="800" height="300"> <text x="40" y="70" style="font-size:56; font-family:Arial, sans-serif; stroke:#CCCCCC; fill:#CCCCCC;"> <tspan id="XMML" style="stroke:#FFCCCC; fill:#FFCCCC;"> <animateColor begin="mouseover" dur="0.1s" attributeName="fill" from="#FFCCCC" to="#FF3333" fill="freeze"/> <animateColor begin="mouseover" dur="0.1s" attributeName="stroke" from="#FFCCCC" to="#FF3333" fill="freeze"/> <animateColor begin="mouseout" dur="0.1s" attributeName="fill" from="#FF3333" to="#FFCCCC" fill="freeze"/> <animateColor begin="mouseout" dur="0.1s" attributeName="stroke" from="#FF3333" to="#FFCCCC" fill="freeze"/> XMML </tspan> <tspan id="NY"> <animateColor begin="mouseover" dur="0.1s" attributeName="fill" from="#CCCCCC" to="#33FF33" fill="freeze"/> <animateColor begin="mouseover" dur="0.1s" attributeName="stroke" from="#CCCCCC" to="#33FF33" fill="freeze"/> <animateColor begin="mouseout" dur="0.1s" attributeName="fill" from="#33FF33" to="#CCCCCC" fill="freeze"/> <animateColor begin="mouseout" dur="0.1s" attributeName="stroke" from="#33FF33" to="#CCCCCC" fill="freeze"/> NY </tspan> <tspan id="A"> <animateColor begin="mouseover" dur="0.1s" attributeName="fill" from="#CCCCCC" to="#FF9900" fill="freeze"/> <animateColor begin="mouseover" dur="0.1s" attributeName="stroke" from="#CCCCCC" to="#FF9900" fill="freeze"/> <animateColor begin="mouseout" dur="0.1s" attributeName="fill" from="#FF9900" to="#CCCCCC" fill="freeze"/> <animateColor begin="mouseout" dur="0.1s" attributeName="stroke" from="#FF9900" to="#CCCCCC" fill="freeze"/> A </tspan> <tspan id="SF"> <animateColor begin="mouseover" dur="0.1s" attributeName="fill" from="#CCCCCC" to="#9900FF" fill="freeze"/> <animateColor begin="mouseover" dur="0.1s" attributeName="stroke" from="#CCCCCC" to="#9900FF" fill="freeze"/> <animateColor begin="mouseout" dur="0.1s" attributeName="fill" from="#9900FF" to="#CCCCCC" fill="freeze"/> <animateColor begin="mouseout" dur="0.1s" attributeName="stroke" from="#9900FF" to="#CCCCCC" fill="freeze"/> SF </tspan> <tspan id="T"> <animateColor begin="mouseover" dur="0.1s" attributeName="fill" from="#CCCCCC" to="#FFFF00" fill="freeze"/> <animateColor begin="mouseover" dur="0.1s" attributeName="stroke" from="#CCCCCC" to="#FFFF00" fill="freeze"/> <animateColor begin="mouseout" dur="0.1s" attributeName="fill" from="#FFFF00" to="#CCCCCC" fill="freeze"/> <animateColor begin="mouseout" dur="0.1s" attributeName="stroke" from="#FFFF00" to="#CCCCCC" fill="freeze"/> T </tspan> </text> <text x="40" y="100" style="font-family:Arial, sans-serif; font-size:14;" > <animate attributeName="visibility" begin="NY.mouseover" dur="0.1s" from="visible" to="hidden" fill="freeze"/> <animate attributeName="visibility" begin="NY.mouseout" dur="0.1s" from="hidden" to="visible" fill="freeze"/> <animate attributeName="visibility" begin="A.mouseover" dur="0.1s" from="visible" to="hidden" fill="freeze"/> <animate attributeName="visibility" begin="A.mouseout" dur="0.1s" from="hidden" to="visible" fill="freeze"/> <animate attributeName="visibility" begin="SF.mouseover" dur="0.1s" from="visible" to="hidden" fill="freeze"/> <animate attributeName="visibility" begin="SF.mouseout" dur="0.1s" from="hidden" to="visible" fill="freeze"/> <animate attributeName="visibility" begin="T.mouseover" dur="0.1s" from="visible" to="hidden" fill="freeze"/> <animate attributeName="visibility" begin="T.mouseout" dur="0.1s" from="hidden" to="visible" fill="freeze"/> XMML.com | New York | Amsterdam | San Francisco | Tokyo | </text> <g id="NYSpecificLocationInformation" display="none"> <animate attributeName="display" begin="NY.mouseout" dur="0.1s" from="visible" to="none" fill="freeze"/> <animate attributeName="display" begin="NY.mouseover" dur="0.1s" from="none" to="visible" fill="freeze"/> <text> <tspan x="40" y="100" style="font-family:Arial, sans-serif; font-size:14;" > New York Office Address Information </tspan> <tspan x="40" dy="1em" style="font-family:Arial, sans-serif; font-size:14;" > New York Office Email: NewYork@XMML.com </tspan> </text> </g> <g id="AmsterdamSpecificLocationInformation" display="none"> <animate attributeName="display" begin="A.mouseout" dur="0.1s" from="visible" to="none" fill="freeze"/> <animate attributeName="display" begin="A.mouseover" dur="0.1s" from="none" to="visible" fill="freeze"/> <text> <tspan x="40" y="100" style="font-family:Arial, sans-serif; font-size:14;" > Amsterdam Office Address Information </tspan> <tspan x="40" dy="1em" style="font-family:Arial, sans-serif; font-size:14;" > Amsterdam Office Email: Amsterdam@XMML.com </tspan> </text> </g> <g id="SanFranciscoSpecificLocationInformation" display="none"> <animate attributeName="display" begin="SF.mouseout" dur="0.1s" from="visible" to="none" fill="freeze"/> <animate attributeName="display" begin="SF.mouseover" dur="0.1s" from="none" to="visible" fill="freeze"/> <text> <tspan x="40" y="100" style="font-family:Arial, sans-serif; font-size:14;" > San Francisco Office Address Information </tspan> <tspan x="40" dy="1em" style="font-family:Arial, sans-serif; font-size:14;" > San Francisco Office Email: SanFrancisco@XMML.com </tspan> </text> </g> <g id="TokyoSpecificLocationInformation" display="none"> <animate attributeName="display" begin="T.mouseout" dur="0.1s" from="visible" to="none" fill="freeze"/> <animate attributeName="display" begin="T.mouseover" dur="0.1s" from="none" to="visible" fill="freeze"/> <text> <tspan x="40" y="100" style="font-family:Arial, sans-serif; font-size:14;" > Tokyo Office Address Information </tspan> <tspan x="40" dy="1em" style="font-family:Arial, sans-serif; font-size:14;" > Tokyo Office Email: Tokyo@XMML.com </tspan> </text> </g> </svg>
NOTE
You have used <animate> or <animateColor> elements in the example as you have built it up. An alternative approach is to use the <set> element. The file XMMLLocations05set.svg shows the <set> element being used to produce the same functionality as shown in Listing 11.12.
Hopefully, you no longer are intimidated by long SVG code listings. If you can break it down into its component parts, it all becomes clear fairly quickly.
A menu with an animated filter rollover
A filter property of an SVG element is just another property that can be animated, as far as an SVG rendering engine is concerned. Therefore, you can create rollover effects using SVG filters in response to mouseover and mouseout events.
The example in this section reuses the drop shadow filter you created in Chapter 7, "Using SVG Filters." The drop shadow effect is already created, and you use it here as a visual component in a menu to add a rollover drop shadow effect.
As a first step, you nest the embryonic menu in a nested <svg> element to make the menu easy to relocate on the page. In a menu, the font size needs to be reduced, so you also reduce the value of the stdDeviation attribute on the <feGaussianBlur> element in the filter. The rollover effect can be added to the <text> element by simply using the following code:
<set begin="mouseover" end="mouseout" attributeName="filter" to="url(#CombinedDropShadow)" />
When the text is not moused, the value of the filter attribute is none. When the text is moused, the <set> element changes the value of the filter property of the <text> element to refer to the combined drop shadow filter. In addition, the text must have hyperlinking functionality; therefore, I have nested the <text> element within an <a> element. With one menu choice created, the code is shown in Listing 11.13.
Listing 11.13 (ShadowRollover01.svg)
<?xml version="1.0" standalone="no"?> <!DOCTYPE svg PUBLIC "-//W3C//DTD SVG 1.0//EN" "http://www.w3.org/TR/2001/PR-SVG-20010719/ DTD/svg10.dtd"> <svg> <defs> <filter id="CombinedDropShadow" width="140%" y="-20%" height="200%"> <feGaussianBlur in="SourceAlpha" stdDeviation="1" result="ShadowOut"/> <feOffset in="ShadowOut" dx="2" dy="2" result="ShadowOnly"/> <feMerge> <feMergeNode in="ShadowOnly"/> <feMergeNode in="SourceGraphic"/> </feMerge> </filter> </defs> <svg x="0" y="0"> <a xlink:href="AboutUs.html" > <text x="10" y="30" style="font-family:Arial, sans-serif; font-size:16; stroke:#CC0099; fill:#CC0099; filter:none;"> <set begin="mouseover" end="mouseout" attributeName="filter" to="url(#CombinedDropShadow)" /> About Us</text> </a> </svg> </svg>
The contents of the <a> element in this code are now a simple visual component with the needed rollover functionality; therefore, you cut and paste those to add links to additional pages, giving you the final code shown in Listing 11.14.
Listing 11.14 (ShaddowRollover02.svg)
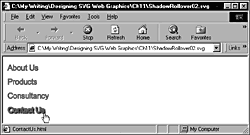
<?xml version="1.0" standalone="no"?> <!DOCTYPE svg PUBLIC "-//W3C//DTD SVG 1.0//EN" "http://www.w3.org/TR/2001/PR-SVG-20010719/ DTD/svg10.dtd"> <svg> <defs> <filter id="CombinedDropShadow" width="140%" y="-20%" height="200%"> <feGaussianBlur in="SourceAlpha" stdDeviation="1" result="ShadowOut" /> <feOffset in="ShadowOut" dx="2" dy="2" result="ShadowOnly" /> <feMerge> <feMergeNode in="ShadowOnly"/> <feMergeNode in="SourceGraphic"/> </feMerge> </filter> </defs> <svg x="0" y="0"> <a xlink:href="AboutUs.html" > <text x="10" y="30" style="font-family:Arial, sans-serif; font- size:16; stroke:#CC0099; fill:#CC0099; filter:none;"> <set begin="mouseover" end="mouseout" attributeName="filter" to="url(#CombinedDropShadow)" /> About Us</text> </a> <a xlink:href="Products.html" > <text x="10" y="60" style="font-family:Arial, sans-serif; font-size:16; stroke:#CC0099; fill:#CC0099; filter:none;"> <set begin="mouseover" end="mouseout" attributeName="filter" to="url(#CombinedDropShadow)" /> Products</text> </a> <a xlink:href="Consultancy.html" > <text x="10" y="90" style="font-family:Arial, sans-serif; font-size:16; stroke:#CC0099; fill:#CC0099; filter:none;"> <set begin="mouseover" end="mouseout" attributeName="filter" to="url(#CombinedDropShadow)" /> Consultancy</text> </a> <a xlink:href="ContactUs.html" > <text x="10" y="120" style="font-family:Arial, sans-serif; font-size:16; stroke:#CC0099; fill:#CC0099; filter:none;"> <set begin="mouseover" end="mouseout" attributeName="filter" to="url(#CombinedDropShadow)" /> Contact Us</text> </a> </svg> </svg>
When you are adding additional links, you must adjust the xlink:href attribute of the <a> element, the y attribute of the <text> element, and the text contained within the <text> element. The appearance of the final menu is shown in Figure 11.09.
Figure 11.09. The text menu with the drop shadow rollover effect showing the drop shadow on a moused link.
A dynamic menu
Now look at creating a dynamic menu, using SVG declarative animation. First, take a look at how the finished menu will look. When the menu is closed, it looks similar to the one shown in Figure 11.10. When the menu is open, it looks like the one shown in Figure 11.11.
Figure 11.10. The menu in the closed position.
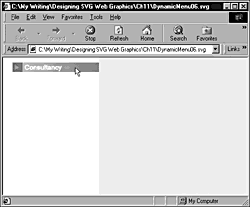
Figure 11.11. The dynamic menu when it is opened.
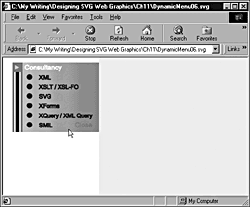
You create the closed appearance and the sliding menu tree separately and later put them together. First, create the square with the flashing triangle:
Listing 11.15 (DynamicMenu01.svg)
<?xml version="1.0" standalone="no"?> <!DOCTYPE svg PUBLIC "-//W3C//DTD SVG 1.0//EN" "http://www.w3.org/TR/2001/PR-SVG-20010719/ DTD/svg10.dtd"> <svg width="200" height="300"> <svg x="20" y="10"> <rect x="0" y="0" width="20" height="20" style="fill:#669999"/> <path d="M5,5 L5,15 13,10 z" style="fill:#669966; stroke:none"> <animate attributeName="fill" begin="0s" dur="1s" val- ues="#669966; #FFFF00; #669966" repeatCount="indefinite"/> </path> </svg> </svg>
Nothing should be unfamiliar there. Add the grayish rectangle that includes a linear gradient, and use white text against that darkish gray background. Because a click on this graphic will be the stimulus to opening the menu, you add an id attribute to the nested <svg> element. The code now looks like this:
Listing 11.16 (DynamicMenu02.svg)
<?xml version="1.0" standalone="no"?> <!DOCTYPE svg PUBLIC "-//W3C//DTD SVG 1.0//EN" "http://www.w3.org/TR/2001/PR-SVG-20010719/ DTD/svg10.dtd"> <svg width="200" height="300"> <svg id="Menu" x="20" y="10"> <defs> <linearGradient id="MyGrayGradient"> <stop offset="5%" style="stop-color:#555555"/> <stop offset="95%" style="stop-color:#AAAAAA"/> </linearGradient> </defs> <rect x="0" y="0" width="20" height="20" style="fill:#669999"/> <path d="M5,5 L5,15 13,10 z" style="fill:#669966; stroke:none"> <animate attributeName="fill" begin="0s" dur="1s" val- ues="#669966; #FFFF00; #669966" repeatCount="indefinite"/> </path> <rect x="20" y="0" width="160" height="20" style="fill:url(#MyGrayGradient); stroke:none;"/> <text x="25" y="15" style="fill:white; stroke:white; font- size:14; font-family:Arial, sans-serif;"> Consultancy </text> </svg> </svg>
Move on to create the part of the menu that appears when the main part is clicked. For now, you should be concerned only with getting the layout to fit together correctly. The <animate> element simply gives some impression of what the opening of the menu looks like.
Listing 11.17 (DynamicMenu03.svg)
<?xml version="1.0" standalone="no"?> <!DOCTYPE svg PUBLIC "-//W3C//DTD SVG 1.0//EN" "http://www.w3.org/TR/2001/PR-SVG-20010719/ DTD/svg10.dtd"> <svg> <svg x="0" y="0" width="180" height="150"> <defs> <linearGradient id="MyOtherGrayGradient"> <stop offset="5%" style="stop-color:#CCCCCC"/> <stop offset="95%" style="stop-color:#999999"/> </linearGradient> </defs> <animate attributeName="y" begin="0s" dur="4s" from="-150" to="0" fill="freeze"/> <rect x="20" y="0" width="160" height="150" style="fill:red; stroke:red;"/> <rect x="0" y="0" width="3" height="100%" style="fill:#669999;stroke:#669999"/> <rect x="4" y="0" width="2" height="100%" style="fill:white; stroke:white"/> <rect x="7" y="0" width="6" height="100%" style="fill:#000099;stroke:#000099"/> <rect x="14" y="0" width="2" height="100%" style="fill:white; stroke:white"/> <rect x="17" y="0" width="3" height="100%" style="fill:#669999;stroke:#669999"/> <rect x="20" y="0" width="160" height="100%" style="fill:url(#MyOtherGrayGradient); stroke:none;"/> </svg> </svg>
If you are wondering why a <rect> element is there with red stroke and red fill, I use that technique in fitting other elements together. If I don't have the positioning absolutely correct, some red shows through, so I know where I need to do some fine-tuning of the position.
Also notice that the from attribute of the <animate> element has a value of -150. The starting point is then 150 pixels above the top of the screen.
Next, you need to get the text etc. that offers links to the various available consultancy services.
<circle cx="35" cy="15" r="5" style="fill:#000099; stroke:#000099"/> <text id="FirstOption" x="55" y="20" style="fill:#000099; stroke:#000099"> XML </text> <circle cx="35" cy="35" r="5" style="fill:#000099; stroke:#000099"/> <text id="SecondOption" x="55" y="40" style="fill:#000099; stroke:#000099"> XSLT / XSL-FO </text> <circle cx="35" cy="55" r="5" style="fill:#000099; stroke:#000099"/> <text id="SecondOption" x="55" y="60" style="fill:#000099; stroke:#000099"> SVG </text> <circle cx="35" cy="75" r="5" style="fill:#000099; stroke:#000099"/> <text id="SecondOption" x="55" y="80" style="fill:#000099; stroke:#000099"> XForms </text> <circle cx="35" cy="95" r="5" style="fill:#000099; stroke:#000099"/> <text id="SecondOption" x="55" y="100" style="fill:#000099; stroke:#000099"> XQuery / XML Query </text> <circle cx="35" cy="115" r="5" style="fill:#000099; stroke:#000099"/> <text id="SecondOption" x="55" y="120" style="fill:#000099; stroke:#000099"> SMIL </text>
Now comes the moment of truth. How will they look when they are put together? Will the animation work? One thing you must remember is that because the slide-down menu you created second will appear from behind the top-level menu, it must appear earlier in the document than the top-level menu.
Listing 11.18 (DynamicMenu04.svg)
<?xml version="1.0" standalone="no"?> <!DOCTYPE svg PUBLIC "-//W3C//DTD SVG 1.0//EN" "http://www.w3.org/TR/2001/PR-SVG-20010719/ DTD/svg10.dtd"> <svg width="200" height="300"> <svg x="20" y="-150" width="200" height="130"> <defs> <linearGradient id="MyGrayGradient"> <stop offset="5%" style="stop-color:#CCCCCC"/> <stop offset="95%" style="stop-color:#999999"/> </linearGradient> </defs> <animate attributeName="y" begin="Menu.click" dur="1s" from=" -150" to="25" fill="freeze"/> <rect x="0" y="0" width="160" height="150" style="fill:red; stroke:red;"/> <rect x="0" y="0" width="3" height="100%" style="fill:#669999;stroke:#669999"/> <rect x="4" y="0" width="2" height="100%" style="fill:white; stroke:white"/> <rect x="7" y="0" width="6" height="100%" style="fill:#000099;stroke:#000099"/> <rect x="14" y="0" width="2" height="100%" style="fill:white; stroke:white"/> <rect x="17" y="0" width="3" height="100%" style="fill:#669999;stroke:#669999"/> <rect x="20" y="0" width="160" height="100%" style="fill:url(#MyGrayGradient); stroke:none;"/> <circle cx="35" cy="15" r="5" style="fill:#000099; stroke:#000099"/> <text id="FirstOption" x="55" y="20" style="fill:#000099; stroke:#000099"> XML </text> <circle cx="35" cy="35" r="5" style="fill:#000099; stroke:#000099"/> <text id="SecondOption" x="55" y="40" style="fill:#000099; stroke:#000099"> XSLT / XSL-FO </text> <circle cx="35" cy="55" r="5" style="fill:#000099; stroke:#000099"/> <text id="SecondOption" x="55" y="60" style="fill:#000099; stroke:#000099"> SVG </text> <circle cx="35" cy="75" r="5" style="fill:#000099; stroke:#000099"/> <text id="SecondOption" x="55" y="80" style="fill:#000099; stroke:#000099"> XForms </text> <circle cx="35" cy="95" r="5" style="fill:#000099; stroke:#000099"/> <text id="SecondOption" x="55" y="100" style="fill:#000099; stroke:#000099"> XQuery / XML Query </text> <circle cx="35" cy="115" r="5" style="fill:#000099; stroke:#000099"/> <text id="SecondOption" x="55" y="120" style="fill:#000099; stroke:#000099"> SMIL </text> </svg> <rect x="0" y="0" width="200" height="10" style="fill:white; stroke:white"/> <svg id="Menu" x="20" y="10"> <defs> <linearGradient id="MyGrayGradient"> <stop offset="5%" style="stop-color:#555555"/> <stop offset="95%" style="stop-color:#AAAAAA"/> </linearGradient> </defs> <rect x="0" y="0" width="20" height="20" style="fill:#669999"/> <path d="M5,5 L5,15 13,10 z" style="fill:#669966; stroke:none"> <animate attributeName="fill" begin="0s" dur="1s" val- ues="#669966; #FFFF00; #669966" repeatCount="indefinite"/> </path> <rect x="20" y="0" width="160" height="20" style="fill:url(#MyGrayGradient); stroke:none;"/> <text x="25" y="15" style="fill:white; stroke:white; font- size:14; font-family:Arial, sans-serif;"> Consultancy </text> </svg> </svg>
Already, the code looks fairly hefty, but you still have a few things to do to create a fully functional menu. You need to add <a> elements to provide the linking functionality, and you need to provide rollover effects, both on the text in the menu and on the <circle> elements that are acting as bul-lets for the available choices. And, of course, you need animation to allow the slide-down menu to close when the top-level menu is clicked again at least, you would if the user wasn't going to take one of the available choices from the menu.
When you have added the link and rollovers, the code for the SVG consultancy option looks like this:
<a id="SVGChoice" xlink:href="SVGConsultancy.html"> <circle cx="35" cy="55" r="5" style="fill:#000099; stroke:#000099"> <animate begin="SVGChoice.mouseover" dur="0.01s" attributeName="fill" from="#000099" to="#FF0066" fill="freeze"/> <animate begin="SVGChoice.mouseout" dur="0.01s" attributeName="fill" from="#FF0066" to="#000099" fill="freeze"/> </circle> <text id="SecondOption" x="55" y="60" style="fill:#000099; stroke:#000099"> <animate begin="SVGChoice.mouseover" dur="0.01s" attributeName="fill" from="#000099" to="#FF0066" fill="freeze"/> <animate begin="SVGChoice.mouseout" dur="0.01s" attributeName="fill" from="#FF0066" to="#000099" fill="freeze"/> <animate begin="SVGChoice.mouseover" dur="0.01s" attributeName="stroke" from="#000099" to="#FF0066" fill="freeze"/> <animate begin="SVGChoice.mouseout" dur="0.01s" attributeName="stroke" from="#FF0066" to="#000099" fill="freeze"/> SVG </text> </a>
Now put all that together. Take time to walk through the code, and make sure that you understand it. If part of it puzzles you, rewind a little and check the explanations earlier in this section so that, gradually, the purpose of each part of the code becomes clearer.
Listing 11.19 (DynamicMenu06.svg)
<?xml version="1.0" standalone="no"?> <!DOCTYPE svg PUBLIC "-//W3C//DTD SVG 1.0//EN" "http://www.w3.org/TR/2001/PR-SVG-20010719/ DTD/svg10.dtd"> <svg width="200" height="300"> <svg x="20" y="-150" width="200" height="130"> <defs> <linearGradient id="MyGrayGradient"> <stop offset="5%" style="stop-color:#CCCCCC"/> <stop offset="95%" style="stop-color:#999999"/> </linearGradient> </defs> <animate attributeName="y" begin="Menu.click" dur="1s" from="- 150" to="25" fill="freeze"/> <animate attributeName="y" begin="MenuClose.click" dur="1s" from="25" to="-150" fill="freeze"/> <rect x="0" y="0" width="160" height="150" style="fill:red; stroke:red;"/> <rect x="0" y="0" width="3" height="100%" style="fill:#669999;stroke:#669999"/> <rect x="4" y="0" width="2" height="100%" style="fill:white; stroke:white"/> <rect x="7" y="0" width="6" height="100%" style="fill:#000099;stroke:#000099"/> <rect x="14" y="0" width="2" height="100%" style="fill:white; stroke:white"/> <rect x="17" y="0" width="3" height="100%" style="fill:#669999;stroke:#669999"/> <rect x="20" y="0" width="160" height="100%" style="fill:url(#MyGrayGradient); stroke:none;"/> <a id="XMLChoice" xlink:href="XMLConsulting.html"> <circle cx="35" cy="15" r="5" style="fill:#000099; stroke:#000099"> <animate begin="XMLChoice.mouseover" dur="0.01s" attributeName="fill" from="#000099" to="#FF0066" fill="freeze"/> <animate begin="XMLChoice.mouseout" dur="0.01s" attributeName="fill" from="#FF0066" to="#000099" fill="freeze"/> </circle> <text id="FirstOption" x="55" y="20" style="fill:#000099; stroke:#000099"> <animate begin="XMLChoice.mouseover" dur="0.01s" attributeName="fill" from="#000099" to="#FF0066" fill="freeze"/> <animate begin="XMLChoice.mouseout" dur="0.01s" attributeName="fill" from="#FF0066" to="#000099" fill="freeze"/> <animate begin="XMLChoice.mouseover" dur="0.01s" attributeName="stroke" from="#000099" to="#FF0066" fill="freeze"/> <animate begin="XMLChoice.mouseout" dur="0.01s" attributeName="stroke" from="#FF0066" to="#000099" fill="freeze"/> XML </text> </a> <a id="XSLTChoice" xlink:href="XSLTXSLFOConsultancy.html"> <circle cx="35" cy="35" r="5" style="fill:#000099; stroke:#000099"> <animate begin="XSLTChoice.mouseover" dur="0.01s" attributeName="fill" from="#000099" to="#FF0066" fill="freeze"/> <animate begin="XSLTChoice.mouseout" dur="0.01s" attributeName="fill" from="#FF0066" to="#000099" fill="freeze"/> </circle> <text id="SecondOption" x="55" y="40" style="fill:#000099; stroke:#000099"> <animate begin="XSLTChoice.mouseover" dur="0.01s" attributeName="fill" from="#000099" to="#FF0066" fill="freeze"/> <animate begin="XSLTChoice.mouseout" dur="0.01s" attributeName="fill" from="#FF0066" to="#000099" fill="freeze"/> <animate begin="XSLTChoice.mouseover" dur="0.01s" attributeName="stroke" from="#000099" to="#FF0066" fill="freeze"/> <animate begin="XSLTChoice.mouseout" dur="0.01s" attributeName="stroke" from="#FF0066" to="#000099" fill="freeze"/> XSLT / XSL-FO </text> </a> <a id="SVGChoice" xlink:href="SVGConsultancy.html"> <circle cx="35" cy="55" r="5" style="fill:#000099; stroke:#000099"> <animate begin="SVGChoice.mouseover" dur="0.01s" attributeName="fill" from="#000099" to="#FF0066" fill="freeze"/> <animate begin="SVGChoice.mouseout" dur="0.01s" attributeName="fill" from="#FF0066" to="#000099" fill="freeze"/> </circle> <text id="SecondOption" x="55" y="60" style="fill:#000099; stroke:#000099"> <animate begin="SVGChoice.mouseover" dur="0.01s" attributeName="fill" from="#000099" to="#FF0066" fill="freeze"/> <animate begin="SVGChoice.mouseout" dur="0.01s" attributeName="fill" from="#FF0066" to="#000099" fill="freeze"/> <animate begin="SVGChoice.mouseover" dur="0.01s" attributeName="stroke" from="#000099" to="#FF0066" fill="freeze"/> <animate begin="SVGChoice.mouseout" dur="0.01s" attributeName="stroke" from="#FF0066" to="#000099" fill="freeze"/> SVG </text> </a> <a id="XFormsChoice" xlink:href="XFormsConsultancy.html"> <circle cx="35" cy="75" r="5" style="fill:#000099; stroke:#000099"> <animate begin="XFormsChoice.mouseover" dur="0.01s" attributeName="fill" from="#000099" to="#FF0066" fill="freeze"/> <animate begin="XFormsChoice.mouseout" dur="0.01s" attributeName="fill" from="#FF0066" to="#000099" fill="freeze"/> </circle> <text id="SecondOption" x="55" y="80" style="fill:#000099; stroke:#000099"> <animate begin="XFormsChoice.mouseover" dur="0.01s" attributeName="fill" from="#000099" to="#FF0066" fill="freeze"/> <animate begin="XFormsChoice.mouseout" dur="0.01s" attributeName="fill" from="#FF0066" to="#000099" fill="freeze"/> <animate begin="XFormsChoice.mouseover" dur="0.01s" attributeName="stroke" from="#000099" to="#FF0066" fill="freeze"/> <animate begin="XFormsChoice.mouseout" dur="0.01s" attributeName="stroke" from="#FF0066" to="#000099" fill="freeze"/> XForms </text> </a> <a id="XQueryChoice" xlink:href="XQueryConsultancy.html"> <circle cx="35" cy="95" r="5" style="fill:#000099; stroke:#000099"> <animate begin="XQueryChoice.mouseover" dur="0.01s" attributeName="fill" from="#000099" to="#FF0066" fill="freeze"/> <animate begin="XQueryChoice.mouseout" dur="0.01s" attributeName="fill" from="#FF0066" to="#000099" fill="freeze"/> </circle> <text id="SecondOption" x="55" y="100" style="fill:#000099; stroke:#000099"> <animate begin="XQueryChoice.mouseover" dur="0.01s" attributeName="fill" from="#000099" to="#FF0066" fill="freeze"/> <animate begin="XQueryChoice.mouseout" dur="0.01s" attributeName="fill" from="#FF0066" to="#000099" fill="freeze"/> <animate begin="XQueryChoice.mouseover" dur="0.01s" attributeName="stroke" from="#000099" to="#FF0066" fill="freeze"/> <animate begin="XQueryChoice.mouseout" dur="0.01s" attributeName="stroke" from="#FF0066" to="#000099" fill="freeze"/> XQuery / XML Query </text> </a> <a id="SMILChoice" xlink:href="SMILConsultancy.html"> <circle cx="35" cy="115" r="5" style="fill:#000099; stroke:#000099"> <animate begin="SMILChoice.mouseover" dur="0.01s" attributeName="fill" from="#000099" to="#FF0066" fill="freeze"/> <animate begin="SMILChoice.mouseout" dur="0.01s" attributeName="fill" from="#FF0066" to="#000099" fill="freeze"/> </circle> <text id="SecondOption" x="55" y="120" style="fill:#000099; stroke:#000099"> <animate begin="SMILChoice.mouseover" dur="0.01s" attributeName="fill" from="#000099" to="#FF0066" fill="freeze"/> <animate begin="SMILChoice.mouseout" dur="0.01s" attributeName="fill" from="#FF0066" to="#000099" fill="freeze"/> <animate begin="SMILChoice.mouseover" dur="0.01s" attributeName="stroke" from="#000099" to="#FF0066" fill="freeze"/> <animate begin="SMILChoice.mouseout" dur="0.01s" attributeName="stroke" from="#FF0066" to="#000099" fill="freeze"/> SMIL </text> </a> <a> <text id="MenuClose" x="130" y="120" style="fill:red; stroke:none; font-size:14"> Close </text> </a> </svg> <rect x="0" y="0" width="200" height="10" style="fill:white; stroke:white"/> <svg id="Menu" x="20" y="10"> <defs> <linearGradient id="MyGrayGradient"> <stop offset="5%" style="stop-color:#555555"/> <stop offset="95%" style="stop-color:#AAAAAA"/> </linearGradient> </defs> <rect x="0" y="0" width="20" height="20" style="fill:#669999"/> <path d="M5,5 L5,15 13,10 z" style="fill:#669966; stroke:none"> <animate attributeName="fill" begin="0s" dur="1s" val- ues="#669966; #FFFF00; #669966" repeatCount="indefinite"/> </path> <rect x="20" y="0" width="160" height="20" style="fill:url(#MyGrayGradient); stroke:none;"/> <text x="25" y="15" style="fill:white; stroke:white; font- size:14; font-family:Arial, sans-serif;"> Consultancy </text> </svg> </svg>
If you have, as you might in a production, two or three of these, you have a reasonably sized download on your hands.
Links using SVG
Because SVG documents or document fragments are commonly used as navigation graphics in Web pages, you should understand fully how to make use of SVG linking functionality. That aspect of SVG interactivity was covered in Chapter 5.
Zooming, Panning and Scrolling SVG Images
Conforming SVG viewers are required to provide the zooming and panning of SVG images. The details of how that is done are left to the implementation in individual SVG viewers.
However, in some situations, you may not want a user to be able to use zooming and panning. In this type of situation, you can disable zooming by setting the zoomAndPan attribute on the outer <svg> element to a value of disable:
<svg zoomAndPan="disable">
The only other value that the zoomAndPan attribute might take is magnify, which is the default. If the zoomAndPan attribute is not mentioned in an <svg> element, therefore, zooming and panning are enabled.
Adding a zoomAndPan attribute to a nested <svg> element has no effect on whether zooming and panning are enabled. The zoomAndPan attribute on the outer <svg> element defines the setting image-wide.
Zooming
In the Adobe SVG Viewer version 2.0, you access zooming functionality by right-clicking on the SVG image. A menu is then displayed with several options, of which the first three relate to zooming.
Alternatively, you can hold down the Ctrl key and drag out an area with the mouse.
Panning
Just as with zooming, the detailed way in which panning is implemented varies from one SVG viewer to another.
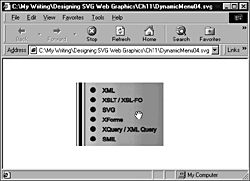
To pan an image in the Adobe Viewer on a Windows platform, hold down the Alt key and then hold down the left mouse button. The cursor then changes to an open hand, as you can see in Figure 11.12.
Figure 11.12. Panning an SVG image (note the open-hand cursor).
Scrolling
At the time this book was written, none of the SVG viewers provided scrolling functionality at least not using the familiar browser scroll bars. The technique for providing scroll bars for an SVG image is described in Chapter 10, "Embedding SVG in HTML or XHTML Pages."
In this chapter, you have seen some examples of using SVG to produce the interactivity of types that are commonly used on Web pages. The techniques you have seen can be adapted for use with other SVG shapes. If you have grasped these techniques, you have a good base for applying your own creativity to create dynamic, interactive SVG Web page furniture.
| CONTENTS |
EAN: 2147483647
Pages: 26