Creating Business Components
Creating Business ComponentsIn this section, you learn how to create business components using Visual Basic and use the components in an ASP.NET page. Business components have a number of benefits:
Creating a Simple Business ComponentA business component is a Visual Basic class file. Whenever you create a component, you need to complete each of the following three steps:
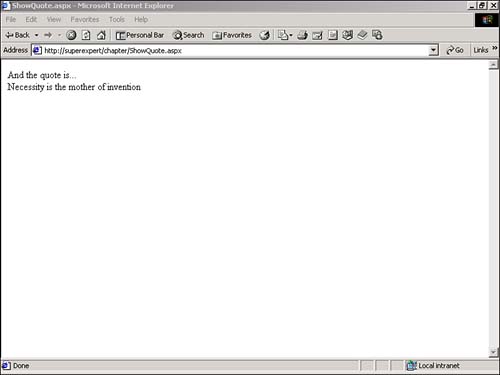
Start by creating a simple component that randomly displays different quotations. You can call this component the quote component . First, you need to create the Visual Basic class file for the component. The quote component is contained in Listing 6.1. Listing 6.1 Quote.vbImports System Namespace myComponents Public Class Quote Dim myRand As New Random Public Function ShowQuote() As String Select myRand.Next( 3 ) Case 0 Return "Look before you leap" Case 1 Return "Necessity is the mother of invention" Case 2 Return "Life is full of risks" End Select End Function End Class End Namespace The C# version of this code can be found on the CD-ROM. The first line in Listing 6.1 imports the System namespace. You need to import this namespace because you use the Random class in your function, and the Random class is a member of the System namespace. NOTE You don't have to import the System , System.Collections , System.Collections.Specialized , System.Configuration , System.Text , System.Text.RegularExpressions , System.Web , System.Web.Caching , System.Web.Security , System.Web.SessionState , System.Web.UI , System.Web.UI.HTMLControls , or System.Web.UI.WebControls namespaces in an ASP.NET page because these namespaces are automatically imported by default. However, a Visual Basic class file does not have default namespaces. Next, you need to create your own namespace for the class file. In Listing 6.1, you created a new namespace called myComponents . You could have created a namespace with any name you pleased. You need to import this namespace when you create the ASP.NET page that uses this component. NOTE If you don't create a namespace for a class, the class is added to something called the global namespace . In general, it's not a good idea to add classes to the global namespace since it increases the likelihood of naming conflicts. The remainder of Listing 6.1 contains the declaration for your Visual Basic class. The class has a single function, named ShowQuote() , that randomly returns one of three quotations. This function is exposed as a method of the Quote class. After you write your component, you need to save it in a file that ends with the extension .vb . Save the file in Listing 6.1 with the name Quote.vb . NOTE The Visual Basic compiler (vbc.exe) is located in your WINNT\Microsoft.NET\Framework\[ version ] directory. You might need to add vbc.exe to your PATH environment variable using the DOS Path command. If you install Visual Studio .NET, then you can execute the vbc.exe compiler by opening the Visual Studio .NET Command Prompt located at Start, Programs, Microsoft Visual Studio .NET, Visual Studio .NET Tools. The next step is to compile your Quote.vb file by using the vbc command-line compiler included with the .NET framework. Open a DOS prompt, navigate to the directory that contains the Quote.vb file, and execute the following statement (see Figure 6.1): vbc /t:library quote.vb Figure 6.1. Compiling a component. The /t option tells the compiler to create a DLL file rather than an EXE file. NOTE If you use either Web or HTML controls in your component, you need to add a reference to the system.web.dll assembly when you compile the component like this: vbc /t:library /r:system.web.dll quote.vb All the classes in the .NET framework are contained in assemblies . If you use a specialized class, you need to reference the proper assembly when you compile the component. If you look up a particular class in the .NET Framework SDK Documentation, it will list the assembly associated with the class. If no errors are encountered during compilation, a new file named Quote.dll should appear in the same directory as the Quote.vb file. You now have a compiled business component. The final step is to move the component to a directory where the Web server can find it. To use the component in your ASP.NET pages, you need to move it to a special directory named /BIN . If this directory does not already exist, you can create it. ASP CLASSIC NOTE You do not need to register the component in the server's Registry by using a tool such as regsvr32.exe . Information about ASP.NET components is not stored in the Registry. This means that you can copy a Web application to a new server, and all the components immediately work on that new server. The /BIN directory must be an immediate subdirectory of your application's root directory. By default, the /BIN directory should be located under the wwwroot directory. However, if your application is contained in a Virtual Directory, you must create the /BIN directory in the root directory of the Virtual Directory. Immediately after you copy the component to the /BIN directory, you can use it in your ASP.NET pages. For example, the page in Listing 6.2 uses the quote component to assign a random quote to a Label control. ASP CLASSIC NOTE Great news! You no longer need to stop and restart your Web server to use a component whenever you modify it. As soon as you move a component into the /BIN directory, the new component will be used for all new page requests . ASP.NET components are not locked on disk because the Web server maintains shadow copies of all the components in a separate directory. When you replace a component in the /BIN directory, the Web server completes all the current page requests using the old version of the component in the shadow directory. As soon as all the current requests are completed, the shadow copy of the old component is automatically replaced with the new component. Listing 6.2 ShowQuote.aspx<%@ Import Namespace="myComponents" %> <Script Runat="Server"> Sub Page_Load Dim myQuote As New Quote lblOutput.Text = myQuote.ShowQuote() End Sub </Script> <html> <head><title>ShowQuote.aspx</title></head> <body> And the quote is... <br> <asp:Label id="lblOutput" Runat="Server" /> </body> </html> The C# version of this code can be found on the CD-ROM. The first line in Listing 6.2 imports the namespace. After the namespace is imported, you can use your component just like any .NET class. In the Page_Load subroutine, you create an instance of your component. Next, you call the ShowQuote() method of the component to assign a random quotation to the Label control (see Figure 6.2). Figure 6.2. Output of the quote component. Using Properties in a ComponentYou can add properties to a component in two ways. Either you can create public variables , or you can use property accessor syntax. Adding properties by using public variables is the easiest method. For example, the component in Listing 6.3 has two variables named FirstValue and SecondValue . Because these variables are exposed as public variables, you can access them as properties of the object. Listing 6.3 Adder .vbImports System Namespace myComponents Public Class Adder Public FirstValue As Integer Public SecondValue As Integer Function AddValues() As Integer Return FirstValue + SecondValue End Function End Class End Namespace The C# version of this code can be found on the CD-ROM. The component in Listing 6.3 is named the adder component . It simply adds together the values of whatever numbers are assigned to its properties and returns the sum in the AddValues() function. The ASP.NET page in Listing 6.4 illustrates how you can use the adder component to add the values entered into two TextBox controls. Listing 6.4 AddValues.aspx<%@ Import Namespace="myComponents" %> <Script Runat="Server"> Sub Button_Click( s As Object, e As EventArgs ) Dim myAdder As New Adder myAdder.FirstValue = txtVal1.Text myAdder.SecondValue = txtVal2.Text lblOutput.Text = myAdder.AddValues() End Sub </Script> <html> <head><title>AddValues.aspx</title></head> <body> <form Runat="Server"> Value 1: <asp:TextBox ID="txtVal1" Runat="Server" /> <p> Value 2: <asp:TextBox ID="txtVal2" Runat="Server" /> <p> <asp:Button Text="Add!" OnClick="Button_Click" Runat="Server" /> <p> Output: <asp:Label ID="lblOutput" Runat="Server" /> </form> </body> </html> The C# version of this code can be found on the CD-ROM. You also can expose properties in a component by using property accessor syntax. Using this syntax, you can define a Set function that executes every time you assign a value to a property and a Get function that executes every time you read a value from a property. You can then place validation logic into the property's Get and Set functions to prevent certain values from being assigned or read. The modified version of the adder component in Listing 6.5, for example, uses property accessor syntax. Listing 6.5 AdderProperties.vbImports System Namespace myComponents Public Class AdderProperties Private _firstValue As Integer Private _secondValue As Integer Public Property FirstValue As Integer Get Return _firstValue End Get Set _firstValue = Value End Set End Property Public Property SecondValue As Integer Get Return _secondValue End Get Set _secondValue = Value End Set End Property Function AddValues() As Integer Return _firstValue + _secondValue End Function End Class End Namespace The C# version of this code can be found on the CD-ROM. The modified version of the adder component in Listing 6.5 works in exactly the same way as the original adder component. When you assign a new value to the FirstValue property, the Set function executes and assigns the value to a private variable named _firstValue . When you read the FirstValue property, the Get function executes and returns the value of the private _firstvalue variable. The advantage of using accessor functions with properties is that you can add validation logic into the functions. For example, if you never want someone to assign a value less than to the FirstValue property, you can declare the FirstValue property like this: Public Property firstValue As Integer Get Return _firstValue End Get Set If value < 0 Then _firstValue = 0 Else _firstValue = Value End If End Set End Property This Set function checks whether the value passed to it is less than . If the value is, in fact, less than , the value is assigned to the private _firstValue variable. Using a Component to Handle EventsYou can use components to move some, but not all, of the application logic away from an ASP.NET page to a separate compiled file. Imagine, for example, that you want to create a simple user registration form with an ASP.NET page. When someone completes the user registration form, you want the information to be saved in a file. You also want to use a component to encapsulate the logic for saving the form data to a file. Listing 6.6 contains a simple user registration component. This component has a sub-routine named doRegister that accepts three parameters: FirstName , LastName , and FavColor . The component saves the values of these parameters to a file named _ userlist.txt . NOTE File access in the .NET framework is discussed in detail in Chapter 25, "Working with the File System." Listing 6.6 Register.vbImports System Imports System.IO Namespace myComponents Public Class Register Shared Sub doRegister( FirstName As String, LastName As String, FavColor As String ) Dim strPath As String = "c:\userlist.txt" Dim strmFile As StreamWriter strmFile = File.AppendText( strPath ) strmFile.Write( "first name: " & firstname & Environment.NewLine ) strmFile.Write( "last name: " & lastname & Environment.NewLine ) strmFile.Write( "favorite Color: " & favColor & Environment.NewLine ) strmFile.Write( "=============" & Environment.NewLine ) strmFile.Close End Sub End Class End Namespace The C# version of this code can be found on the CD-ROM. After you compile the Register.vb file and copy the compiled component to the /BIN directory, you can use the component in an ASP.NET page. The page in Listing 6.7 demonstrates how you can use the register component. Listing 6.7 UserRegistration.aspx<%@ Import Namespace="myComponents" %> <Script Runat="Server"> Sub Button_Click( s As Object, e As EventArgs ) Register.doRegister( txtFirstName.Text, txtLastName.Text, txtFavColor.Text ) End Sub </Script> <html> <head><title>UserRegistration.aspx</title></head> <body> <form Runat="Server"> First Name: <br> <asp:TextBox ID="txtFirstName" Runat="Server" /> <p> Last Name: <br> <asp:TextBox ID="txtLastName" Runat="Server" /> <p> Favorite Color: <br> <asp:TextBox ID="txtFavColor" Runat="Server" /> <p> <asp:Button Text="Register!" OnClick="Button_Click" Runat="Server" /> </form> </body> </html> The C# version of this code can be found on the CD-ROM. When someone completes the form and clicks the button, the Button_Click subroutine is executed. This subroutine calls the doRegister() method to save the form data to a file. NOTE In Listing 6.7, you do not need to create an instance of the Register component before calling its doRegister() method. You don't need to create an instance of the component since the doRegister() method is declared as a shared method. Typically, when you declare a method, you declare instance methods. Instance methods operate on a particular instance of a class. A shared method, however, operates on the class itself. Notice that you must still place some of the application logic in the UserRegistration. aspx page. In the Button_Click subroutine, you must pass the values entered into each of the TextBox controls to the doRegister() method. You are forced to do so because you cannot refer directly to the controls in UserRegistration.aspx from the register component. Later in this chapter, in the discussion of code-behind, you learn how to move all your application logic into a separate compiled file. Using the Current HttpContext in a ComponentWhen using components, it would be nice if you could take advantage of ASP.NET intrinsics such as the Cache , Session , Application , or Trace objects. For example, if you are using a component to return database data, it would be great if there were a way to use the Cache object inside a component so that you could cache the database data returned by the component. Or, if you are trying to debug a component, it would be nice if there were a way to use the Trace.Warn() method to output tracing information to the page that hosts the component. NOTE The Cache , Session , and Application objects are discussed in Part IV of this book, "Working with ASP.NET Applications." Within an ASP.NET page, you are able to use objects such as the Cache and Session objects since these objects are exposed as properties of the Page class. When you are creating a component, on the other hand, these objects are not available in the same way. If you want to use ASP.NET intrinsics within a component, you must first get a reference to the HttpContext object. For example, if you want to use the Trace object to output a trace message, then you would need to use the following line of code: System.Web.HttpContext.Current.Trace.Warn( "Trace message from a component!" ) The statement System.Web.HttpContext.Current returns an object that represents the current HttpContext . This object has properties that expose standard ASP.NET objects such as the Trace , Cache , and Session objects. Since the HttpContext object is located in the System.Web namespace, you must add a reference to the System.Web.dll assembly when compiling a component that refers to the HttpContext object. |

EAN: 2147483647
Pages: 263