| Since all the necessary fields are already on the layout and most will share the same format, we can save some time by formatting them now.  In Layout mode (View > Layout Mode), select all the field labels. In Layout mode (View > Layout Mode), select all the field labels.
You can drag a selection rectangle around the labels using the Selection Tool or  -click each label. However, the fastest way is to select one of the labels and then press -click each label. However, the fastest way is to select one of the labels and then press    / / . .  Format the labels as Arial, 12 pt., Bold. Format the labels as Arial, 12 pt., Bold.
You can choose formatting options from the Format submenus or from the Text Formatting toolbar (View > Toolbars > Text Formatting).   Select one field, and then press / to select all fields. Format the fields as Arial, 10 pt. Select one field, and then press / to select all fields. Format the fields as Arial, 10 pt.
  Select all fields and labels by choosing Edit > Select All. To change them all to the new height, choose Arrange > Resize To > Largest Height. Select all fields and labels by choosing Edit > Select All. To change them all to the new height, choose Arrange > Resize To > Largest Height.
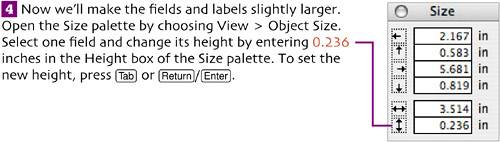
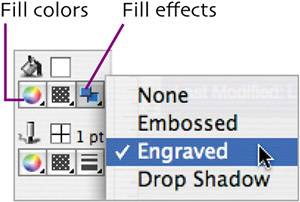
 Select only the fields again. Set the fill color to white and the effect to Engraved. Select only the fields again. Set the fill color to white and the effect to Engraved.
 To create a 1-point black border around every field, choose Format > Field/Control > Borders. Ensure that Borders is selected in the drop-down list in the Field Borders dialog box. Click the Top, Bottom, Left, and Right check boxes, and then click OK. To create a 1-point black border around every field, choose Format > Field/Control > Borders. Ensure that Borders is selected in the drop-down list in the Field Borders dialog box. Click the Top, Bottom, Left, and Right check boxes, and then click OK.
|