Chapter 3. creating the data entry layout
| As explained in Chapter 2, the default layout created when you define the initial set of fields can sometimes be used as-is. But if you want the database to be attractive and pleasant to use, it's more common to design a custom layout instead. Normally, layouts are created with the New Layout/Report wizard. By starting with the wizard, you can select a formatting theme and colors, as well as specify the fields to use. However, since our default layout already contains the necessary fields, we'll use it as the starting point for Main, the data entry layout. (Note that all changes to layouts are made in Layout mode.) 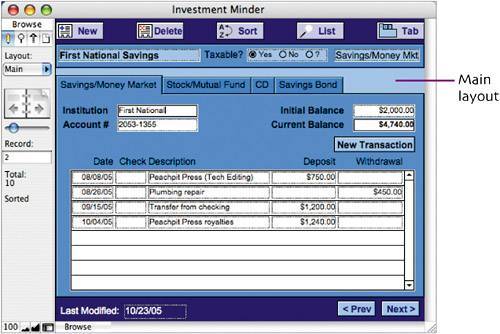 |
Creating a Database in FileMaker Pro 8: Visual QuickProject Guide
ISBN: 0321414837
EAN: 2147483647
EAN: 2147483647
Year: 2005
Pages: 115
Pages: 115
Authors: Steve Schwartz
- Challenging the Unpredictable: Changeable Order Management Systems
- The Effects of an Enterprise Resource Planning System (ERP) Implementation on Job Characteristics – A Study using the Hackman and Oldham Job Characteristics Model
- Distributed Data Warehouse for Geo-spatial Services
- Data Mining for Business Process Reengineering
- Healthcare Information: From Administrative to Practice Databases