The Interface
| There have been a lot of upgrades to the Flash authoring environment, and one in particular is a "catch-up" feature added to the Mac. Tabs on the MacOne of the best productivity features in the previous version of Flash was the document tabs at the top of the screen. This allowed users working in the interface to quickly switch between files, including FLAs, ActionScript files, and JSFL files. But in the previous version of Flash, this feature was PC only. Now, as you can see in Figure 1.1, document tabs have indeed been included in the Mac interface. However, if you prefer the old way of having several floating file windows, you can easily switch back to it on the Mac platform. Figure 1.1. Document tabs in the Mac interface. Tabs in Panels Are BackThose who worked in Flash as early as Flash 5 will remember when you could group panels together into a single panel with a tab for each individual section. When Flash MX came out, this feature was removed in favor of dockable/collapsible panels. Now this feature is back, and dockable/collapsible panels are still here as well. To group panels together, select the panel options drop-down (in the top right of the panel) and select Group "PANEL NAME" with, and then select the panel or group of panels you want to group the current panel with. You can also choose New Panel Group to remove the selected panel from the group it is currently in. Figure 1.2 shows the Transform tab among other tabs inside the same panel window. Figure 1.2. Grouping panels is a welcome feature returned to the Flash authoring environment.
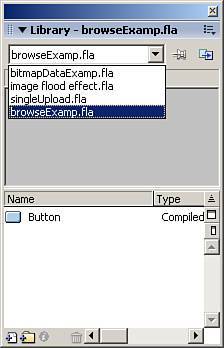
One Library to Rule Them AllIn previous versions of Flash, when you had multiple documents open, and you wanted to grab elements from one library and place them in another file, you would have a separate library for each document. The new library has a drop-down menu, as shown in Figure 1.3, that enables you to switch among different document libraries. You can also "pin" the current library so that when you switch documents, it stays as the current library. This new feature is similar to the feature added in the previous version of Flash that enabled you to pin ActionScript in the Actions panel. If you want to have several libraries floating around instead of the one, you can do this as well by clicking the New Library panel to the right of the Pin Current Library button. Figure 1.3. A single Library panel will help you keep as much screen real estate as possible.
Bigger PasteboardSometimes, you will want to have content available, but not necessarily on the stage where it is visible to end users. Most Flash users will put these elements off the stage in what's called the pasteboard. This area will not be viewable by end users viewing your Flash content, but you can manipulate it with ActionScript or tweening. In Flash 8, the pasteboard has been expanded to allow the storage of even more elements. Two Levels of UndoWith Flash 8, you now have two options for undoing mistakes:
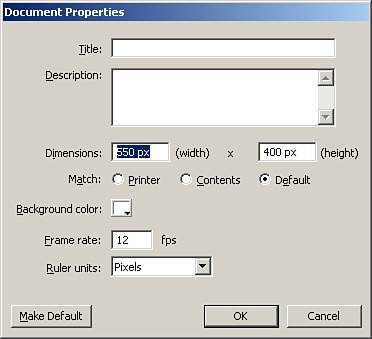
You can set which type of undo you want to use by going to Edit, Preferences, and opening the Preferences window, which has also been updated, as you can see in Figure 1.4. Figure 1.4. The new and improved Preferences window.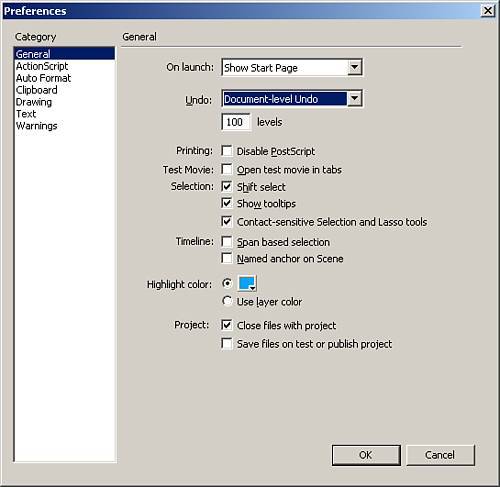 Object DrawingThe New GroupingWhen dealing with raw shapes on the stage, if you place one shape over top of the other (in the same layer) and then move that shape, the shape in the background will have lost the area the foreground shape was overlaying. You can group shapes so that this will not happen, but then you lose the ability to directly edit them. Drawing Objects, however, have the best of both worlds. Drawing Objects can be placed over other Drawing Objects or raw shapes on the same level, and they will not affect one another. In addition, Drawing Objects can have changes applied to them just as if they were a raw shape. You can create Drawing Objects as you draw the shape with the Rectangle and Oval tool by selecting the Object Drawing option in the Options section of the toolbar. You can also convert raw shapes to Drawing Objects by selecting the shape and going to Modify, Combine Objects, Union. You can see in Figure 1.5 that when a Drawing Object is selected, the Properties Inspector will still show the same options as if it were a raw shape. Figure 1.5. Drawing Objects have the capability to be edited like raw shapes, but do not affect other elements like groups. Content on the GoWith the capability to publish to both Flash Lite 1.0 and 1.1, you might be using Flash to create a great deal of mobile content. Macromedia has included several templates and panels to help you. After you set your publish settings to publish to Flash Lite, the device settings become available, as shown in Figure 1.6. Here you can select the content type your application will be, and as you do, all the available devices for that content type become available. Then you can select the individual devices that you want to test on and click OK. Figure 1.6. The Device Settings window where you can choose which devices to test for.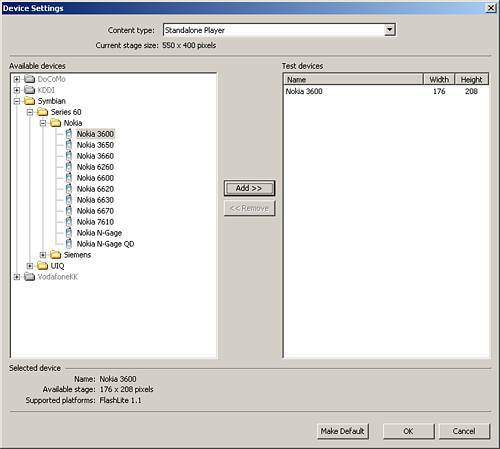 When you have your Flash app ready for testing, you can test the movie as you would normally by going to Control, Test Movie, but this time a different window will appear, as in Figure 1.7. In this test window, you can choose the different devices to test and output information about your application. You can also adjust the magnification level and rotation of the device in the test environment. Figure 1.7. The test devices window where you can test your Flash content in emulators of your selected devices.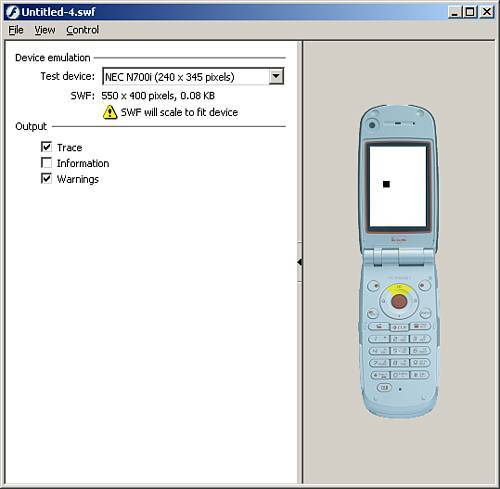 Hide and Seek Is OverOne of the major complaints about Flash content on the web (.swf files) is that their content cannot be searched by search engines such as Google. But now in Flash 8, you can actually embed data directly into your published content instead of just having comments and text within the HTML that many search engines do not fully index. To create the metadata necessary for search engines to see SWFs, fill out two fields in the Document Properties dialog box, as shown in Figure 1.8. Figure 1.8. You can now embed metadata directly into your SWF file through Document Properties.
Following are descriptions of the two fields:
There are even more new features in the interface, and you will find them scattered throughout the book. But the interface is not the only part of Flash to receive upgrades. Welcome Back, Normal ModeIf you have worked in Flash MX or earlier, you might remember an optional way to enter ActionScript that did not require a great deal of typing, but instead allowed you to choose certain options for certain scripts. This was called Normal mode, and it was removed from Flash MX 2004. However, it has returned to Flash as Script Assist. Script Assist will help you if you are unfamiliar with ActionScript or are concerned that you might be missing some options of a given script. To activate Script Assist, click the Script Assist button in the Actions panel (Window, Actions) and you will see something like Figure 1.9. Figure 1.9. The Actions panel with Script Assist turned on and the gotoAndPlay action selected.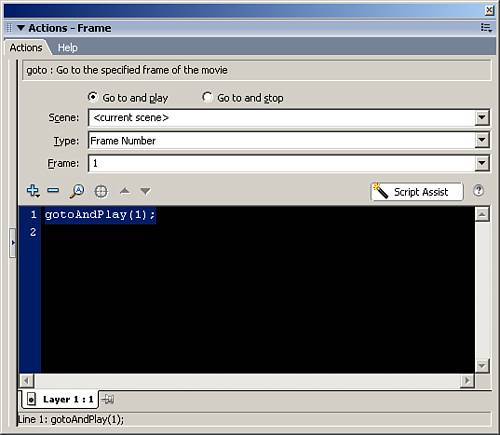 |

EAN: 2147483647
Pages: 319