| You can create bitmap fills in two ways: by using the bitmaps that live in the library or by using editable bitmaps. When you select a bitmap as a fill, Flash turns it into a repeating, or tiling, pattern within the area it fills. You can use bitmap fills with any of the drawing tools that create fills: the oval, rectangle, polystar, pen, paintbrush, and paint bucket tools. To apply a bitmap fill from the Color Mixer 1. | Open a Flash document that contains bitmap graphics.
| 2. | On the Stage, create a shape with a solid fill, using the oval, rectangle, polystar, pen, or paintbrush tool.
| 3. | Access the Color Mixer panel.
If the panel isn't already open, choose Window > Color Mixer.
| 4. | From the Fill Type menu, choose Bitmap.
The panel's color-definition bar becomes a window displaying thumbnails of the bitmaps in the current document's library.
| 5. | Position the pointer over one of the thumbnails.
The pointer changes to the eyedropper tool (Figure 14.13).
Figure 14.13. Select Bitmap in the Type menu of the Color Mixer panel to see bitmap thumbnails. Click a thumbnail to select it as the fill. 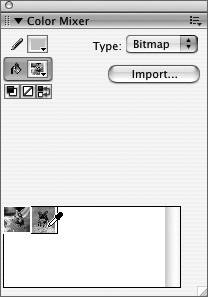
| 6. | Click the bitmap thumbnail you want to use.
The bitmap appears as the current fill selection in all the Fill Color controls (Figure 14.14). You're ready to use the bitmap fill as you would any other fill color.
Figure 14.14. When you select a bitmap for use as a fill, a miniature version of that bitmap appears in each of the Fill Color controls (this one is in the Color Mixer panel). 
| 7. | In the Toolbar, select the paint bucket; position the paint bucket over the shape you created in step 2; then click.
Flash fills your shape with a tiling pattern made from the bitmap you selected (Figure 14.15). Each tile is 5 percent of the original image's size.
Figure 14.15. With the bitmap fill selected as the fill "color," click the item you want to fill with the bitmap pattern (top). Flash fills the shape with small repeating tiles of the bitmap (bottom). 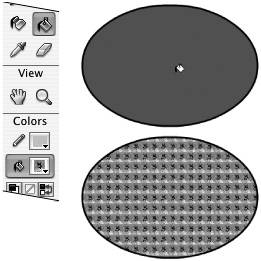
|
 Tips Tips
In step 4, if the document you're working in contains no bitmaps, Flash opens the Import to Library dialog so that you can import one. In step 7, it makes no difference if the fill is locked or unlocked.
To apply an editable bitmap as a fill 1. | On the Stage, create a shape with a solid fill using the oval, rectangle, polystar, pen, or paintbrush tool.
| 2. | Create an editable bitmap (see the sidebar "Editing Bitmaps in Flash").
| 3. | In the Toolbar, select the eyedropper tool.
| 4. | Position the eyedropper over the editable bitmap on the Stage (Figure 14.16).
Figure 14.16. Click an editable bitmap with the eyedropper tool to pick up the fill "color." 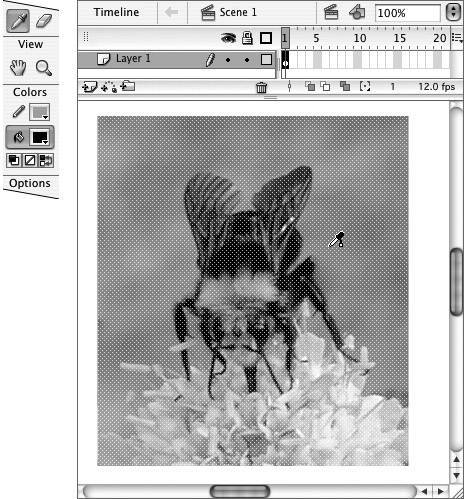
| 5. | Click anywhere within the editable bitmap.
In the Toolbar, Flash makes the bitmap the current fill selection and selects the paint bucket tool.
| 6. | Position the paint bucket over the fill shape you created in step 1, and then click.
Flash fills your shape with a tiling pattern made from the editable bitmap (Figure 14.17). Each tile shows the bitmap image at 100 percent. Depending on your shape, the tile may not be placed to show itself well.
Figure 14.17. When you sample an editable bitmap with the eyedropper tool, Flash makes the bitmap the current fill color and selects the paint bucket tool. Click the item you want to fill with the bit-mapped pattern (top). Flash fills the shape with large repeating tiles of the editable bitmap (bottom). 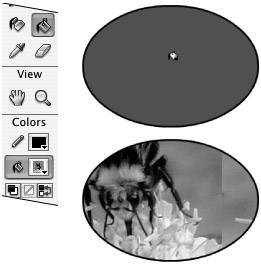
|
Tips To modify the tiles of a bitmap fill, in the Toolbar, select the gradient-transform tool (Figure 14.18) and position it over the filled shape. Click the fill. Transformation handles and a transformation-point circle appear around one tile of the fill (Figure 14.19). Drag the circle to change the way the tiling pattern fits within your shape. To scale, rotate, or skew the tiles, drag any of the other handles as you would when using the free-transform tool (see Chapter 4). Figure 14.18. Select the gradient-transform tool to modify the tiles of a bitmap fill. 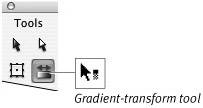 Figure 14.19. Clicking the bitmap fill pattern with the gradient-transform tool brings up handles for modifying the tiles. 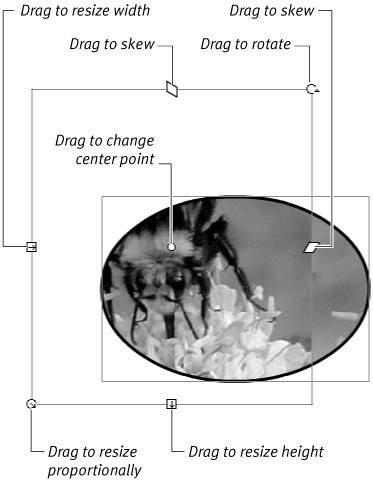 If a drawing-object was ever part of a symbol that you broke apart, you may have trouble modifying its bitmap fill. If you're working on a drawing-object with a bitmap fill and find that the gradient-transform tool never changes to a transformative arrow, and you can't grab the tile's gradient-transform handles, this may be your problem. To restore the ability to use the gradient-transform tool on this drawing-object, double-click it to drill down to its underlying merge-shape. You can either use the gradient-transform tool on that shape or choose Edit > Edit Document to return to the main Stage. From now on, the gradient-transform tool will recognize the handles. Any of the tools that create fill shapes can create shapes with the bitmap fill as the chosen "color." For example, select the paintbrush tool in the Toolbar, and then select a bitmap as the fill following the steps in either of the preceding tasks. Paint a shape on the Stage. The brushstrokes you create fill with the tiling pattern. You can use the filled oval, rectangle, polystar, and pen tools this way, too.
|