| After you import a bitmap into a Flash file, you can trace the bitmap to turn it into a set of vector shapes that looks like the bitmap. Flash offers several settings to help you strike a balance between the accurate rendering of the color areas in the bitmap and the creation of too many curves and small vectors within one object, which increases the file size. To trace a bitmap 1. | Place a copy of the bitmap on the Stage.
| 2. | Select the bitmap.
| 3. | Choose Modify > Bitmap > Trace Bitmap (Figure 14.10).
Figure 14.10. Choose Modify > Bitmap > Trace Bitmap to convert a bitmap to a group of vector shapes. 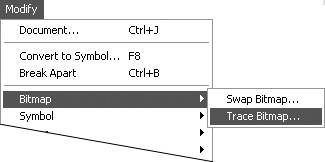
The Trace Bitmap dialog appears (Figure 14.11).
Figure 14.11. The Trace Bitmap dialog controls how Flash converts bitmaps to vectors. 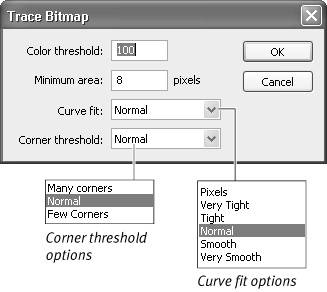
| 4. | Enter values for the four settings in the dialog: Color Threshold, Minimum Area, Curve Fit, and Corner Threshold.
The settings in this dialog control how closely the vector image matches the bitmapped image. Flash creates the vectors by examining the pixels that make up the bitmap, lumping together contiguous pixels that are the same color and making a vector shape out of that clump:
Color Threshold (a number between 1 and 500) tells Flash how to decide when one pixel is the same color as its neighbor. The higher the threshold, the broader the range of colors Flash lumps together. A sky made up of light and dark blue pixels in three slightly different shades, for example, may wind up as one vector shape if you set a high-enough threshold but may wind up as dozens of separate shapes if you set a low threshold.
Minimum Area (a number between 1 and 1,000) determines how many neighbor pixels to include in calculating the color.
Curve Fit tells Flash how smoothly to draw the outlines around the vector shapes it creates.
Corner Threshold tells Flash whether to create sharp corners or smoother, more rounded ones.
| 5. | Click OK.
The Tracing Bitmap dialog appears, with a progress bar and a Stop button. (To cancel the tracing process, click Stop.)
Flash replaces the bitmap with filled vector shapes that imitate the image (Figure 14.12).
Figure 14.12. These tracings use different settings. The top one closely imitates the original bitmap; the bottom one has a posterized effect but ends up at a much smaller file size. 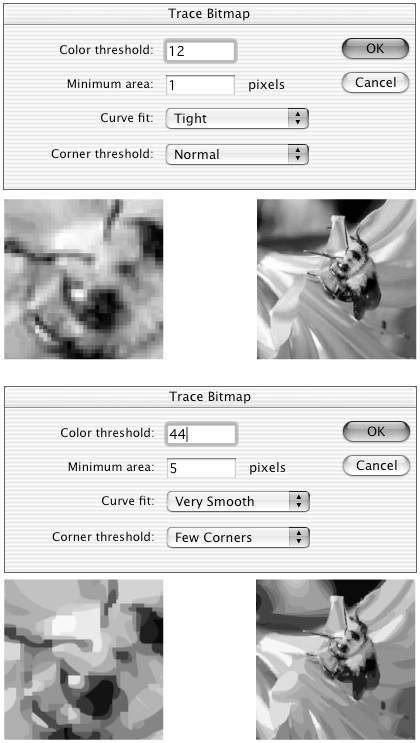
|
 Tip Tip
To translate a bitmap in vectors most closely (for example, to turn a digital photo into a set of vector graphics that still look like a photo), Macromedia recommends settings of 10 for Color Threshold, 1 for Minimum Area, Pixels for Curve Fit, and Many Corners for Corner Threshold. However, these settings can result in huge files, often larger than the original bitmap.
Editing Bitmaps in Flash You can always edit bitmaps with an external bitmap editor, but Flash also lets you create a version of a bitmap that you can edit (to a certain degree) within Flash. First, you must break the image apart (select it and choose Modify > Break Apart). Flash converts the bitmap to a special type of graphic and selects it. Flash has no specific name for this type of graphic, but let's call it an editable bitmap. An editable bitmap is no longer a collection of individual pixels, each with its own color value; neither is it a collection of tiny vector shapes. It acts more or less like a single vector shape with a gradient fill. (Macromedia describes this state as being a number of discrete color areas.) If you use the selection tool to click any area of the image now, you select the entire image. To select just a region of color in the editable bitmap, you must use the lasso tool in Magic Wand mode. Select the lasso tool in the Tools panel, and then select the Magic Wand Settings modifier (the right-hand wand icon in the Options section of the Tools panel). In the dialog that appears, enter values for Threshold and Smoothing. The Threshold setting works the same way as the Color Threshold setting in the Trace Bitmap dialog (described earlier in this chapter). Smoothing works similarly to the Curve Fit setting of the Trace Bitmap dialog; it determines how smooth a vector path Flash draws when the magic wand makes a selection. Click OK. Select the lasso tool's Magic Wand modifier (the left-hand wand icon in the Options section of the Tools panel). Using the tool's hot spot, the transparent area in the center of the starburst, click the editable bitmap. Flash selects the pixel you clicked and all surrounding pixels of the "same" color (determined by the threshold you chose). Now you can edit the selection. Try filling it with a single color by clicking the selection with the paint-bucket tool. Flash replaces all the pixels in the selection with the new color, creating a solid vector shape that you can edit with Flash's tools. If the magic wand fails to grab the full range of colors you wanted, change Threshold to a higher number and try again. You can also add to the selection by clicking (or Shift-clicking, depending on your Preferences setting) the missed pixels. |
|