| You put movie-clip symbols to work by placing an instance of a symbol on the Stage in your Flash document. Unlike animated graphic symbols, movie-clip symbols have their own Timeline. A movie clip plays continuously, like a little film loop, in a single frame of the main movie. As long as the movie contains no other instructions that stop the clip from playinga blank keyframe in the Timeline for the layer containing the movie clip, for examplethe clip continues to loop. As you work on your Flash document, you can see only the first frame of a movie clip. To view the animation of the movie-clip symbol in context with all the other elements of your movie, you must export the movie (by choosing one of the test modes, for example). You can preview the animation of the movie-clip symbol by itself in the Library panel. To place an instance of a movie clip 1. | Continuing with the movie you created in the preceding task, choose Insert > Scene.
Flash creates a new scene and displays its Timeline: a single layer with a blank keyframe in frame 1. The Stage is empty.
| 2. | Access the Library panel.
If it's not open, choose Window > Library.
| 3. | Select the Ping-PongClip symbol.
The first frame of the animation appears in the preview window.
| 4. | Drag a copy of the selected symbol to the Stage.
Flash places the symbol in keyframe 1 (Figure 11.43). You don't need to add any more frames to accommodate the animation, but you must export the movie to see the animation.
Figure 11.43. Drag an instance of your movie clip from the Library panel to the Stage (top). Flash places the instance in keyframe 1 (bottom). 
|
To view the movie-clip animation in context 1. | Continuing with the movie you created in the preceding task, choose Control > Test Scene (Figure 11.44).
Figure 11.44. Choose Control > Test Scene to preview the animation of just one scene in a movie. 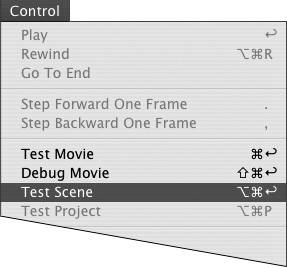
Flash exports the movie to a Flash Player format file, adding the .swf extension to the filename and using the current publishing settings for all the export options. (For more information on Publish Settings, see Chapter 16.) During export, Flash displays the Exporting Flash Movie dialog, which contains a progress bar and a Stop (Mac) or Cancel (Windows) button for canceling the operation (Figure 11.45).
Figure 11.45. The Exporting Flash Movie dialog contains a progress bar and a button for canceling the export. 
When it finishes exporting the movie, Flash opens the .swf file in Flash Player so you can see the movie in action (Figure 11.46).
Figure 11.46. Flash Player displays your movie in a regular window. To exit the Player, close the window. 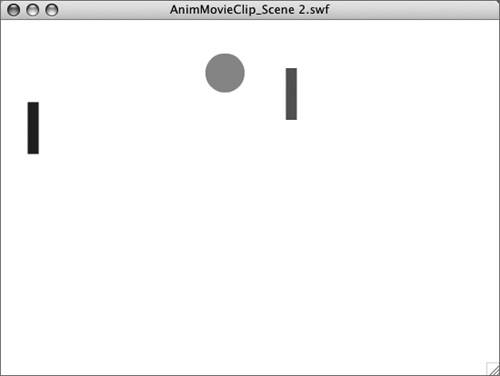
| 2. | When you've seen enough of the movie in test mode, click the movie window's Close box (Windows) or Close button (Mac) to exit Flash Player.
|
The Mystery of Bitmap Caching Flash's original impact on the World Wide Web was due in large part to its ability to send vector graphics rather than bitmaps over the Internet. If you send multiple bitmap images for animation, the process bogs down. However, when the image is complex but doesn't change much over time, especially when most of the changes that do take place involve positioning within a frame rather than redrawing shapes, it's less processor intensive to work with bitmaps than with vectors. An easy example to imagine is a cartoon backgroundsay, a forest thick with trees and flowers, bushes and vines, over which you animate the creatures that move through the forest. If the background remains still, you can create a bitmap background layer that extends the length of your movie and doesn't require redrawing in each frame. But there are drawbacks to that method. You can't create or edit the bitmap inside Flash; you must use a program such as Macromedia Fireworks or Adobe Photoshop and import the image. (You must edit the image externally and reimport it each time you do.) And what if you want the background to move from time to time? Let's say you want to create a backdrop that's much wider than the screen and then shift it to the right periodically to show a bit of the scenery that's been hidden. Nothing changes but the position of the background. If you use a bitmap image, Flash can move it pixel by pixel without too much slowdown of the movie, but you still have the inconvenience of creating the image outside Flash. If you use a vector image, Flash must recalculate all the vectors in that background for each move, bogging things down. Flash 8 can give you the best of both worlds by, turning a vector image into a bitmap at runtime. This technique is called bitmap caching. To enable it, you must create your complex element as a movie-clip symbol. Select the symbol instance on the Stage. In the Properties tab of the Property inspector, for that symbol instance, select the "Use runtime bitmap caching" check box (Figure 11.47). At runtime, Flash captures a snapshot of the vector image by turning it into a bitmap; then Flash moves that bitmap pixel by pixel as needed, thus avoiding recalculating all those vectors. Figure 11.47. If a movie clip contains complex graphics, but they don't animate in complex ways, you can ask Flash to cache a bitmap of the symbols' image at runtime. Flash creates a sort of bitmap snapshot, redrawing the vector graphics only when something changes. Bitmap caching can speed processing during playback of your Flash creations. Select the movie-clip symbol on the Stage; then, in the Properties tab of the Property inspector, select "Enable runtime bitmap caching". 
|
|