Managing the Metabase
|
|
Now that you can navigate your way around the metabase, you may think you’re ready to start editing it using Notepad. But what if you make a mistake and cause the metabase to become corrupt so that IIS no longer starts? Before you start messing around with the metabase, it’s important to have a rollback plan in case something goes wrong.
So, before I discuss how to modify the metabase, we’ll first look at several issues regarding metabase management, including flushing the in-memory metabase to disk, backing up the metabase, and restoring the metabase from history files or backups. Next, we’ll look at how to edit and repair the metabase, and I’ll close this chapter with a look at metabase import and export.
Saving Changes to Disk
The in-memory metabase is flushed to disk whenever the following happens:
-
IIS is stopped or restarted gracefully with IIS Manager or using net stop, iisadmin, or iisreset /stop from the command line. If, however, IIS stops suddenly and unexpectedly (for example, due to a power failure when no UPS is configured) then any metabase edits pending in-memory will be lost.
-
IIS automatically restarts itself due to abnormal termination of the IIS Admin service for some reason. This depends on whether the Automatic Restart feature of IIS is enabled (which it is by default) or disabled (which occurs when you type iisreset /disable in a command-prompt window running locally on your IIS machine).
-
Changes have been made to IIS Manager properties sheets and All Tasks | Save Configuration to Disk has been selected for the servername node.
-
Changes have been made to IIS Manager properties sheets and sufficient time has elapsed for IIS to automatically flush the metabase to disk (see the earlier section in “Automatic Flushing” for a detailed description of how this process works).
-
Iiscnfg /save is used at the command line (see the next section, “iiscnfg.vbs”).
-
IIS configuration information is backed up using IIS Manager or running the command iisback /backup at the command line.
“Flushing” the metabase means that IIS overwrites the MetaBase.xml and MBSchema.xml files in the \System32\Inetsrv folder with the contents of the in-memory metabase. Whenever the metabase is flushed to disk, a new pair of history files is also created in the \System32\Instsrv\History folder.
A few notes concerning IIS Help on the subject of metabase flushing:
-
If IIS Manager is simply opened and then closed without any property sheet settings being modified, the metabase is flushed to disk and new history files are created. This behavior is not described in IIS Help and may be a bug.
-
If IIS is stopped or restarted while metabase edits are pending in-memory but edit-while-running is disabled, IIS Help says that the pending edits will be lost. This does not seem to be the case, however, so again, it’s either a bug or the Help file is wrong.
If you make a lot of changes to the metabase using IIS Manager, it may be a good idea to use Save Configuration to Disk immediately afterward to ensure these changes are persisted to disk. That way, if the power suddenly goes off and you discover your UPS battery is dead, you haven’t lost your work.
iiscnfg.vbs
Iiscnfg.vbs is another WMI script that can be used to manage certain aspects of IIS from the command line. For a full discussion of IIS command-line administration, see Chapter 11, “Working from the Command Line.”
Iiscnfg.vbs can perform the following tasks:
-
Save configurations to disk
-
Export configurations
-
Import configurations
-
Copy configurations
I’ll discuss the first of these options here and the rest in later sections. Here’s an example of how to save the configuration (flush the in-memory metabase to disk) of an IIS machine using this command:
C:\>iiscnfg /save Connecting to server ...Done. Metadata successfully flushed to disk.
If you’re working from a remote computer, you could do the same thing like this:
C:\>iiscnfg /save /s 172.16.11.220
You could also add specific credentials, like this:
C:\>iiscnfg /save /s server16 /u MTIT\Administrator /p ********
| Note | The message “Metadata successfully flushed to disk” doesn’t necessarily mean the metabase has been flushed. If no changes are pending in the in-memory metabase, the metabase is not flushed even though the command responds by saying that flushing has occurred. This is not a bug but a poorly coded script that doesn’t check afterward to see if a flush actually occurred. |
Backing Up the Metabase
While IIS automatically creates metabase backups in the form of history files, you can also manually back up the metabase to ensure you can recover from a problem or disaster. Let’s now look at some of the ways you can do this.
| Note | The following procedures back up IIS configuration information only, not website content. A good disaster recovery plan should involve regular backups of all server data including system state information. To do this, use Windows Backup or a third-party tool like Backup Exec from Veritas. |
Initial Configuration Backup
When IIS is first installed, it automatically creates an initial configuration backup and saves it in the \System32\Inetsrv\MetaBack folder (Figure 14-2). You can use this backup to restore IIS to its immediate post-installation state if this is ever required.
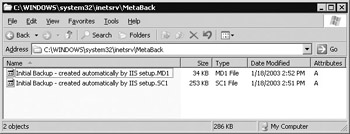
Figure 14-2: Contents of MetaBack folder
Using IIS Manager
To manually back up the metabase using IIS Manager, right-click the servername node and select All Tasks and then Backup/Restore Configuration. This opens the Configuration Backup/Restore dialog box (Figure 14-3).
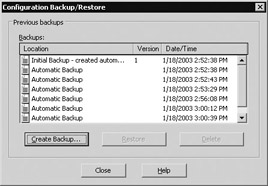
Figure 14-3: Backing up the metabase
This dialog box shows all metabase backups that have been made to date, including:
-
The automatic initial configuration backups saved in the \Inetsrv\MetaBack folder
-
Manually created backups, also saved in the \Inetsrv\MetaBack folder
-
History files saved in the \Inetsrv\History folder
The list of backups displayed in the Configuration Backup/Restore dialog box is therefore a merging of the contents of the History and MetaBack folders. Now click the Create Backup button and specify an informative name for your backup set (Figure 14-4). Click OK to create the new backup, which consists of an *.MD0 and *.SC0 file in the MetaBack folder.

Figure 14-4: Naming a metabase backup set
Note that you can also specify that your backup be encrypted using a password you supply. This is important because only backups that have been encrypted can be restored to a different machine running IIS or to the current machine after Windows Server 2003 has been reinstalled on it. The initial configuration backup created automatically when IIS is installed is not encrypted and is therefore no use if your server fatally crashes and you have to reinstall the operating system on it. Immediately after installing the IIS components on your machine, you should manually create a second configuration backup and make sure it’s encrypted.
You can also delete any unnecessary backups you have created using the Configuration Backup/Restore dialog box, but you cannot use this box to delete history files.
| Note | Creating encrypted backups takes longer than unencrypted ones, and the metabase is locked during the backup process to prevent modifications from occurring. |
Using iisback.vbs
You can also back up your configuration using the WMI script iisback.vbs, which can be used to perform the following tasks:
-
Backing up IIS configurations
-
Restoring IIS configurations
-
Deleting IIS configurations
-
Listing IIS configurations
Let’s try this out. First, create another backup with the same name as the previous one (imagine you’re creating them both on the same day):
C:\>iisback /backup /b mitch210102 /e password Connecting to server ...Done. Backup mitch210102 version NEXT_VERSION has been CREATED.
To see what happened, list all the backups (note that this lists only backups in the MetaBack folder and not history files in the History folder, as in Figure 14-3):
C:\>iisback /list Connecting to server ...Done. Backup Name Version # Date/Time ======================================================================== Initial Backup - created automatically by IIS setup 1 1/18/2003 2:52:38 PM mitch210102 0 1/21/2003 4:04:28 PM mitch210102 1 1/21/2003 4:14:22 PM
Because you made a backup with the same name as an existing backup, the new backup has its version number incremented by one over the previous backup of the same name. Now create another backup, this time overwriting version 1:
C:\>iisback /backup /b mitch210102 /v 1 /overwrite /e password Connecting to server ...Done. Backup mitch210102 version NEXT_VERSION has been CREATED.
Verify the result:
C:\>iisback /list Connecting to server ...Done. Backup Name Version # Date/Time ======================================================================== Initial Backup - created automatically by IIS setup 1 1/18/2003 2:52:38 PM mitch210102 0 1/21/2003 4:04:28 PM mitch210102 1 1/21/2003 4:15:41 PM
Note that the timestamp for mitch210102 version 1 has changed. Now delete this backup:
C:\>iisback /delete /b mitch210102 /v 1 Connecting to server ...Done. Backup mitch210102 version 1 has been DELETED.
And verify:
C:\>iisback /list Connecting to server ...Done. Backup Name Version # Date/Time ======================================================================== Initial Backup - created automatically by IIS setup 1 1/18/2003 2:52:38 PM mitch210102 0 1/21/2003 4:04:28 PM
| Tip | You can also use ADSI or WMI to programmatically back up IIS configurations and Scheduled Tasks to automate running iisback.vbs commands. |
Restoring the Metabase
You have a choice of two ways of restoring configuration information:
-
Restoring from backup files This method is more powerful as you can restore to a different machine or to the same machine after reinstalling Windows Server 2003. However, you must ensure that your backup is encrypted in order to perform a restore on anything other than the current installation on your IIS machine.
-
Restoring from history files This method allows you to restore your configuration only to the same IIS machine. If you reinstall Windows Server 2003 on your IIS machine, you will not be able to restore history files created before the reinstallation.
I’ll focus first on restoring configurations to the same machine and then at how to restore them to different machines later in this chapter in the section entitled “Exporting the Metabase.”
| Note | Restoring a backup created on an earlier version of IIS isn’t supported. |
Restoring from Backup Files
To restore from backup files using IIS Manager, follow these steps:
-
Create a new website called Test Site on your IIS machine in the usual way.
-
Create a backup called Test Backup of your configuration using IIS Manager.
-
Delete the website you just created.
-
Save your configuration to disk to make sure that all trace of Test Site is removed from the metabase.
-
Restore your configuration from the backup you created by right-clicking the servername node in IIS Manager and selecting All Tasks | Backup/Restore Configuration.
-
Select the backup you created in step 2 and click Restore.
-
Click Yes and wait while IIS stops and configuration information is restored from the backup files. When IIS restarts, you’ll be informed of the result.
-
Use IIS Manager to verify that Test Site has been restored.
Now do the same thing with iisback.vbs. Because you already have Test Site on your machine, you can omit the preceding first step and proceed as follows:
-
Create a backup called Another Test Backup of your configuration using iisback /backup as described in the preceding section.
-
Delete Test Site from your machine.
-
Save your configuration to disk.
-
Restore your configuration from your backup by typing the following at a command-prompt window on the IIS machine:
iisback /restore /b "Another Test Backup"
-
Refresh IIS Manager to verify that Test Site has been restored.
Restoring from History Files
Now you’ll try a similar walkthrough, but this time you’ll restore your configuration from a history file on your system. First, use IIS Manager to perform the restore:
-
Delete Test Site from your system.
-
Save your configuration to disk to flush the metabase to disk.
-
Right-click the servername node in IIS Manager and select All Tasks | Backup/Restore Configuration.
-
Select the second most recent history file by reviewing the timestamps of files named Automatic Backup. Why the second most recent file? Because the most recent one was created when you saved your configuration to disk, and this was done after you deleted Test Site!
-
Click Yes and wait while IIS stops and configuration information is restored from the backup files. When IIS restarts, you’ll be informed of the result.
-
Refresh IIS Manager and verify that Test Site has been restored.
What if you can’t use IIS Manager to restore from a history file? For example, if you edit the metabase manually using Notepad and make an error in XML syntax that results in metabase corruption, IIS Manager may not be able to enumerate the metabase and hence will not be able to start. If you don’t have any recent backups in the \MetaBack folder to restore from, you may think you’re out of luck because the iisback /restore command cannot be used to restore a history file, only a backup file. Fortunately, however, there is a procedure you can follow to restore the metabase from a history file, even when IIS Manager won’t start:
-
Save your configuration to disk to create a history file with information about Test Site. Then delete Test Site with IIS Manager and save your configuration to disk again to flush the metabase.
-
Open a command prompt on your server and type iisreset /stop to stop all IIS services.
-
Type cd C:\Windows\System32\Inetsrv to change your current directory and then make backup copies of your current metabase files with copy MetaBase.xml MetaBase.old and copy MBSchema.xml MBSchema.old, just in case something else goes wrong.
-
Type cd History to make the \History folder your current directory, and type dir to display the history files.
-
Determine which pair of history files you want to restore for the metabase configuration and schema, for example, using the find or findstr commands to search for the string “Test Site” within the history files.
-
Copy and overwrite the pair of history files you select over the schema files using the copy command, for example,
copy /y MetaBase_0000000081_0000000000.xml ..\MetaBase.xml copy /y MBSchema_0000000081_0000000000.xml ..\MBSchema.xml
-
Type iisreset /start to restart all IIS services. Open IIS Manager and verify that Test Site has been restored.
Editing the Metabase
Before editing the metabase directly, make sure that you back up your IIS configuration using the methods described in the previous sections. There are two ways you can edit the metabase manually in IIS 6:
-
Stop all IIS services first This was the approach used in previous versions of IIS, but it has the disadvantage of your having to disconnect users from your server and take the server offline while you make your changes to the metabase.
-
Enable edit-while-running Also called direct metabase edit, this feature lets you make changes to the metabase while IIS services are still running. This new method increases the availability of IIS by reducing downtime for maintenance.
I’ll focus in this section on the direct metabase edit approach.
| Note | Even if you enable edit-while-running on your IIS machine, you can’t directly edit the MBSchema.xml file using a text editor. You can only edit the MBSchema.xml file programmatically using ADSI, and only when IIS is stopped. |
Enabling Direct Metabase Edit
Direct metabase edit is disabled by default on IIS and can be enabled by opening the properties sheet for the servername node and selecting the appropriate check box (Figure 14-5).
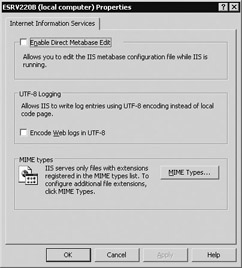
Figure 14-5: Enabling direct metabase edit
You can also enable direct metabase edit from the command line as follows:
-
Open a command prompt on the server and type iisreset /stop to stop all IIS services on the machine.
-
Open the MetaBase/xml file using Notepad or some other text editor, search for the EnableEditWhileRunning property, and change the value of this property from 0 to 1.
-
Save your changes and type iisreset /start from the command line.
Note For the direct metabase edit feature to work, the history feature must be enabled on IIS and the MaxHistoryFiles property be set to at least 10. By default the history feature is enabled and MaxHistoryFiles has the value 10.
How Direct Metabase Edit Works
When direct metabase edit is enabled, you can open the MetaBase.xml file in the \Inetsrv folder and edit it directly using Notepad, or you can programmatically modify the file using scripts. When using Notepad, for example, you would typically make a number of changes and then save the file to write the changes to MetaBase.xml. When you save the file, the Windows file change notification service detects that the MetaBase.xml file has changed on disk. A short time later, IIS copies the MetaBase.xml file to the in-memory metabase, so there’s a slight delay between modifying the metabase on disk and seeing the changes take effect. The response time of the file change notification service is independent of how many changes have been made to the file.
Examples of Editing the Metabase
Let’s now try editing the metabase directly and test the result. First, you’ll make some changes properly, and then I’ll have you deliberately make some mistakes and see what that effect is. Be sure to make backups of your metabase before each walkthrough so you can recover afterward if something goes wrong.
Examples of Proper Editing
Open MetaBase.xml using Notepad and change the line
ServerComment="Default Web Site"
to
ServerComment="Default Webbie Site"
Save the file and quickly refresh IIS Manager to see if the change has taken effect. You should see the change almost immediately. If you check the \History folder, you will see that a new history file pair was also created when you saved your changes to Metabase.xml.
Example of Improper Editing
Open MetaBase.xml using Notepad and change the line
ServerComment="Default Webbie Site"
to
ServerComment=Default Webbie Site
Removing the quotes ruins the syntax of the XML for this line. When you save your changes, refresh IIS Manager and you will see that nothing has changed. This is because improper XML syntax makes the modified MetaBase.xml file invalid, and as a result IIS automatically restores MetaBase.xml from the most recent history file. To verify this, close Notepad (do not click F5 to refresh Notepad—it doesn’t work) and reopen the MetaBase.xml file in Notepad, and you’ll see that the line again reads
ServerComment="Default Webbie Site"
If you check the \History file, you’ll see a file named MetaBaseError_0000000000.xml. If you open this file in Notepad, you’ll find the line
ServerComment=Default Webbie Site
The metabase error file contains the bad version of the MetaBase.xml file you just created. By comparing the error file with the current MetaBase.xml file using the comp command, you can retrace your steps and determine what went wrong.
An even quicker way of finding out what went wrong is by reviewing event logs on the server. Open the Event Viewer console from Administrative Tools and display the contents of the System Log (Figure 14-6).
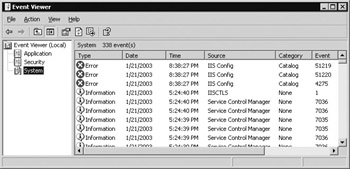
Figure 14-6: Metabase errors in Event Viewer
Note the three errors whose source is IIS Config—these are generated by the IIS Admin service trying to parse the metabase and write the changes to the in-memory metabase. Open the first of these errors to view its event properties (Figure 14-7). Note the detailed explanation of the problem.
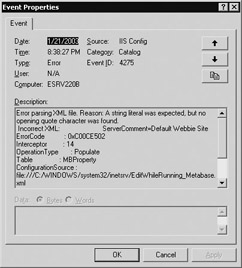
Figure 14-7: Details of a metabase error event
Example of Serious Metabase Corruption
Let’s really try to wreck the metabase. Open the MetaBase.xml file using Notepad and delete the following line:
</IIS_Global>
What you’ve done here is wreck the XML of the metabase by deleting the closing tag for the IIS_Global key. This is fairly serious, but, interestingly enough, IIS is able to automatically recover from this problem. If you immediately open the \Inetsrv folder in Windows Explorer, you’ll probably see two things:
-
A file named EditWhileRunning_Metabase.xml, which is generated by IIS during the process of repairing the XML syntax of the metabase configuration file and which vanishes as soon as the repair process is complete.
-
A file named something like IIS Config_0000000001.log or something similar, which contains a permanent record of the diagnosis and repair process performed by IIS.
Once the EditWhileRunning_Metabase.xml file disappears, open MetaBase.xml in Notepad and you should see that the </IIS_Global> tag has been restored.
Now try something more drastic. Delete the following lines from MetaBase.xml and save the changes:
<IIsComputer Location ="/LM" EnableEditWhileRunning="1" EnableHistory="1" MaxBandwidth="4294967295" MaxHistoryFiles="10" > </IIsComputer>
This is too much metabase corruption for the automatic repair process to handle. If you refresh IIS Manager, you’ll find that your server is in a fatal error state (Figure 14-8).
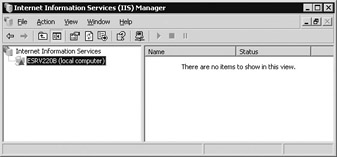
Figure 14-8: IIS won’t start if the metabase is corrupt
The solution here is to restore the metabase manually from your backup files in the \MetaBack folder. First, open a command prompt and type iisreset /stop. Then open the \Inetsrv folder in Windows Explorer and rename MetaBase.xml as MetaBase.bad. Switch to the \Inetsrv\MetaBack folder and copy the most recent *.MD0 file to \Inetsrv and rename it MetaBase.xml. Return to your command-prompt window and type iisreset /start. Now open IIS Manager, and it should connect to your server and display your sites as expected.
Exporting the Metabase
My final topics are how to export and import portions of the metabase. Exporting lets you save portions of the metabase such as the configuration info for a particular website or virtual directory (or even the configuration of all websites on your machine) as an XML file that can later be imported back into your server or onto another Windows Server 2003 machine with IIS installed. The export feature can also create a metabase template file that will copy or “clone” website configurations to multiple IIS machines so they all have the same settings.
Note that metabase export is not the same as metabase backup and should not be used to replace proper backups of the metabase. The differences are as follows:
-
Metabase export files do not include encrypted properties present in metabase backup files.
-
Metabase export can only be used to back up the metabase configuration file and not the metabase schema file.
There are two ways to export metabase information to a file:
-
Using IIS Manager
-
Using the iiscnfg.vbs script
Using IIS Manager
First, you’ll use IIS Manager to export the configuration of the Default Web Site (actually the Default Webbie Site, if you’ve been performing the walkthroughs in this chapter). Do the following:
-
Right-click the Default Webbie Site and select All Tasks | Save Configuration to a File.
-
Specify a name for your export file and select the encryption option so you can later try importing the file into a different IIS 6 machine (Figure 14-9).
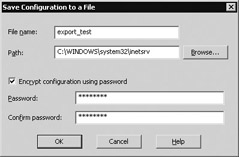
Figure 14-9: Exporting a website configuration using IIS Manager -
Click OK
Find your export file in the \Inetsrv folder and open it using Notepad. Here’s a condensed version of what it should look like, replacing properties of keys with ellipses:
<?xml version ="1.0"?> <configuration xmlns="urn:microsoft-catalog:XML_Metabase_V54_0"> <MBProperty> <IIS_Global...> </IIS_Global> <IIsWebServer...> </IIsWebServer> <IIsFilters...> </IIsFilters> <IIsCertMapper...> </IIsCertMapper> <IIsWebVirtualDir...> </IIsWebVirtualDir> <IIsInheritedProperties...> </IIsInheritedProperties> </MBProperty> </configuration>
Using iiscnfg.vbs
Now you’ll create another export file for the Default Webbie Site, but this time you’ll use the iiscnfg.vbs script to perform the action from the command line. Here’s an example of what your command-line session might look like:
C:\>iiscnfg /export /f export_test_2.xml /sp /lm/w3svc/1 /inherited /children Connecting to server ...Done. Configuration exported from /lm/w3svc/1 to file export_test_2.xml.
The syntax of this command is as follows:
-
/f filename.xml is the name of the export file, which is saved by default in the root of the C: drive unless a path is explicitly specified.
-
/sp location specifies the topmost metabase node to export. /lm/w3svc/1 is the location of the Default Web Site (or, here, the “Default Webbie Site”) in the metabase hierarchy.
-
/inherited specifies that properties inherited by the location node from its parent node should explicitly be included in the export file.
-
/children specifies that subkeys should be recursively added to the export file.
Tip To export the entire configuration of an IIS machine, specify location as / (a slash) in the preceding command.
Importing the Metabase
Now you can try importing your first export file. You’ll import it first to the same machine and then later to a different machine, which is more complicated.
To the Same Machine
Open IIS Manager, delete the Default Webbie Site from your machine, and save your configuration to disk. To import this site back using your previously created export file, do the following:
-
Right-click the Web Sites node and select New | Web Site (From File).
-
Click the Browse button in the Import Configuration dialog box, and select the export file you created earlier (Figure 14-10).
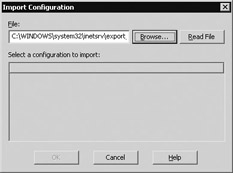
Figure 14-10: Importing a previously exported configuration file -
Click the Read File button, and Default Webbie Site should appear in the Location listbox.
-
Select Default Webbie Site and click OK.
-
Enter the password you used to encrypt the export file, and click OK.
-
The Default Webbie Site should appear in IIS Manager in a stopped state. Start it and test it by browsing http://localhost.
Now repeat the preceding walkthrough using the iiscnfg.vbs script instead of IIS Manager. Delete the Default Webbie Site again, save your configuration to disk, open a command prompt and type:
C:\>iiscnfg /import /f C:\export_test_2.xml /sp /lm/w3svc/1 /dp /lm/w3svc/1 /children /inherited Connecting to server ...Done. Configuration imported from /lm/w3svc/1 in file C:\export_test_2.xml to /lm/w3svc/1 in the Metabase.
Refresh IIS Manger, and note that this time the Default Webbie Site is restored and already started.
| Tip | The iiscnfg /import command has some additional options such as /merge that can be used for advanced tasks like merging a virtual directory with a website or importing good metabase data over corrupt or damaged data. See IIS Help for more info on these options. |
To Another Machine
Before you can import a configuration file exported from one IIS 6 machine into another, you have to do a little extra work first. Specifically, you need to:
-
Change or remove any machine-specific information from the export file.
-
Create any necessary folders on the target machine, for example, the home directories for each website being imported.
Examples of machine-specific information you may have to modify or delete include
-
Modifying any file system paths in metabase properties such as Path="c:\inetpub\wwwroot" if these are different on the target machine.
-
Deleting any properties referencing IUSR or IWAM accounts (they will be different on the target computer).
-
Deleting any AdminACL properties (they are machine specific and cannot be hand modified).
-
Deleting any properties specifying passwords (they are machine specific and cannot be hand modified).
Another useful command to explore is iiscnfg /copy, which can be used to copy the entire metabase configuration and the schema files from one IIS 6 machine to another in a single step. (This is particularly useful for creating web server farms in enterprise environments by cloning a fully configured IIS machine.) While this command removes machine-specific information from the metabase, unfortunately it doesn't adjust directory paths that might need modifying, so you may still need to manually edit the metabase on the target machine afterward to make things work. The iiscnfg /copy command replaces IISSync.vbs and IISRepl.vbs, which were used for a similar purpose in IIS 5.
Also, the IIS 6 Migration Tool can be used to copy entire IIS configurations with website content from one IIS 6 machine to another, or from earlier IIS 4 or IIS 5 machines to IIS 6. This tool is currently in Beta 1 version at the time of writing and should be available soon from Microsoft.
Try making the necessary changes to your export file and then importing it into another IIS 6 machine on which the Default Web Site has been deleted to see if you can successfully re-create the Default Webbie Site on that machine. Use either IIS Manager or iiscnfg.vbs to import the file, and then test the final result to make sure everything works.
You have an IIS machine that has several websites running on it and you want to copy these sites to another machine. What are some different ways you can do this? What sort of preliminary planning would be required to ensure that your procedure works? How can you test the result of your procedure to ensure it was successful?
|
|
- Using SQL Data Manipulation Language (DML) to Insert and Manipulate Data Within SQL Tables
- Using Keys and Constraints to Maintain Database Integrity
- Working with Functions, Parameters, and Data Types
- Understanding Transaction Isolation Levels and Concurrent Processing
- Monitoring and Enhancing MS-SQL Server Performance