| Masking is a method of using the shape and the fill of one object to control another object. A mask can be either a vector or a bitmap. In Lesson 2, you used Paste Inside to place the triangles around the inside edge of the candy logo. Paste Inside is a form of masking: The circle controls how much of the image is displayed. Another form of masking uses the fill of an object, not just the outline of the object. Imagine a piece of black construction paper with a hole cut from the middle. Place the construction paper over a picture. As you move the picture behind the paper, only a part of the picture is visible through the hole. The construction paper is acting as a mask. The size and shape of the cutout area determine what part of the picture is visible. The color of the hole controls the visibility of the image. In the construction paper example, the cutout area is white, and so all the colors of the picture are displayed. If you place a piece of frosted glass over the picture, you see fewer colors in the picture because the frosted glass filters out some of the colors. If the color of the mask is white, you see all of the colors of the image beneath the mask. If the color of the mask is black, the entire image is hidden. Shades of gray show varying amounts of the image. 1. | Select the Specials layer on the Layers panel.
You want the new objects for this page on that layer. If you want, you can lock the other layers to make sure the elements on those layers are not accidentally moved or deleted.
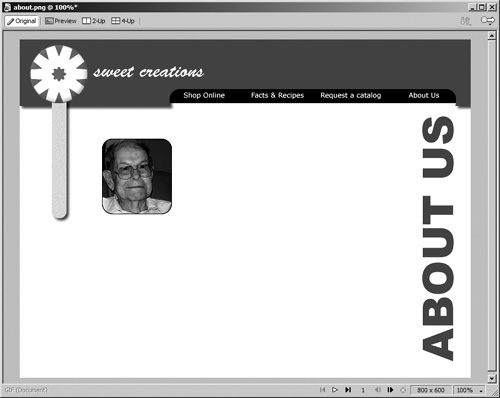
| 2. | From within the about.png file, choose File > Import. Open the founder.psd file in the Media folder within the Lesson10 folder.
Click to place the image on the page. (The image is an Adobe Photoshop file.) You want to round the corners of the image and crop it more tightly. To do this, you will create a mask.
| 3. | Draw a rectangle, 124 by 134 pixels. Change the roundness to about 30. Make the rectangle with a thin black stroke and a fill of None. Move the rectangle over the founder image.
You want the fill to be set to None so you can see the image of the founder as you complete the next step.
| 4. | Select the image with the Pointer tool and then resize the image by using the Scale tool or holding down Shift as you drag a corner handle with the Pointer tool.
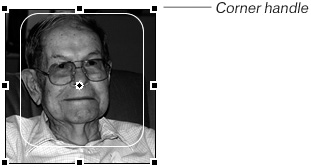 Scale the image so it is slightly larger than the rectangle. You want the face of the founder to fit within the rectangle. If you make the image too small, don't make it larger. Instead, choose Edit > Undo Transform to reverse the scaling changes, and try again. Remember that you can make a bitmap image smaller, but if you make it larger, you reduce the quality of the image.
Tip Hold down Alt (PC) or Option (Mac) and the Shift key as you drag with either the Scale tool or the Pointer tool to resize from the center of the image. | 5. | Select the rounded rectangle over the image and change the fill to white.
Remember that the fill color determines the color of the image beneath the mask. Since the mask (the rectangle) is white, you will see all of the colors in the image after you apply the mask.
| 6. | Select both the rectangle and the image with the Pointer tool. Then choose Modify > Mask > Group as Mask.
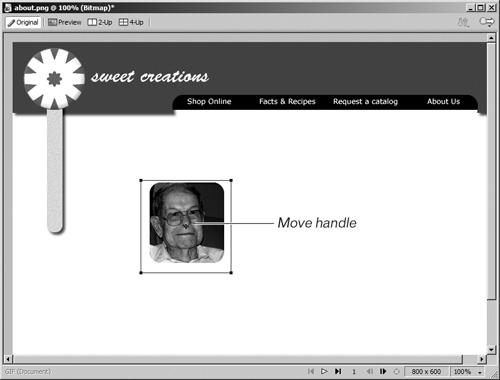
The image is placed within the rectangle. The Group as Mask command with a vector object creates a vector mask that crops the masked object using the outline of the vector object. Select the masked image, and you see a star the move handle in the middle of the image. You can drag the move handle to move the image around in the mask. (You are moving the image within the mask, not the object itself. To move the image object, drag another part of the object.)
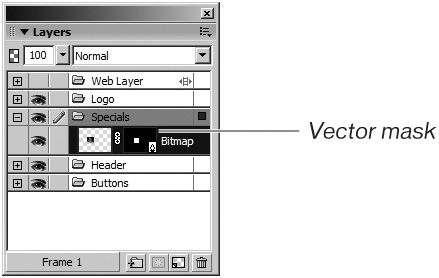
 The stroke on the rectangle disappeared when you made it a mask. In the next step, you will show the stroke. Look on the Specials layer for the masked object. The image and the mask appear together as a group. The icon for the mask is on the right (it contains a small pen, indicating that it is a vector mask). The layer object is labeled Bitmap. The stroke on the rectangle disappeared when you made it a mask. In the next step, you will show the stroke. Look on the Specials layer for the masked object. The image and the mask appear together as a group. The icon for the mask is on the right (it contains a small pen, indicating that it is a vector mask). The layer object is labeled Bitmap.
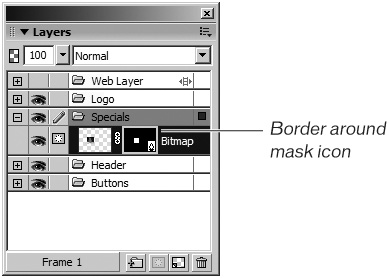
 | 7. | Click the mask icon on the Layers panel.
When you select the mask icon, a green border appears around the icon. The Property inspector displays options for the mask.
 | 8. | Select Path Outline in the Property inspector and then select Show Fill and Stroke.
 You can change the stroke settings for the mask in the Property inspector. Change the color of the stroke to black or the red color of the top header. You can change the stroke settings for the mask in the Property inspector. Change the color of the stroke to black or the red color of the top header.
You want the masked image of the founder to the right of the candy stick. When you move the image, make sure you grab the image, not the move handle (the blue star).
| 9. | Using the Text tool, type ABOUT US. Change the font to Arial Black, the color to the red color of the top rectangle, and the size to 75 points. Choose Modify > Transform > Rotate 90° CCW.
The text is rotated. Move the text to the right of the canvas. You can change the size if necessary to fit the text on your page.
 | 10. | Save your file.
The next exercise shows you another masking technique. You will continue working with this same file.
|
|