3.2 Setting Up Windows 9598Me Computers
3.2 Setting Up Windows 95/98/Me ComputersThe Windows 95/98/Me operating systems are very similar to each other, and as far as this chapter is concerned , it is possible to treat them with a common set of directions. 3.2.1 Setting Up the NetworkSamba uses TCP/IP to communicate with clients on the network, so you will need to make sure there is support for TCP/IP on each Windows client. Unlike Unix operating systems, Windows does not necessarily have support for TCP/IP installed. However, when Windows is installed on a computer with a network card or a network card is added to a system already running Windows, TCP/IP support is installed by default, along with the Client for Microsoft Networks, which supports SMB file and printer sharing. To make sure both services are installed on your Windows system, double-click the Network icon in the Control Panel to open the Network dialog box, as shown in Figure 3-3. Figure 3-3. The Windows 95/98/Me Network dialog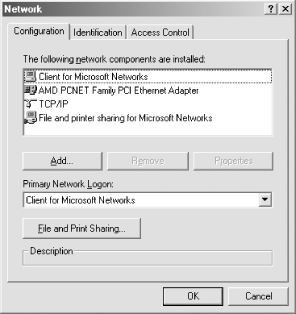 You should see at least the Client for Microsoft Networks component installed on the system, and hopefully a networking device (preferably an Ethernet card) bound to the TCP/IP protocol. If there is only one networking hardware device, you'll see the TCP/IP protocol listed below the device to which it is bound, as shown in Figure 3-1. You might also see "File and printer sharing for Microsoft Networks," which is used to make the system into a server. In addition, you might see NetBEUI or Novell Networking. Definitely remove NetBEUI unless you are sure you need it, and if you don't have any Novell servers on your network, you can remove Novell (IPX/SPX) as well. To remove a service, simply click its name and then click the Remove button. 3.2.1.1 Adding TCP/IPIf you don't see TCP/IP listed, you'll need to install the protocol. You can add the protocol by inserting the Windows distribution CD-ROM in your CD-ROM drive and clicking the Add button below the component window. Indicate that you wish to add a protocol by selecting Protocol and clicking "Add..." on the following dialog box, which should look similar to Figure 3-4. Figure 3-4. Selecting a component type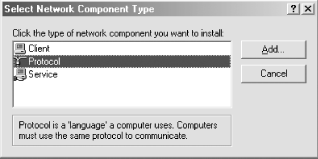 After that, select manufacturer Microsoft, then protocol TCP/IP, as shown in Figure 3-3, then click OK. After doing so, you will be returned to the network dialog. Click OK to close the dialog box, and Windows will install the necessary components from the CD-ROM and request that the system be rebooted. Go ahead and reboot the system, and you're set. If Client for Microsoft Networks is not in the list, you can add it similarly. The only significant difference is that you are adding a client instead of a protocol, so make sure to select "Client" rather than "Protocol" when asked. 3.2.1.2 Configuring TCP/IPIf you have more than one networking device (for example, both an Ethernet card and a modem for dial-up networking), the protocol to hardware bindings will be indicated by arrows, as shown in Figure 3-5. Figure 3-5. Selecting a protocol to install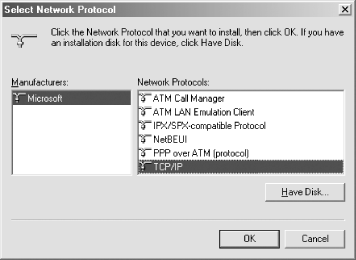 Select the TCP/IP protocol linked to the networking device that will be accessing the Samba network. If you have only one networking device, simply click the TCP/IP item. Now click the Properties button to open the TCP/IP Properties dialog. You should see something similar to Figure 3-6. Figure 3-6. Selecting the correct TCP/IP protocol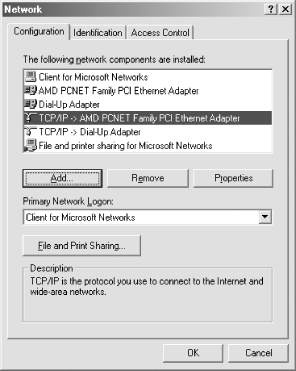 3.2.1.3 IP Address tabThe IP Address tab is shown in Figure 3-7. Figure 3-7. The IP Address tab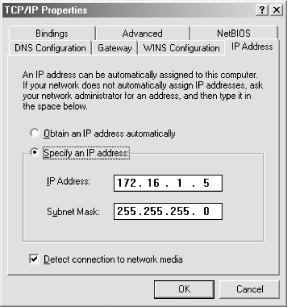 If you use DHCP on your network to provide IP addresses automatically to Windows systems, select the "Obtain an IP address automatically" radio button. Otherwise, click the "Specify an IP address" radio button and enter the client's address and subnet mask in the space provided. You or your network manager should have selected an address for the client on the same subnet (LAN) as the Samba server. 3.2.1.4 WINS Configuration tabIf you've enabled WINS on Samba or are choosing to make use of another WINS server on your network, you must tell Windows the server's address. After selecting the WINS Configuration tab, you will see the dialog box shown in Figure 3-8. Figure 3-8. The WINS Configuration tab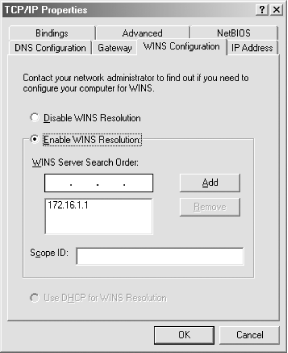 This is for Windows 98/Me; Windows 95 is just a little different, having separate spaces for the primary and backup WINS server IP addresses. Select the "Enable WINS Resolution" radio button, and enter the WINS server's address in the space provided, then click the Add button. Do not enter anything in the Scope ID field.
3.2.1.5 DNS Configuration tabUnless you are using DHCP, you will need to provide the IP address of one or more DNS servers. Click the DNS tab, then click the "Enable DNS" radio button, and type the IP address of one or more DNS servers into the appropriate field, shown in Figure 3-9, to add the server's address to the top DNS Server Search Order field. Figure 3-9. The DNS Configuration tab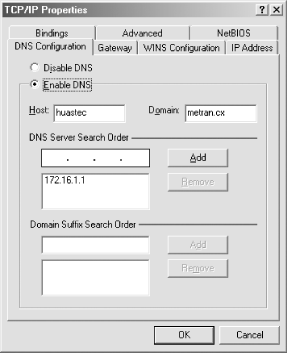 Also, provide the hostname (which is the same as the NetBIOS computer name) of the Windows 95/98/Me computer and your Internet domain. (You will need to enter the computer name again later, along with the workgroup. Make sure to enter the same name each time.) You can safely ignore the Domain Suffix Search Order field for anything related to Samba. 3.2.1.6 LMHOSTS fileIf you want to install an LMHOSTS file, it must be placed in your Windows installation directory (usually C:\Windows ). In the same directory, Microsoft has provided a sample LMHOSTS file named lmhosts.sam , which you might want to look at for further information on the file's format. 3.2.1.7 NetBIOS tabThis tab appears in Windows 98/Me, but not in Windows 95. All you need to do here is make sure the checkbox is checked, enabling NetBIOS over TCP/IP. If TCP/IP is your only protocol installed (as we recommended earlier), the selection will be grayed out, with the box checked so that you couldn't uncheck it even if you wanted to. 3.2.1.8 Bindings tabThe final tab to look at is Bindings, as shown in Figure 3-10. Figure 3-10. The Bindings tab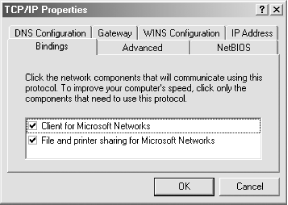 You should have a check beside Client for Microsoft Networks, indicating that it's using TCP/IP. If you have "File and printer sharing for Microsoft Networks" in the dialog, it should also be checked, as shown in Figure 3-10. 3.2.2 Setting the Computer Name and WorkgroupFinally, click the OK button in the TCP/IP configuration dialog, and you'll be taken back to the Network Configuration dialog. Then select the Identification tab, which will take you to the dialog box shown in Figure 3-11. Figure 3-11. The Identification tab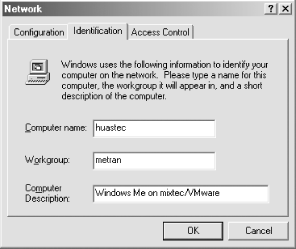 This is where you set your system's NetBIOS name (which Microsoft likes to call "computer name"). Usually, it is best to make this the same as your DNS hostname, if you are going to have one for this system. For example, if the system's DNS name is huastec.metran.cx , give the computer a NetBIOS name of huastec on this tab. You also set your workgroup name here. In our case, it's METRAN, but if you used a different one in Chapter 2, when creating the Samba configuration file, use that instead. Just don't call it WORKGROUP (the default workgroup name) or you'll be in the same workgroup as every misconfigured Windows computer on the planet! You can also enter a comment string for this computer. See if you can come up with some way of describing it that will remind you of what and where it is when you see the comment in a list displayed on another computer. Everyone on the network will be able to see your comment, so be careful not to include any information that might be useful to crackers. Finally, click the OK button and follow whatever instructions Windows provides. (You might have to insert your Windows distribution CD-ROM and/or reboot.) 3.2.3 Username and PasswordYou have probably already given Windows a username and password by now. However, to authenticate with the Samba server, your Windows username and password must match with a valid account on the Samba server. It is simple to add a new user and password to a Windows 95/98/Me system. Just reboot or log out, and when you are prompted for a username and password, enter your Unix username and password. (If you are using encrypted passwords, you must run smbpasswd on the Unix host to enter them into Samba's password database, if you have not already done so.) You can use this method to add as many users as you want, so as to allow more than one user to use the Windows system to gain access to the Samba shares. If you mistakenly entered the wrong password or your Unix password changes, you can change your password on the Windows system by going to the Control Panel and double-clicking the Passwords icon. This will bring up the Passwords Properties dialog. Click the Change Passwords tab, and you will see the dialog shown in Figure 3-12. Now click the "Change Windows Password..." button, which will bring up the Change Windows Password dialog box, shown in Figure 3-13. As indicated by the text entry fields in the dialog, enter your old password, and then the new password, and again to confirm it. Click the OK button and then the Close button on the Password Properties dialog box. Reboot or log out, and use your new password when you log in again. Figure 3-12. The Password Properties dialog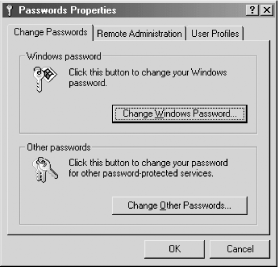 Figure 3-13. The Change Windows Password dialog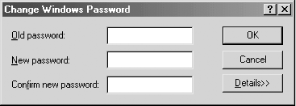 3.2.3.1 Logging in for the first timeIf you don't have a Change Passwords tab in the Passwords Properties window, it is because networking is not fully set up yet. Assuming you've followed all the directions given so far, you just need to reboot; when the system comes up, it will ask you to log in with a username and a password. Now for the big moment. Your Samba server is running, and you have set up your Windows 95/98/Me client to communicate with it. 3.2.3.2 Accessing the Samba Server from Windows 95/98Double-click the Network Neighborhood icon on the desktop. You should see your Samba server listed as a member of the workgroup, as shown in Figure 3-14. Figure 3-14. Windows 95/98 Network Neighborhood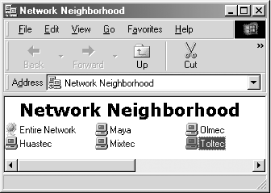 Double-clicking the server name will show the resources that the server is offering to the network, as shown in Figure 3-15 (in this case, the test directory). Figure 3-15. The test shared folder on the Toltec server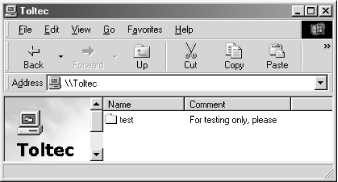 3.2.3.3 Accessing the Samba Server from Windows MeDouble-click the My Network Places icon on the desktop. You should see the test shared directory as shown in Figure 3-16. Figure 3-16. My Network Places on Windows Me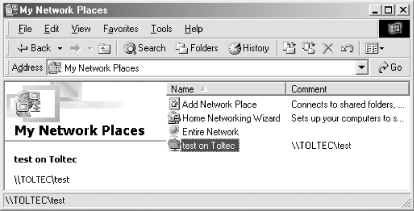 Double-click the Entire Network icon, and you should see an icon for your workgroup, as shown in Figure 3-17. Figure 3-17. Entire Network window, showing the Metran workgroup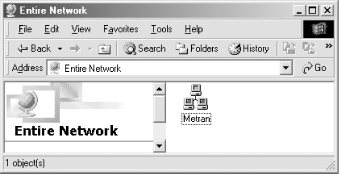 Double-clicking the workgroup icon will bring up a window showing every computer in the workgroup, which should include your Samba server, as shown in Figure 3-18. Figure 3-18. Computers in Metran workgroup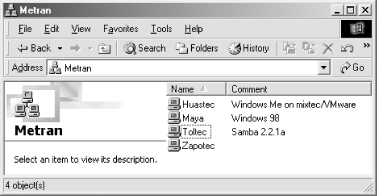 Double-click the Samba server's icon, and you will get a window showing its shared resources (in this case, the test directory) as shown in Figure 3-19. Figure 3-19. View of shares on the Toltec server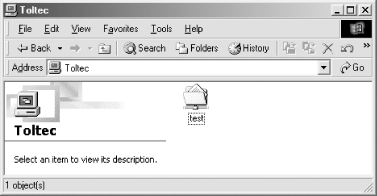 If you don't see the server listed, it might be that browsing is not working correctly or maybe the server is just taking a few minutes to show up in the browse list. In either case, you can click the Start button, then select "Run...". This will give you a dialog box into which you can type the name of your server and the share name test in the Windows UNC format \\ server \test , as we did in Chapter 1. This should open a window on the desktop showing the contents of the folder. If this does not work, there is likely a problem with name resolution, and you can try using the server's IP address instead of its computer name, like this: \172.16.1.1\test If things still aren't right, go directly to Section 12.2 to troubleshoot what is wrong with the network. If it works, congratulations! Try copying files to and from the server using the Windows drag-and-drop functionality. You might be pleasantly surprised how seamlessly everything works. |
EAN: 2147483647
Pages: 475