Document First
|
The easiest way to make sure you've got a workable design is to start writing the documentation. If you can explain it in the docs, then there's a good chance you'll be able to code it. When you get stuck writing the documentation, there's a good chance you've discovered a flaw in your design. This is an excellent time to fix design flaws—there's no code to rewrite and very little effort wasted.
Plain Old DocumentationPerl provides a very simple code documentation system called plain old documentation, or POD. POD allows you to place your documentation inline with your Perl code. POD can be translated into a number of formats—HTML, text, manual pages, PostScript, and more. The perldoc command that you've been using to read Perl documentation is a POD formatter that formats POD to be read on your screen. The primary strength of POD is its ease of use. You only need to know a couple commands to get started. POD commands always begin with an equal sign (=) and must start at the beginning of a line. Here's a minimal example that documents the function estimate():
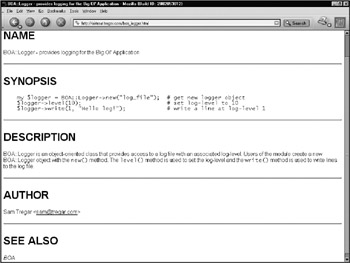
=pod ($low, $high) = estimate($design_time, $loc) This function computes an estimate for the amount of time required for a project. It takes two arguments - the amount of time spent on design in hours and the expected number of lines of code. The return value is a list of two values, the lower and upper bounds on the time required in hours. =cut Everything between a =pod and a =cut is POD documentation. Perl knows to skip this stuff when it's compiling your module so you don't have to do any commenting to have it ignored. POD is a paragraph-oriented format. Paragraphs begin and end with blank lines. If the paragraph begins with white space, then it is considered a verbatim paragraph and no formatting is applied. This is useful for code examples where the spacing is important. The text in normal paragraphs will be automatically formatted in a number of ways—the text will be wrapped and filled, plain quotes may be turned into smart quotes, and any embedded Perl identifiers will be made more visible. The actual details of the formatting are up to the individual formatter— what makes sense in HTML may not make sense in a man page. Modules typically have at least five sections: NAME, SYNOPSIS, DESCRIPTION, AUTHOR, and SEE ALSO. The NAME section gives the module's name followed by a dash and a short description. The SYNOPSIS section shows some simple usages of the module. DESCRIPTION contains the bulk of the documentation, usually containing subsections for each function or method in the module. AUTHOR gives credit and contact information, and SEE ALSO contains references to external documents related to the module. The best way to learn POD is by example—it's just too simple to be worth a lot of complicated explanation. Here's the start of some POD docs for BOA::Logger, the example module in the last chapter:
=pod =head1 NAME BOA::Logger - provides logging for the Big Ol' Application =head1 SYNOPSIS my $logger = BOA::Logger->new("log_file"); # get new logger object $logger->level(10); # set log-level to 10 $logger->write(1, "Hello log!"); # write a line at log-level 1 =head1 DESCRIPTION BOA::Logger is an object-oriented class that provides access to a log file with an associated log-level. Users of the module create a new BOA::Logger object with the new() method. The level() method is used to set the log-level and the write() method is used to write lines to the log file. =head1 AUTHOR Sam Tregar <sam@tregar.com> =head1 SEE ALSO L<BOA> =cut
Inside normal paragraphs you can apply formatting to your text. POD formatting codes begin with a capital letter and the text to be formatted goes inside angle brackets. The formatting codes used purely for formatting are B<bold>, I<italic>, C<code-style>, and F<filename>. There are also codes for linking between documents (L<Pod::Parser> links to the Pod::Parser documentation), displaying special characters (for example, E<lt> for the less-than sign), and designating non- breaking space (S<text like this>).[3] In general, it's best to avoid overusing the formatting codes. One of POD's best features is that it's generally readable even without a formatter; use too many of the code sequences, and that feature disappears.
IndentationYou can indent a paragraph using the =over command and go back to the previous indentation using =back. The =over command takes a numeric argument that indicates how far to indent in characters, defaulting to 4. Here's a little indented paragraph: =over POD is so great that I need extra room to say it. =back Indenting is also used to layout lists. You start a list by indenting and then using the =item command for each list item. The argument to =item can be words, an asterisk to create a bulleted list, or numbers to create a numbered list. For example, here's a numbered list of some of my favorite things: =head1 My Favorite Things =over =item 1 An ancient train stopped in a forest. =item 2 Victor Hugo =item 3 Watermelon Sugar =back
Explicit FormattingIf you ever need to add some explicit formatting for a particular formatter, you can use =begin and =end. For example, to add an HTML table that will only show up when the POD is translated into HTML, do the following: =begin html <table> <tr><th>Name</th><th>Nickname</th></tr> <tr><td>Sam</td><td>Dave</td></tr> </table> =end html You can add explicit formatting instructions for any POD formatter by using the appropriate format identifier. For example, to add special formatting for the pod2man formatter that translates POD into UNIX manual page format, you would use a =begin man command. These identifiers (html, man, and so on) are usually easy enough to guess, but you can also determine the identifier for a particular translator by reading its documentation. That's all there is to it.[4] For the most part writing POD is no more difficult than writing comments—you rarely need to worry about formatting unless that sort of thing makes you happy. This is the key to its success; getting lazy programmers like us to write documentation is hard enough, so the format has to be as simple as possible.
Where to StartNow that you have the tools for the job, you're ready to start designing your module. Start with a general description of what the module will do. Try to focus on what not how at this stage. Here's an example of a good description:
=head1 DESCRIPTION This module will provide an interface to the BOA SETI satelite. It provides functions to send signals to distant star-systems as well as functions to retrieve responses. The reader is presented with a clear description of what the module is meant to do. Here's an example of how not to describe the same module:
=head1 DESCRIPTION This module will provide an interface to the BOA SETI satellite. The satellite communicates with the base station over a radio-IP link. The module uses a low-level UDP socket interface to communicate with the satellite to maximize bandwidth utilization. It also compresses larger packets with Compress::Gzip for further saving. This description also delivers useful information, but it leaves open the most important question—what does the module do? It can be tempting to jump directly into implementation details; after all, that's where the fun of programming is. However, even the most technically minded reader would be hard-pressed to figure out what BOA::SETI does from the preceding description.
Know Your AudienceWriting good documentation is a lot like any other kind of writing—to do a good job you need to think about your audience. Your primary audience at this stage is actually yourself. The best reason to start designing by writing documentation is to explain the module to yourself. You'll explore your design, find problems, and fill in the gaps long before the module is ever examined by anyone else. Later on when you return to the module, your documentation will help you remember how your module works. Secondarily, think about the eventual users of the module, but be careful not to think only about the short term. In the near future the only user might be yourself or the guy in the next cubicle over who knows your brain like the back of his eyelids, but that won't last. Software frequently lives longer than you think it will. Your module should be designed to stand the test of time—make sure it has enough documentation to make its own introduction.
Make Your CaseConsider writing some documentation about why the module is being written. This may seem brutally obvious, but in many cases it's not. For example, if there is an existing CPAN module that provides similar functionality, you should explain why you're not using it. You might also use this as a chance to explain any design goals that might not be obvious from the module description. Such a section might look like this:
=head1 RATIONAL The CPAN module Net::SETI seems on the surface to provide the same functionality as BOA::SETI, but in actuality Net::SETI only works over a TCP connection. The BOA application requires greater performance than can be achieved using TCP so the decision was made to implement our own module. Writing down your rational for building the module forces you to critically examine your design choices before it's too late to reverse them. Also, your users will be less likely to reject your module if they understand why your wrote it in the first place. Any time you can spend convincing your fellow programmers to stop reinventing the wheel is time well spent!
[3]There are some fairly complicated rules governing these nonformatting codes (linking in particular). When you're ready to start using them, you should read the perlpod documentation.
[4]With some minor exceptions. See the perlpod documentation for the other 10 percent of POD that takes up 90 percent of the manual. | |||||||||||||||||||||||||||||||||
EAN: 2147483647
Pages: 110