Section 8.5. Final Words
8.5. Final WordsExcept for the CPU cooler problem, this system assembled easily. It took us about half an hour to build, or two days, depending on how you look at it. Counting only actual construction time, it took about 30 minutes from start to finish. Counting the time to shoot images, reshoot images, re-reshoot images, tear down for reshoots and re-reshoots, rebuild and re-rebuild after the re-shoots and re-reshoots, and so on, it took two days. A first-time system builder should be able to assemble this system in an evening with luck, and certainly over a weekend.
8.5.1. Installing SoftwareMicrosoft declined our request for a beta copy of Windows Vistawe suspect we're on their Enemies List because we're vocal Linux advocatesso we installed Windows XP instead. We installed Windows XP uneventfully from a distribution disc that included SP2.
The next step was to install and update drivers. Like most motherboard makers, ASRock includes a driver CD that automates the process. Running the Drivers CD displays the dialog shown in Figure 8-63. We installed all of the drivers in the order shown. Figure 8-63. The ASRock Drivers CD main menu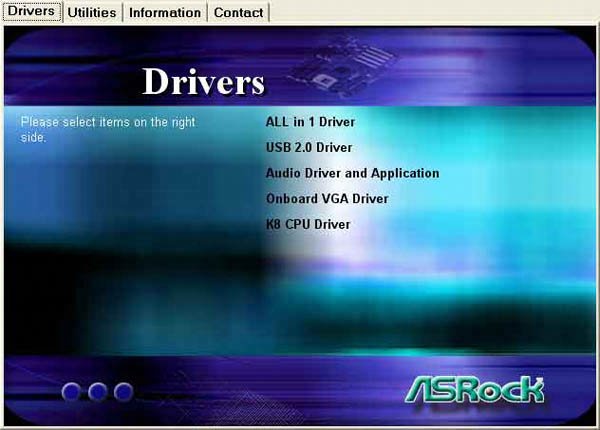 After the Drivers CD installs the ASRock-provided drivers and utilities, install any necessary third-party drivers. For this system, no third-party drivers were needed. With all of the drivers installed, we restarted the system and installed our standard suite of applications, including Firefox and OpenOffice.org. 8.5.2. Updating the BIOS"If it ain't broke, don't fix it" is a good rule when it comes to updating the main system BIOS. We generally don't update the main system BIOS unless the later BIOS fixes a problem that actually affects us. The most recent BIOS available for the ASRock motherboard was only one version more recent than the one supplied with the motherboard, and included only a few minor fixes, none of which pertained to us. Still, for illustrative purposes, we decided to update our main system BIOS.
Like most motherboard makers, ASRock provides two methods to update the BIOS. The first is the traditional boot floppy method. You download the BIOS update as a binary file and copy it and the updater program to a floppy disk. Booting that floppy disk transfers the updated BIOS code to the system. The boot floppy method works on any systemat least any system that has a floppy drivewhether it runs Windows or some other operating system (or no operating system at all.) Most people use the second method, shown in Figure 8-64, which uses a Windows executable to update the BIOS. To update the BIOS using this method, you simply double-click the updater program icon and follow the prompts. Figure 8-64. The ASRock Windows BIOS updater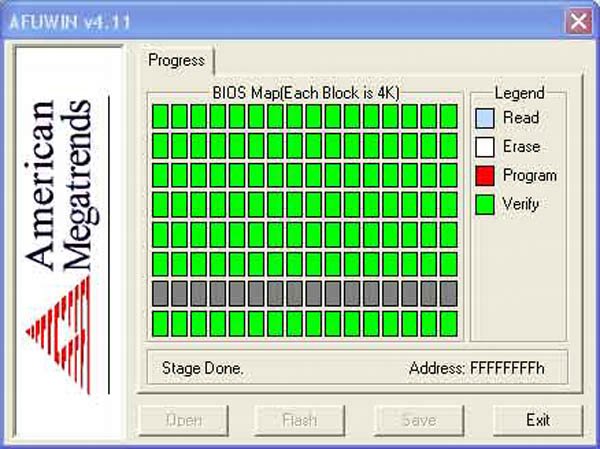
8.5.3. End ResultWe're extremely happy with this system, particularly for the price. It sits under Robert's desk, and has the distinction of being the only computer in the house that runs Windows. (We have anything from half a dozen to a dozen other systemsthe exact number varies from day to daybut all of them run Linux.) We built this system because Robert needed a Windows system to run some Windows-only astronomy software he was using to generate charts for an astronomy book we were writing. We didn't want to spend much money on it, because it was needed only for as long as it took to complete the book. Once we finish that book, we'll donate this system to a local nonprofit and again have our home as a Microsoft-free zone. Still, although it cost only $350 excluding external peripherals, many people would be happy with this system as their only system. It's slower than the fastest current systems, but it's more than fast enough for casual use, including even light gaming. It's also quiet enough that we wouldn't hesitate to use it in our den, living room, or bedroom. All in all, this is the perfect budget PC for us. For updated component recommendations, commentary, and other new material, visit http://www.hardwareguys.com/guides/budget-pc.html. |
EAN: 2147483647
Pages: 84
- Key #1: Delight Your Customers with Speed and Quality
- Key #3: Work Together for Maximum Gain
- When Companies Start Using Lean Six Sigma
- Making Improvements That Last: An Illustrated Guide to DMAIC and the Lean Six Sigma Toolkit
- The Experience of Making Improvements: What Its Like to Work on Lean Six Sigma Projects