Controlling Who Has Access and What They Can Do to Your PDF
Acrobat provides a complete set of access and use controls through its security functions. You can control who can open and view your PDFs as well as who can edit and output them with varying levels of permissions. PDFs also offer digital signature capabilities for document tracking and authorization. And this is easier to set up and use than you might think. Here is how it all works.
See What Access You Have to a PDF
If you can open a PDF, you already know that you have been allowed access. To check to see what restrictions might have been placed on its use, you once again consult the Document Properties. Here s how to open those properties and view the current settings:
| Note | The rest of this chapter describes how to change various security settings. |
-
Open the Document Properties by choosing File > Document Properties or by typing
 /Ctrl+D. The Document Properties window appears.
 -
Select Security from the list of Document Properties categories in the left side of the window. The Security preferences appear (Figure 5.10).
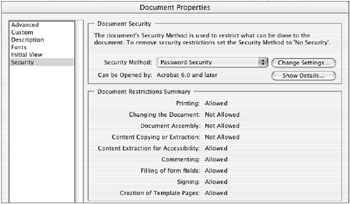
Figure 5.10: Viewing the document s Security Method -
View the permissions associated with this PDF. Here you can see that there is a password set to allow access to perform certain functions such as Printing and Commenting, while other functions such as Changing The Document and Content Copying Or Extraction are not allowed.
-
To get more specifics on the permissions, click the Show Details button. A window labeled Document Security appears (Figure 5.11). Here you see, for example, that while printing is allowed, it is allowed only at low resolution.
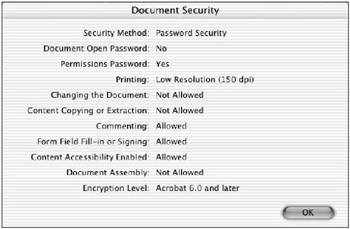
Figure 5.11: Viewing the document s security details -
If you would like to change the Security settings and have access to do so, click the Change Settings button. Setting and changing Acrobat security is the subject of the following sections.
Controlling Access and Use of Your PDFs
In Chapter 4, Creating the PDF You Want, you learned how to set PDF security when you create a PDF during the distilling process. Here you ll see how to control access after a PDF is created and learn how to use Acrobat s expanded security capabilities.
From the main menu bar, choose Document > Security > Restrict Opening And Editing. The Password Security - Settings window appears (Figure 5.12).
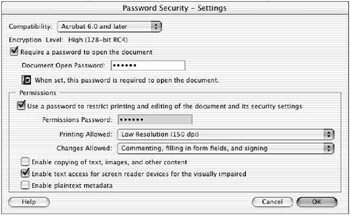
Figure 5.12: Setting document open and access security
| |
The lower the version number, the greater the compatibility. Before you select Acrobat 6.0 And Later, be sure that the recipients of your PDFs are equipped with Acrobat 6 or Adobe Reader 6. Unless you need the Enable Plaintext Metadata feature provided exclusively in Acrobat 6, the Acrobat 5.0 And Later setting is a more compatible, and equally powerful, choice.
Version incompatibility is the most common reason why someone cannot read one of your PDF documents. Therefore, I save in the lowest possible version of Acrobat. I often save all the way back to version 3 for PDFs that I intend to distribute widely across the Internet. Even version 3 provides good basic document security features.
| |
Configure the Security settings to match your needs. Following are a few guidelines and suggestions:
Compatibility Select an Acrobat version compatibility that will match the latest version of Acrobat the users of these PDF documents will have. Your choices are Acrobat 3.0 And Later, Acrobat 5.0 And Later, and Acrobat 6.0 And Later.
Document Open Password Check the Require A Password To Open The Document option and assign a password to restrict the opening of the document. Be sure to record this password and supply it to those who need it.
Permissions Password If you want to control what can be done with your PDF file once it is opened, then you should check the Use A Password To Restrict Printing And Editing Of This Document And Its Security Settings option and set a Permissions Password. This password should be different than the Document Open Password.
| Note | Anyone who has the Permissions Password will automatically have Document Open access as well. |
-
Printing Allowed Set the quality of printing, if any, that will be allowed: None, Low Resolution (150 dpi), or High Resolution. Using the Low Resolution setting is a good way to allow some printing access. But remember that most desktop printing devices can print very well with 150 ppi of resolution, so sometimes setting this Low Resolution restriction has little real impact.
-
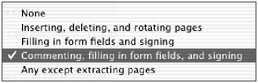
Changes Allowed Read carefully through these choices to make sure you allow only what you want in terms of change to your document. The choice of Commenting, Filling In Form Fields, And Signing is a favorite of mine because it allows all kinds of feedback but prevents any fundamental changes to, or access to content from, the document.
Enable Copying Of Text, Images, And Other Content Check this option if you want others to be able to access the data in your documents. Sales datasheets would be a good example. I typically leave this unchecked, since I usually do not want others to freely use my content.
Enable Text Access For Screen Reader Devices For The Visually Impaired I usually check this option to facilitate access.
Enable Plaintext Metadata This is an Acrobat 6 “only feature. Turn this feature on to allow digital asset-management software to search the document metadata. If you need to store, search, and retrieve data from your PDFs, this is a good option to activate.
Once you ve set these restrictions the way you want them, click the OK button. Acrobat will lead you through a sequence of windows asking you to type in and verify any passwords you have set.
To finish the process, save and close the document. The next time you or anyone else opens this document, Acrobat will prompt them to enter any assigned passwords and will restrict the usage to those allowed during this security assignment session.
That s all there is to it. After you have done this a couple of times, it will be easy.
Encrypting Documents
In addition to the document access security, you can also encrypt PDF documents and control access to encrypted documents through Digital IDs, Digital ID Certificates, and trusted lists of certificates.
Creating a Digital ID
The first step in using encrypted documents and trusted lists is to set up a certified Digital ID. Once established, this Digital ID can be used to create a Digital ID Certificate, which in turn can be used to encrypt documents and to control access to encrypted documents. Here s how to create an ID:
-
From the main menu bar, choose Document > Security > Encrypt For Certain Identities Using Certificates. The Document Security - Digital ID Selection window appears (Figure 5.13).

Figure 5.13: No Digital IDs have been created yet. -
Click the New Digital ID File button. The Create Self-Signed Digital ID window (Figure 5.14) appears.
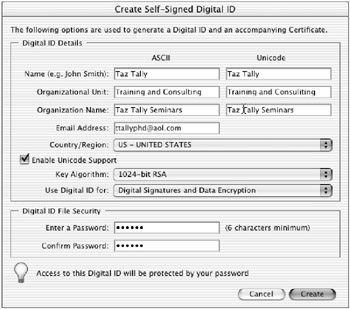
Figure 5.14: Creating a Digital ID -
Fill in all the data fields in the Digital ID Details; the first few fields (Name, Organizational Unit, Organization Name , Email Address, and Country/Region) should be self-evident. Here are some details on the rest:
Enable Unicode Support If you want to use UNICODE extended character sets, click this check box and fill in the ID info fields that appear to the right of the first set of ID fields.
Key Algorithm Select either the 1024-bit or 2048-bit RSA encryption algorithm. The 2048 is more secure (that is, more difficult to hack) but is less compatible/widely used. 1024-bit is usually my choice since it is plenty secure and more universally used.
Use Digital ID For Select one of the three uses for Digital IDs Digital Signature, Data Encryption or Digital Signature And Data Encryption (my standard selection).
Digital ID File Security Enter a password and confirm it.
-
Click the Create button. A New Self-Sign Digital ID File Save As window will appear (Figure 5.15) with the Acrobat Security folder preselected.
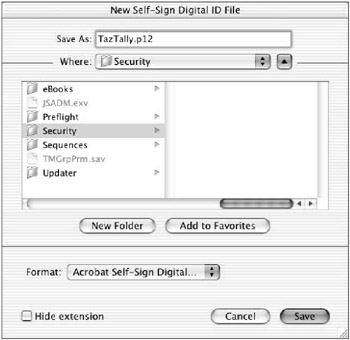
Figure 5.15: Save your Digital ID in the Acrobat Security folder. -
Click the Save button. Macintosh Digital ID files will have a .p12 extension; Windows files will have a .pfx extension.
Once any Digital ID has been created, it can be shared with other (trusted) individuals who can use this Digital ID to open your encrypted files.
Managing Digital IDs
Once you have created a Digital ID, you can create others and manage them using the Digital ID Manager. You access these features from a submenu; from the main menu bar, select Advanced > Manage Digital IDs > My Digital ID Files, and you will have the choice of three commands (Figure 5.16):
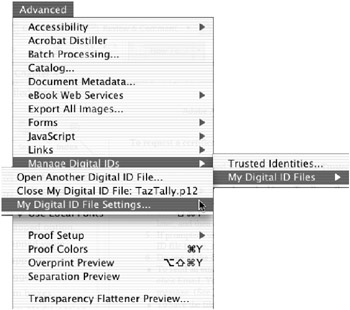
Figure 5.16: Managing Digital ID Files
Open Another Digital ID File Allows you to create new Digital ID files or open other already created ID files (Figure 5.17).
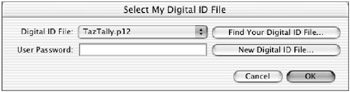
Figure 5.17: Open or create an ID.
Close My Digital ID File Allows you to close your current Digital ID file and access other IDs.
My Digital ID File Settings Allows you to manage Digital ID files: add, remove, view, export, change the password of, or change the setting of your ID (Figure 5.18). We ll use the Export function next to create a Digital ID Certificate, which can be used to create and control access to an encrypted PDF.
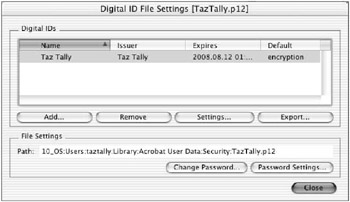
Figure 5.18: Manage existing IDs from this dialog.
Creating a Digital ID Certificate
Once you have created a Digital ID file, this can be used to create a certificate, which can be used for a number of purposes, including creating and opening encrypted files. Digital ID Certificates are password-protected portable files that contain the information you placed in your Digital ID file. Here s how to create one:
-
Choose Advanced > Manage Digital IDs > My Digital Files > My Digital File Settings (Figure 5.18).
-
Select the Digital ID file you would like to convert into a Digital ID Certificate.
-
Click the Export button. The Data Exchange File “ Export Options window appears (Figure 5.19).
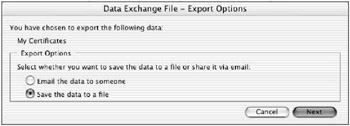
Figure 5.19: Export Digital ID data as a Certificate. -
Select either the e-mail or save option. Digital ID Certificates can be e-mailed to those people (referred to as trusted recipients) to whom you would like to provide access to your encrypted and signed files.
-
Click Next. An Export Data As window appears.
-
Select a location to save your certificate file and click Save. Your new Digital ID Certificate file will be saved in this location.
The file extension of this Digital ID Certificate is .fdf , which is the standard data exchange format for PDF document data.
Creating an Encrypted Document
Once you have created a Digital ID Certificate, it can be used for several purposes, including creating and opening encrypted files. Here s how:
-
Using either the Document > Security submenu or the Secure icon in the Tool palette (Figure 5.20), select the command Encrypt For Certain Identities Using Certificates. A window appears labeled Restrict Opening And Editing To Certain Identities (Figure 5.21).
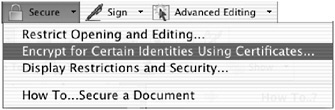
Figure 5.20: Begin the encryption process either from the Document > Security submenu or from this Secure icon.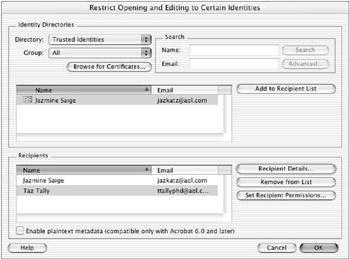
Figure 5.21: Set up identities for certificates you have and recipients for others who have your certificate. -
To add a certificate to the list of trusted identities, click the Browse For Certificates button.
-
In the Locate Certificate File dialog (Figure 5.22), locate the certificate (an FDF file) for the person you want to add to the list, and click Open. This certificate name (Jazmine Saige here) will be added to the list of names in the Identity Directories area.
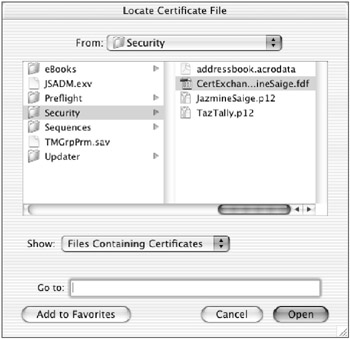
Figure 5.22: Browse for the certificate to add. -
Click this new name in the Identity Directories area to select it, then click the Add To Recipient List button. The new name (Jazmine Saige here) will be added to the list at the bottom.
-
Click the Set Recipient Permissions button.
-
Configure the Recipient Permission Settings window (Figure 5.23) to suit your wishes, and click OK.
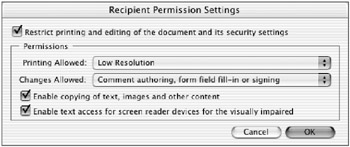
Figure 5.23: Set the permissions for this recipient. -
Back in the Restrict Opening And Editing To Certain Identities window, click OK to finish the assignment process.
-
Save and close the document to apply the encryption. (Acrobat should present you with a reminder message to do this.)
Once you have mastered creating and editing Digital IDs and Digital ID Certificates you will be in good shape to use all of the variations of security offered by Acrobat. One security function you might find useful is the ability to use digital signatures to track documents, so we will cover this next.
Tracking Documents Using Self-Signed Security
In addition to the document access and encrypting security described in the previous sections, Acrobat provides document tracking and verification security through the use of digital signatures, both regular and certified. Digital signatures can be either text-based or customized graphics.
Creating a Certified Digital Signature
Creating a certified and signed PDF not only allows you to track who has opened a document, through the use of signatures, but also protects the integrity of the file through certification:
-
The first step in using encrypted documents and trusted lists is to set up a certified Digital ID. Once established, this Digital ID can be used to sign and track document use. Follow the instructions for creating a Digital ID in the previous section on encrypting.

Certification Certification provides a way of tracking a document as it moves from one location to another. If a document is certified, it has not been altered, without permission, from its original form. If you want to make sure that a document s contents are not altered without you finding out about it, then certification is the way to go. If document integrity is not paramount, but you want to track a document s use, then you may want to use digital signature without going through the process of certification.
-
Open the PDF to which you would like to assign a digital signature.
-
Using either the Document > Digital Signatures submenu or the Sign icon in the Tool palette (Figure 5.24), select the Sign This Document command.
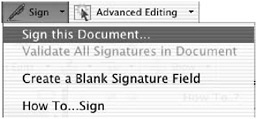
Figure 5.24: Certifying a PDF begins with the Sign > Sign This Document command. -
If this is the first time this document has been signed, a window appears labeled Alert “ Document Not Certified (Figure 5.25). (If the document has already been signed and certified, you will be led through the following signing steps without the Alert window.) This window gives you two choices, either to sign without certifying or to certify the document. Click the Certify Document button, because this will provide you with the most control over the document. This process will lead you through a series of dialog boxes; let s see where this journey takes you.
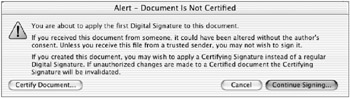
Figure 5.25: Yes, certify the document. -
The Save As Certified Document window appears (Figure 5.26) and provides the option of using either your own Digital ID or one from an third-party Adobe partner. Using third-party IDs can be useful if you want to distribute your PDF widely and want to use an ID that can be obtained elsewhere, thereby eliminating the need to distribute your own Digital ID Certificate to all whom you may want to see the file. You will use your own in this process, so click OK.

Figure 5.26: Click OK to continue saving your PDF as a certified document. -
In the Choose Allowable Actions window (Figure 5.27), select the use capabilities you want to allow from the Allowable Actions drop-down list, and then click Next.
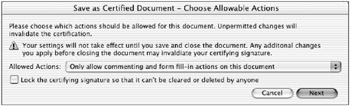
Figure 5.27: Choose what viewers will be able to do with your document. -
In the Select Visibility window (Figure 5.28), choose whether you want the certification to be visible or not, and then click Next.
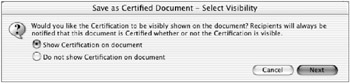
Figure 5.28: Make your certification visible or hide it.If you decide to make the certification visible, the next window (Figure 5.29) instructs you to draw with your mouse an area where the certified signature will be placed. Note, that the larger you draw the area, the larger the signature will be. Click OK and draw the area.
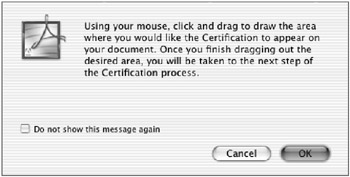
Figure 5.29: Drag out the area on the PDF page where your signature will appear. -
Once you have drawn the signature area (or chosen not to make the certification visible), the Sign window appears (Figure 5.30). You can specify a reason for the digital signature here before you continue. Type in your password; you must use the password for the currently active Digital ID. (To see the currently active Digital ID, click the View Digital ID button or choose Advanced > Manage Digital IDs > My Digital ID Files.) Click the Sign And Save As button or the Sign And Save button to complete this window. I recommend that you routinely use Sign And Save As so that a security-free copy of your document will still be available.
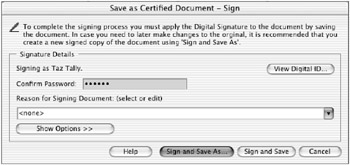
Figure 5.30: Sign your certified document and save it with a new filename.Note We ll examine the Show Options button in the next section.
-
A standard Save As window will appear. Name and choose a location for your signed and certified PDF to be placed. I like to place a C at the end of the name of any PDF that I sign in this manner to indicate that it is certified. Click the Save button.
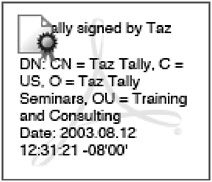
Your digital signature will appear where you drew the signature area during Step 7; an example is shown here. You will note that in the upper-right corner of the signature is a small certificate icon, indicating that it is a certified as well as a signed PDF. What you see here is the basic, default text-based signature. Your signature can be customized in many ways, and that s what we will do next!
Customizing a Graphic Digital Signature
If you want to customize your digital signature, Acrobat provides a variety of customizing capabilities, including using a graphic as a digital signature. To customize your signature, first follow Steps 1 “7 in the preceding section to get to the window titled Save As Certified Document - Sign ( illustrated back in Figure 5.30). From there, continue with these instructions:
-
Click the Show Options button. The window title changes to Apply Signature To Document, and the window expands to include an Options section (Figure 5.31).

Figure 5.31: Creating a custom graphic signature -
Click the Edit button if you want to edit a current signature or New if you want to create a new signature. The Configure Signature Appearance window appears (Figure 5.32).
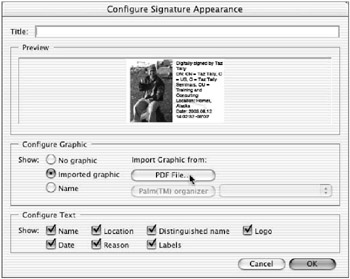
Figure 5.32: Combine graphics and text elements to create your signature. -
To import a graphic, click the PDF File button under the heading Import Graphic From. A Select Picture window appears (Figure 5.33), where you browse to and open the PDF picture you would like to use as a signature icon. Click OK to return to the Configure Signature Appearance window.
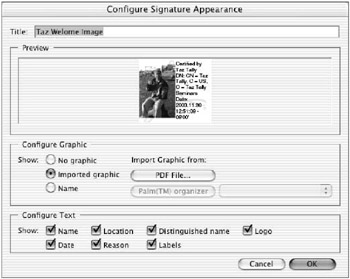
Figure 5.33: If you like, import and title a PDF graphic to serve as your signature. -
Type in a name the Title Field a the top of the window, here Taz Welcome Image.
-
Under Configure Text, check each of the text items you would like included in your custom signature, and then click OK.
-
Continue the signature process as before (Step 9 from the preceding section), clicking the Sign And Save As button.
-
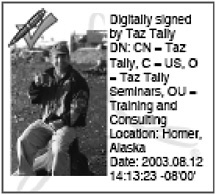
View your new graphic signature in all its glory !
Validating, Checking, Editing, and Deleting Digital Signatures
Once a digital signature has been created, there are numerous ways to check, validate, and modify the signature. Here are a few of the most common and useful ones:
-
First, visually check the digital signature to see if it has a check mark next to it. If it does, it is probably in good shape.
-
To receive more information about the signature, simply double-click it and a Signature Validation Status window will appear with information about the signature (Figure 5.34). You can also click the Signature Properties button to get even more data.
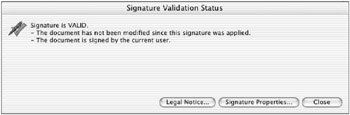
Figure 5.34: Double-click a signature to see details. -
The Document > Digital Signatures submenu (Figure 5.35) includes more digital signature and validation functions; some of these are also available by clicking the Sign icon in the Tool palette. You can find the most comprehensive overview and editing of digital signatures by selecting the Signatures tab on the left side of the PDF document page and then clicking the Options button.
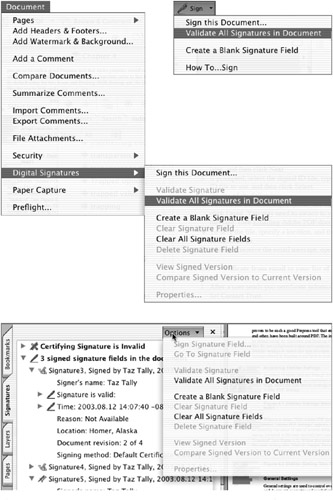
Figure 5.35: Validate signatures, sign documents, and compare versions from these menus .
EAN: 2147483647
Pages: 102